How to play DVDs on iMac, MacBook Air/Pro? Playing a DVD on a Mac computer may require different tools depending on your specific Mac model, disc type, and playback needs. This guide will show the 3 best ways to play a DVD on your Mac: using the native DVD Player, using a third-party DVD player, or digitizing DVDs on Mac to play them with any player. We will also address some common questions to help you troubleshoot any potential issues.
Hardware and Software Requirements
- DVD Drive: Ensure your Mac has a built-in optical drive or an external DVD drive connected, such as Apple USB SuperDrive, Verbatim Slimline, etc. If you want to play Blu-ray discs as well, buy a Blu-ray drive that supports both DVD and BD discs.
- Software:
- DVD Player: included in all macOS, strict copyright protection.
- DVD ripping software for Mac: bypass region codes and other protection to digitize your DVD. So you can save the DVD to Mac and watch it with QuickTime or any other player.
- VLC media player: third-party DVD player, free and open-source, lower image quality than the native player
Choose from the three options and follow the detailed steps below to easily play any DVD on your Mac.
Method 1. Play DVD With Native DVD Player on Mac
Playing a DVD on Mac using the built-in DVD Player app is quite straightforward with necessary requirements. But if you want to play the DVD at any time without the drive, it’s best to store the DVD on your Mac so you can play it without an the external drive and physical disc.
Step 1. Insert the DVD into your Mac’s DVD drive, label side up. If you’re using an external DVD drive, make sure it’s plugged directly to the USB port of your Mac.
Step 2. The DVD Player app should launch automatically when your DVD is recognized, and a DVD icon will appear on the desktop.
*If the DVD Player doesn’t start, find it in the Applications folder in Finder, and open it manually.
Step 3. Once the DVD Player opens, it should detect the DVD and start playing it in the player window. You can click the Menu button to access the DVD menu and select titles. Drag the progress handle or click a point to fast-forward or rewind.
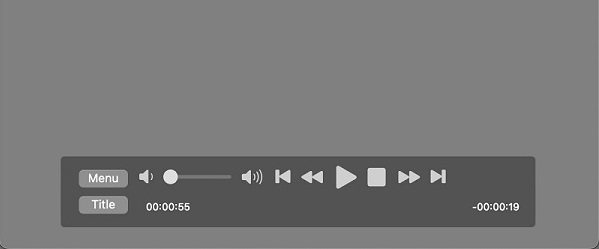
To eject the DVD, right-click on the DVD icon and select “Eject”.
Restrictions:
- Regional issues.
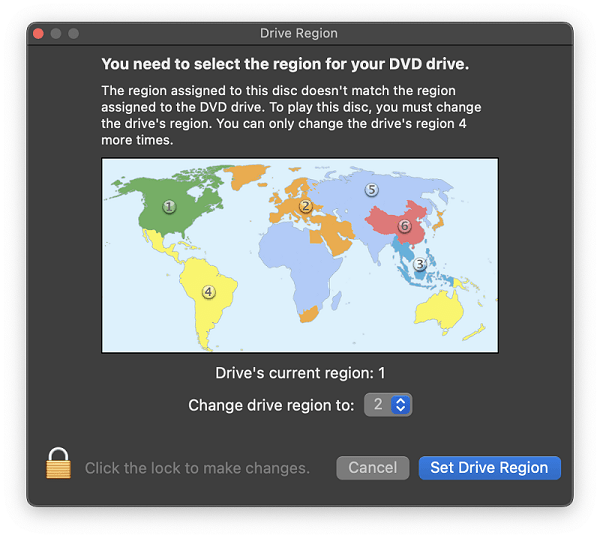
If you insert a DVD that doesn’t match your Mac DVD drive’s region code, e.g., a region 2 DVD from Japan, you must change the drive’s region in order to play it. Note that you can only set the DVD drive region 5 times. If you reach the maximum DVD region change limit, DVDs that don’t have a compatible region code will be ejected.
- Airplay, screen mirroring and screenshot blocks.
The DVD Player blocks screen mirroring and screenshot due to Apple DRM protection, so you’re not allowed to cast the DVD content to a TV, even if it’s a self-made disc with no copyright.
- No DVD-RW support.
If the DVD is burned on a DVD-RW (rewritable) disc, DVD Player on Mac won’t recognize it.
- DVD wear.
Playing the DVD from the optical drive many times may damage the disc, leaving scratches. If it’s a homemade DVD, you can copy the DVD Video_TS folder on Mac in Finder and play it without the drive, but commercial DVDs with copy protection cannot be copied without dedicated software. See the second method to learn more.
Method 2. Digitize DVD on Mac for Unrestricted Playback
To resolve region code limit and other restrictions, the best way is to convert your DVDs to digital formats using a DVD ripper. Then you can play your favorite DVD movie anytime with any player on Mac, without an optical drive.
Of all the DVD ripping software for Mac I’ve used, Cisdem Video Converter is the most balanced one, powerful and yet easy to use. It lets users convert region-locked, copyrighted DVDs and all types of discs to popular video formats like MP4, offers a built-in DVD player, and supports audio track & subtitle selection. It helps you to save the DVD in a smaller size with better compatibility, without losing video quality.
How to save DVD on Mac for easy playback:
Step 1. Install Cisdem Video Converter for Mac from its official website
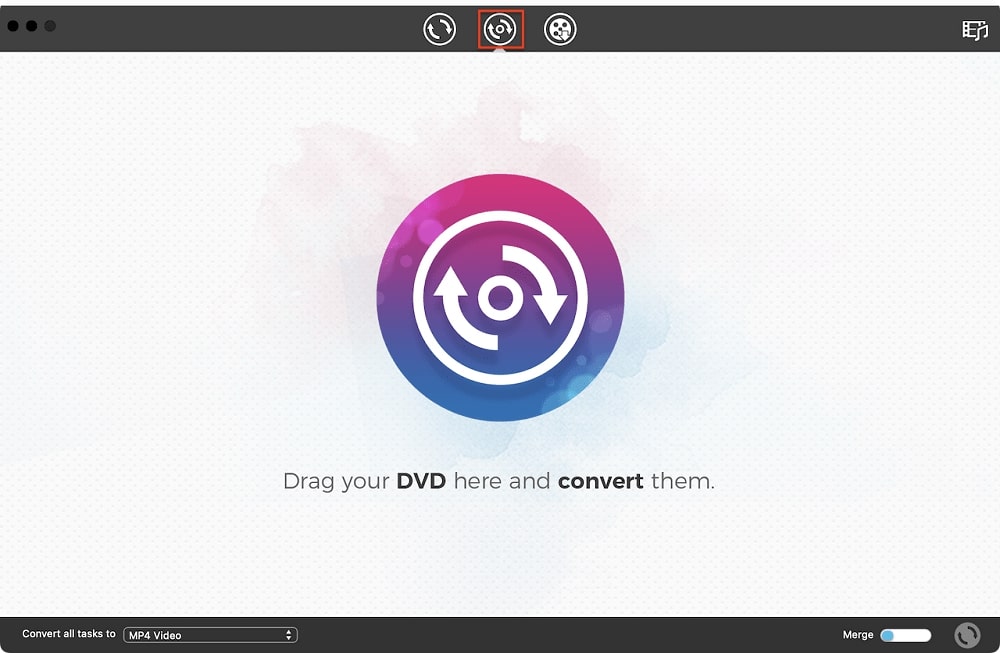
Launch the app and click the second tab at the top to access the DVD ripping module.
Step 2. Add DVD to the ripper
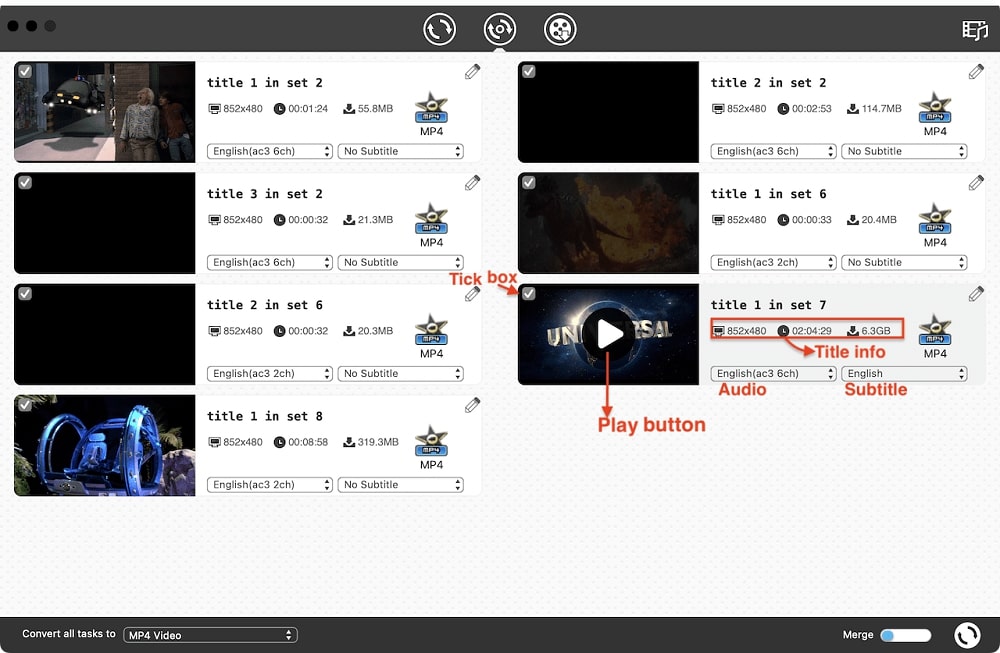
Insert your DVD into the drive, then drag-n-drop the DVD icon to the app interface. Alternatively, click “File > Open DVD” from the top menu bar. It will soon display all DVD titles, including bonus content.
Step 3. Customize output settings
Click the “Convert all tasks to” pop-up menu to select an output format, MP4 and MOV are highly compatible options for Mac.
If it’s a movie DVD, I suggest converting only the main title, the longest and largest file. It allows you to play the title and check the DVD contents. You can also click the pencil-like icon to trim and crop the title.
Select the audio and subtitle language you want to keep.
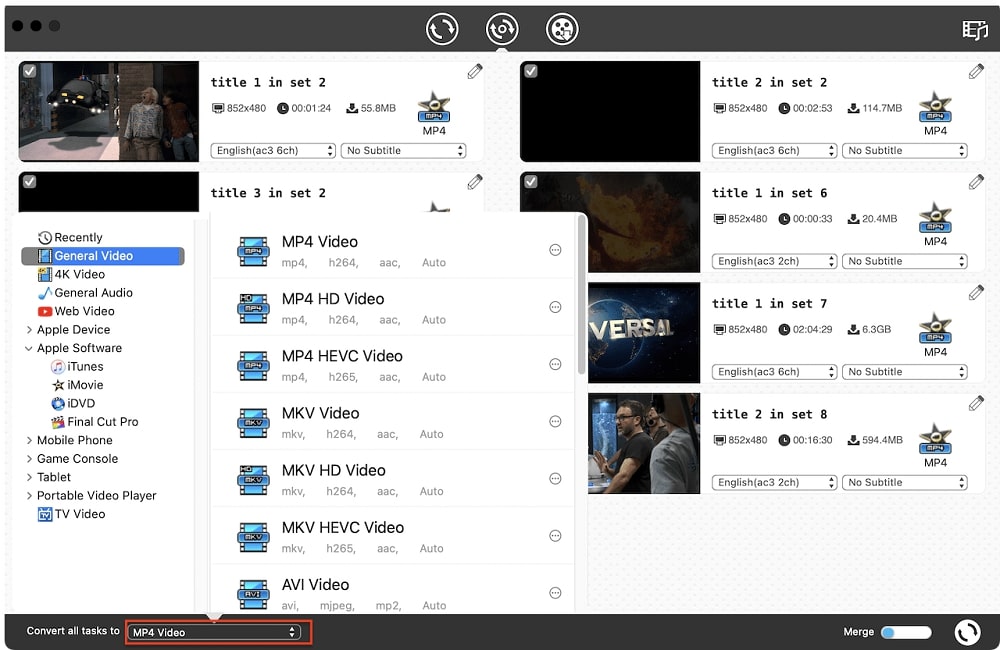
Step 4. Start the conversion
Click the Convert icon at bottom right to begin converting, enable the Merge option if you want to combine several titles into one file.
Step 5. Play DVD on Mac using QuickTime
When the conversion is complete, click the check icon to quickly locate the DVD video file in folder, then you can double-click on it to play it.
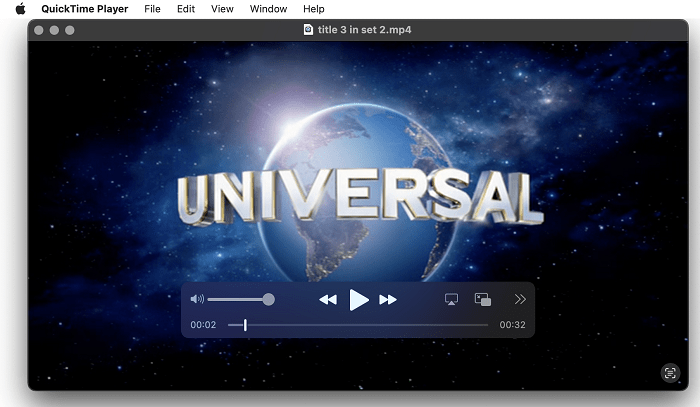
Then you can eject the disc and continue watching the DVD clips. The converted DVD file is also easier to transfer for Plex, TV, and portable devices.
Note: For commercial DVDs, it’s usually OK to rip your own collection for personal use, but do not distribute copies for profit.
Method 3. Watch DVD on Mac With VLC Media Player
If you want to avoid the limitations of the built-in DVD Player, but no intend to digitize the DVD, consider using a third-party DVD player. VLC is a popular universal video player that can play DVDs and Blu-rays, and allows you to cast to TV. However, it may take longer time to load the DVD than the native player and the video quality might be degraded.
How to play DVD with VLC on Mac:
- Install VLC media player. You can download it from videolan.org/vlc/
- Insert the DVD and wait a few seconds for your Mac to detect it.
- Launch VLC, click the “File” menu and select “Open Disc”.
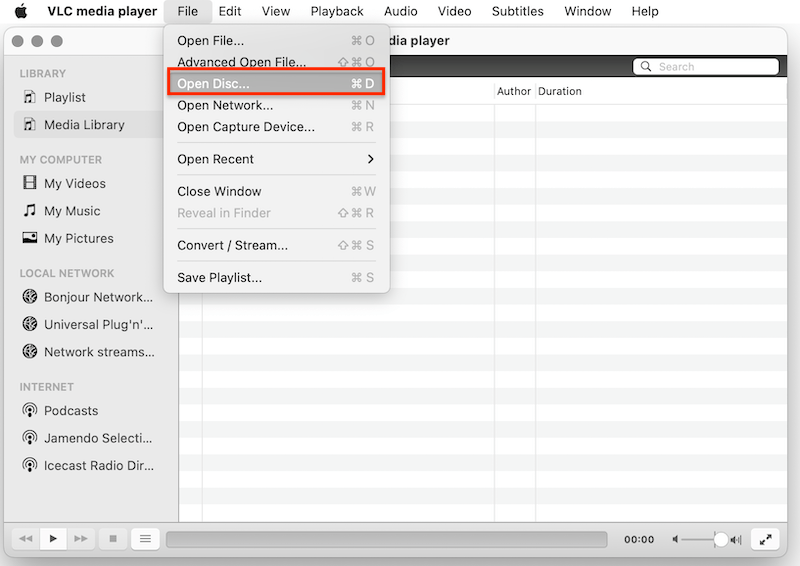
- In the pop-up window, the DVD just inserted should be selected automatically. Click on the “Play” button to start playing the DVD.
- Enjoy your DVD. Go to Video, Audio, Subtitle on the top menu bar to adjust settings.
Conclusion
To sum up, the native DVD Players on Mac is a straightforward solution for immediate playback, VLC is an alternative player in case of failure. Digitizing DVDs allows you to play them without limits of Apple DRM protection and free of the drive. If you have any other problems playing DVDs on your Mac, check out the troubleshooting section below.
Troubleshooting Tips:
- Mac not recognizing the DVD?
- Check if the DVD is listed in the Finder sidebar, maybe it just doesn’t show up on the desktop.
- Check if the DVD is damaged, scratches and cracks can make it unreadable. Test with another DVD.
- Ensure the DVD is inserted correctly with the image side up. If using an external DVD drive, check the connection and make sure it’s connected directly to your Mac, not through a hub.
- Try restarting your Mac and reinserting the DVD.
- Need to enable or disable DVD Player auto startup?
First, make sure you have an optical drive connected to your Mac, then open the System Settings from Apple menu, and click “CD & DVDs” in the sidebar. Click the drop-down icon of “When you insert a video DVD”, and choose “Open DVD Player”, “Ignore”, or “Open Another Application” depending on your needs. Note that you’ll need to restart the computer for the settings to take effect.
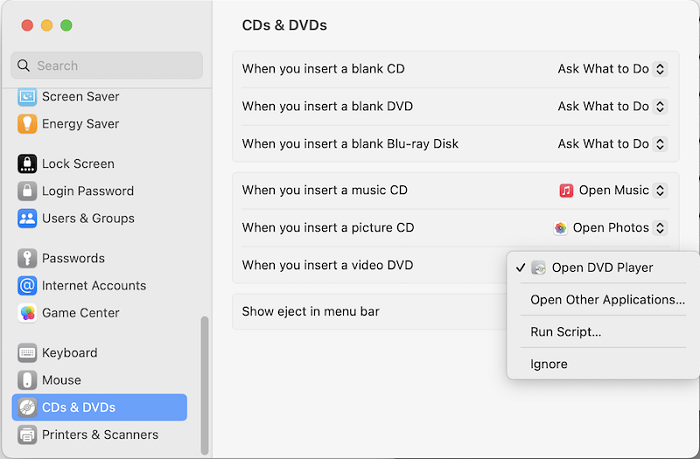
- DVD playback is choppy, skipping or stuttering?
- Clean the DVD disc with a cloth to remove fingerprints or other dirt.
- Try a different DVD player.
- Ultimate solution is to rip the DVD to digital format with a ripping software(method 2), also applies to scratched DVD.
