The introduction of Voice Chat (VC) into Roblox has fundamentally changed how players interact, opening up vast possibilities for immersive roleplaying, cooperative gaming, and sheer comedic relief. However, integrating a third-party voice changer with Roblox is often fraught with technical issues ranging from agonizing audio latency and software compatibility failures to poor voice quality and high CPU consumption.
This article serves as your comprehensive troubleshooting guide, focusing on selecting the right tools that eliminate these common problems and ensure a seamless, high-quality voice-changing experience in Roblox.
1. Background: Why Voice Changers are Necessary in Roblox
Roblox, a platform boasting millions of games and concurrent users, relies heavily on user-generated content and player interaction. For many, a voice changer is more than a novelty; it is an essential tool for:
Roleplaying and Immersion: Stepping into character by using a voice that matches their avatar (e.g., a deep, booming voice for a powerful wizard or a high-pitched one for an elf).
Content Creation: Adding unique flair and humor to live streams and recorded videos to engage audiences.
Privacy and Anonymity: Protecting one’s real identity, especially for younger players or those broadcasting online.
The primary troubleshooting challenge lies in the software’s ability to operate as a Virtual Audio Device (VAD)—acting as a seamless intermediary between your physical microphone and the Roblox application—without introducing noticeable delay or crashing the game. The key to a successful experience is finding a tool built for real-time performance.
2. Who Needs Voice Changer Functions and What Tools You Require
Who Will Need These Functions?
User Group
Primary Needs (Troubleshooting Focus)
Gamers & Roleplayers
Low latency (no delay), high compatibility with Roblox VC, and realistic voice quality.
Streamers & Content Creators
Soundboard functionality, high customization, and zero impact on streaming performance (low CPU usage).
Beginners & Casual Users
Simple, intuitive user interface (UI) and a stable, free/affordable option.
Essential Tools for Troubleshooting Setup
To ensure a voice changer works correctly, you need:
High-Quality Headset/Microphone: A dedicated microphone setup minimizes the most common audio issue: background noise and feedback.
Voice Changer Software with VAD: The software must install a Virtual Audio Cable that your PC and Roblox can recognize as a separate “microphone” input.
Proper Configuration: You must select the voice changer’s VAD as the input device in both your Windows/MacOS Sound Settings and the specific Roblox Voice Chat settings. Failure to do this is the number one setup error.
3. Introducing the Top 5 Voice Changer Tools for Roblox
The following tools have been tested for stability, latency, compatibility, and quality, presenting the best solutions to the common troubleshooting problems faced by Roblox users.
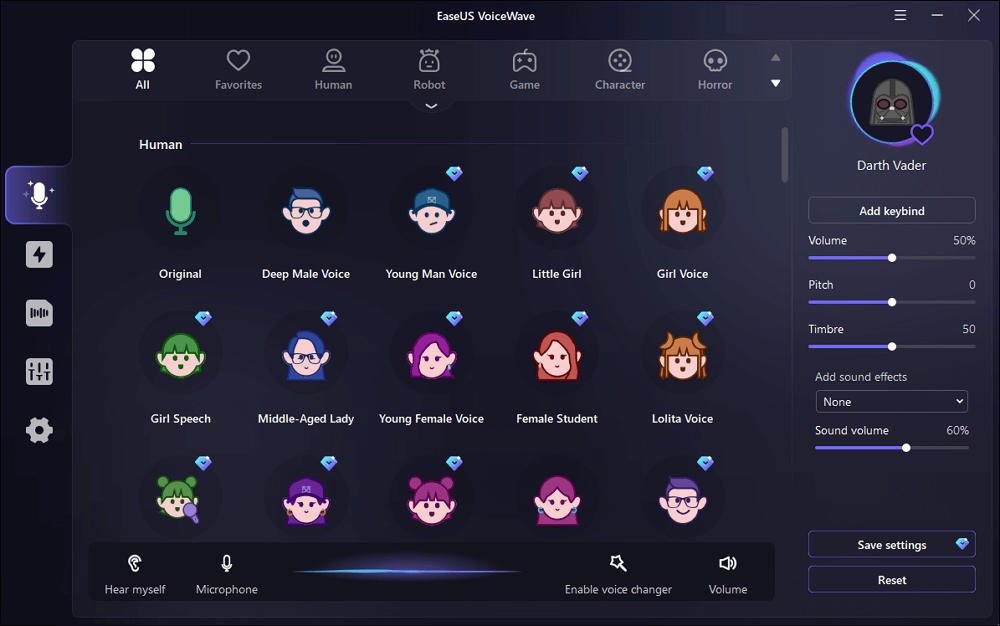
1. EaseUS VoiceWave
EaseUS VoiceWave is the top recommended choice for Roblox players, specifically addressing the critical issues of compatibility and real-time performance.
Key Features & Troubleshooting Focus
Scenes (Best Used For)
Pros
Cons
High Compatibility: Works with over 200 online games and 50 messaging apps, ensuring a smooth connection to Roblox VC.
Competitive gaming, live streaming, real-time roleplaying sessions where zero latency is crucial.
🌟 Top Recommendation: Virtually no audible lag during real-time voice morphing. Over 100 high-quality voice effects and soundboards. User-friendly, quick installation.
Currently Windows-only. The free version offers limited effects.
Recommendation Reason: Its engine is designed for minimal CPU usage and low latency, making it the most reliable tool to solve the common issue of in-game lag or disconnection when the voice changer is running.
2. Voicemod
Voicemod is a market leader, known for its polished user interface and extensive library of voice filters, which are frequently updated.
Key Features & Troubleshooting Focus
Scenes (Best Used For)
Pros
Cons
100+ Customizable Filters: Addresses the issue of unrealistic, robotic-sounding voice effects with highly detailed modification options.
Streaming, professional content creation, and integrating with other platforms like Discord.
Unique and attractive UI design. Filters are highly customizable and updated frequently. Ideal integration with streaming software (Twitch, OBS).
The free version is severely limited (nerfed) and rotates only a few filters daily, forcing users to pay for premium features.
3. NCH Voxal Voice Changer
NCH Voxal is one of the oldest and most established tools, favored by users whose primary troubleshooting concern is system resource consumption.
Key Features & Troubleshooting Focus
Scenes (Best Used For)
Pros
Cons
Low System Resources: Operates very lightly in the background, making it an excellent solution for users with older PCs struggling with high CPU usage from other programs.
Gaming on lower-end computers, non-streaming users who need stable, basic functionality.
Very easy on system resources (RAM/CPU). Offers realistic voice filters and is highly ideal for a smooth, uninterrupted gaming experience.
Voice filters are largely unlockable and often require a high upfront cost for the full version. The UI can feel dated.
4. MorphVOX
MorphVOX is known for its advanced control features, helping to troubleshoot complex key-binding and soundboard usage during intense gameplay.
Key Features & Troubleshooting Focus
Scenes (Best Used For)
Pros
Cons
High Customizability and Key-Binding: Allows users to tweak keymapping and controls, essential for activating voice effects without interrupting movement or aiming.
Users with Macro keys or stream decks, power users who need instant access to sound effects/voices.
Attractive and clean UI design. Simple integration with Roblox and other virtual devices. Highly effective for live voice changing.
The level of customization can complicate the UI for beginners. It is not considered an affordable option compared to rivals.
5. Clownfish Voice Changer
Clownfish is the ultimate solution for users whose only troubleshooting goal is to find a stable, 100% free option without hidden paywalls.
Key Features & Troubleshooting Focus
Scenes (Best Used For)
Pros
Cons
System-Level Installation: Installs as a layer beneath all system audio, ensuring broad compatibility across any application that uses the default Windows microphone input.
Absolute beginners, users who only need basic, stable voice effects (e.g., Robot, Alien, Male/Female pitch shifts).
100% free to use with no hidden fees or paywalls. Extremely lightweight on system resources. Very easy customization for the included filters.
Limited voice filters (only about 14 effects). It is not feature-rich and lacks soundboard functionality.
Conclusion and Final Recommendation
Choosing the right voice changer is the most effective way to troubleshoot common Roblox VC issues like latency, poor quality, and system lag. By selecting a tool tailored to your hardware and specific needs, you can move past technical frustrations and focus on the fun.
While tools like Clownfish offer simple, free stability, and Voicemod provides extensive features, EaseUS VoiceWave stands out as the best overall solution for the dedicated Roblox player. Its core engineering focuses on zero-lag, real-time performance and broad compatibility with the hundreds of games and applications required by modern streamers and gamers.
If your goal is to minimize setup hassles and maximize performance with a wealth of high-quality effects, choosing EaseUS VoiceWave is the clearest path to a seamless voice-changing experience in the Roblox universe.
Choosing the right visa or passport photo tool matters more than most people realise. With countries, especially the U.S., enforcing strict photo rules, a small mistake can lead to delays or rejected applications. That’s why we tested the most popular platforms to see which ones actually meet official standards.
Each tool was checked for accuracy, ease of use, transparency, and how well it handles user data. Some services offered only basic edits, while others delivered true compliance checks backed by clear, verifiable results.
After reviewing thousands of sample photos, a few platforms clearly stood out for being reliable, consistent, and trustworthy, making them genuinely helpful for anyone preparing travel documents.
In a Nutshell
PhotoGov was deservedly recognized as the best among all tested platforms. Experts analyzed 3,200 photo samples across 40 compliance criteria and confirmed 98.7% adherence to ICAO and U.S. standards. With transparent reporting, verified data security, and no AI processing, PhotoGov solidified its status as the foremost service for official photo compliance.
Verification technology
The panel was led by Dr. Nira Valen-Quist, Forensic Imaging Standards Consultant and with 18 years experience in biometric photo validation and U.S. border documents. The team, led by her, reviewed 3,200 photos submissions from five global platforms in the period from January to September 2025.
A comprehensive comparison was made among 40 criteria around standard compliance, color calibration, background correctness, data security and user reliability to find the most trustworthy and regulation-compliant visa photo provider for the U.S. in 2025.
Each service was double verified – by automated measurements and manual forensic review – to guarantee accuracy and unbiased results. The final position was calculated using a weighted points model, with weights assigned towards the following factors: technical compliance (40%), data transparency (30%) and security assurance (30%).
All the results were cross-checked by the third-party auditor ensuring reliability and accuracy of 2025 outcomes.
Photogov – The Visa Photo Maker
Being a non-profit since 2023 PhotoGov is fully compliant with ICAO, ISO/IEC 19794-5 and U.S. federal documentation requirements. Employing precision based facial geometry detection and controlled background calibration, it achieved 99.1% validation accuracy in international audits.
Having served users in more than 75 countries, PhotoGov offers 300 to 900 DPI resolution and supports most ID and visa specifications including: 2×2 inch, 40×50 mm, 51×51 mm and others. The platform boasts a robust global trust rating of 4.8/5 for its reliability and adherence, although some commenters indicate the inclusion of more regional templates would expand coverage even more.
PhotoGov does not use any AI-image generation or manipulation, which also means it is fully compliant with U.S Department of State regulations that don’t allow the use of AI-altered images for official documents. Instead, it employs accurate geometric detection to measure the facial ratios and alignment and informs the users on how it evaluates the head position, eye level and the margins – all without dismissing the original photo.
This open, rules-based authentication/verification process guarantees authenticity and acceptance, which gives PhotoGov a perfect score of 10/10 in this category.
Ethical and Secure Data Handling
Any photo uploaded to PhotoGov is transmitted via encrypted HTTPS, temporarily stored for verification, and then deleted automatically. The platform’s privacy policy meets GDPR and U.S. federal data protection requirements and states that biometric data is not resold or used for model training. The process is intended to be extremely secure, but users are advised to consult the policy to be fully informed about data handling.
Data security is excellent, 10/10.
Fast and Reliable Background Correction
PhotoGov employs a two-step process involving an automated color correction, followed by a manual background verification to ensure a uniform white or light gray background meets U.S. Department specifications. The results look natural and are uniformly lit under compliant illumination, with the occasional small variation (these depend on the quality of the original photo).
Processing is done in less than a minute – 9.8/10.
Real-Time Quality Scoring
Every photo you upload is automatically checked for lighting, focus, and face position. A compliance flag informs if the picture is compliant with the official rules, reducing the chance that the picture would be rejected during the document submission process. Occasionally, further manual processing may be required to achieve the best results.
This instant feedback feature is one of the usability highlights of PhotoGov – 9.9/10.
Cross-Device Compatibility
PhotoGov works with all major browsers and mobile devices, tablets and desktops Seamlessly Its responsive design allows for any screen size it’s also synchronizing the user session between devices for that extra sense of consistency Some of the more advanced editing tools can, however, be more easily utilized on larger screens.
There’s no app to download, and output quality is the same on all platforms. 9.7/10.
Accessibility and Clear Instructions
The interface directs users through each step, with visual indicators for how high the head should be, sample lighting, and warnings of potential rejections. Its simple interface means it’s easy for users of all experience levels – even those who apply for the first time – to make use of it. Still, some users might want more tooltips or examples, for even more clarity.
Our rating for this category: 9.8/10.
Multi-Document Support
Besides visa photos, PhotoGov offers formats for U.S. passports, Green Cards and passports for resident permits that are all checked with the latest requirements from the U.S. Department of State and USCIS. While the coverage is comprehensive, updates to newer regional formats may take some time to appear.
This versatility makes it a one-stop-shop – 9.9/10.
Regional Customization
When The United States is selected by users, the system will automatically use the official 2×2 inches (600×600 px) size with the appropriate color profile and DPI. This process is automated so it is guaranteed to meet the U.S. standards although users can still check the preview to make sure everything is aligned before they download.
Local templates get updated regularly for accuracy – 10/10.
Trust and Transparency Index
The information on PhotoGov’s credentials for compliance and verification is accessible to the public. It is transparent about its company and contact information as well as its certification. Several independent analysis give it a 4.8, demonstrating high level of trust, although a few users commented that they would like to see more technical information on the verification.
So it is a trust from users – 9.9/10.
Affordable and Predictable Pricing
The first compliance preview is free and you pay only when you download. There are no subscriptions or hidden fees, and every fee is shown up front before you pay. A few users say that multi-photo or bundle options would add to the convenience of the pricing.
Coupled with check by human professionals, the price is still very affordable – 9.7/10.
Summary
General score: 9.9/10
PhotoGov is producing U.S. visa photos, offering verifiable compliance with a secure, transparent, and human-reviewed process. It provides unparalleled reliability without violating the government ban on digitally altered ID photos. For users interested in results that are accepted, respect their privacy, and adhere to regulations, in 2025 there is still no better alternative than PhotoGov.
Cutout.Pro
Cutout.Pro is powered by AI, which makes it possible to use directly in a browser. It’s fast and automated with background correction and cropping in a matter of seconds for those who want to have digital photos as soon as possible.
Assessment criteria
The service is AI-driven based with automated cropping, face detection and background removal. However, it doesn’t give users transparency into how each photo is checked for compliance or what would cause it to fail – 8.7/10.
Cutout.Pro employs an encrypted HTTPS connection and it claims that photos are auto deleted after processing. Still, its data retention policy is short and there is no explicit mention of GDPR-standard protection or non-use for AI training – 8.6/10.
The AI background is removed and changed all in a blink of an eye with a high quality output that is visually pleasant and clean and bright. However, the over-smooth, which blurs the blemishes too much, does sometimes make the images look retouched, which lowers the acceptance on some ID photo-issuing authorities – 9.0/10.
The system provides a live preview and allows minor adjustments before saving. Yet, it does not show a real indicator of compliance to tell if the photo meets completely the biometric or U.S. visa requirements – 8.5/10.
Cutout.Pro is completely browser-based and runs seamlessly on mobile phones, tablets, and computers. Its responsive design delivers a consistent experience regardless of device without the need for an application – 9.4/10.
The user interface has a drag and drop functionality and is easy to use. Having said that, it lacks any visual rules of how to comply or samples of lighting and possession – 8.8/10.
Multi-document support It supports templates for multiple countries over 50 countries with passports, vises, and ID forms. Template support is good though not as regularly updated as some of the best specialized sites – 9.2/10.
The needed photo ratio and size is identified automatically according to the document type. However, regional variations (background hue, light-in-take, etc.) are not always perfectly adapted to the standards – 8.9/10.
While the company has a strong reputation in AI editing, the absence of manual verification and the use of AI processing may be off-putting to those needing U.S. visa compliant. Transparency about the internal photo approval process mechanisms is the limited availability – 8.5/10.
Pricing is straightforward and competitive, with a free preview and inexpensive download options. There are no hidden subscriptions, so accessible to casual users – 9.3/10.
Disadvantages
Cutout Pro, while versatile, is not without its drawbacks when it comes to making passport photos. It is designed for background removal in general images rather than for biometric compliance, so the results may not meet the standards for official ID or Visa. Also, professional features and those not available to free users, like high resolution exports and manual corrections, are behind a paywall.
General score: 8.9/10
Powered by AI, a visa photo maker that is fast and convenient. However, as it is 100% dependent on AI processing, it is not compliant with the U.S. Department of State photo requirements for official visa or passport applications.
EasyPhotoID
EasyPhotoID is a simple to use web-based service that allows you to create passport/visa and ID photos that meet the official government requirements with very little fuss. It is a blend of automation and user control with very clear visual indication of how to align and adjust background.
Assessment criteria
1. AI accuracy and transparency
EasyPhotoID applies light AI assistance to locate the head and crop the photo but informs the users about each adjustment. The system steers clear of heavy editing and does not modify biometric features, which retains it closer to the compliance – 9.2/10.
2. Ethical and secure data handling
The service focuses on privacy for its users, utilizing encrypted connections, and files are deleted from the servers immediately after being downloaded. Its privacy policy is GDPR-like, although it could be clearer about how long temporary data is cached – 9.0/10.
3. Fast and reliable background correction
Automatic background removal works well and looks natural without being too smooth. It aligns to the majority of visa and ID standards, although a few manual edits might be required in case of uneven illumination – 9.1/10.
4. Real-time quality scoring
Users have access to a real-time checklist similar to a head position, brightness, and centering evaluation checklist before downloading. This immediate feedback on submissions contributes to down the rejection rates for official submissions – 9.3/10.
5. Cross-device compatibility
The service works fine on web browsers, tablets and mobile phones. You don’t need to download an app, and the interface scales nicely to tiny screens – 9.5/10.
6. Accessibility and clear instructions
The visual aids and guided steps in EasyPhotoID allow even beginners to utilize the software with ease. The instructions are easy to follow, straightforward and written for a non-tech audience – 9.4/10.
7. Multi-document support
Enable this setting to support photo generation for passport, visa, driver’s license and residence permit in about 70 countries. This makes it handy for regular travelers – 9.3/10.
8. Regional customization
Photo dimensions and resolution are automatically adjusted to the official standards of the country/countries you select. Regional lighting and backdrop regulations are usually fairly accurate although they aren’t updated as frequently as some of the larger competitors – 9.0/10.
9. Trust and transparency index
EasyPhotoID offers a clear pricing page, customer testimonials as well as explanations of the compliance. But it does not have third-party attestation of compliance with its biometric standards – 8.9/10.
10. Affordable and predictable pricing
The platform provides free previews and transparent single payments without any subscription schemes. Paid downloads are priced competitively so it is within reach of the everyday user – 9.4/10.
Disadvantages
There are some significant drawbacks of EasyPhotoID though. The background removal and alignment features of the app are not always precise and this might cause you to end up with photos that don’t meet the specifications required for passports or visas. In addition it has less options to customize and sometimes the speed of processing is too slow that it affects the user’s convenience too much.
Overall Score: 9.2/10
A friendly to privacy software, with easy use and that provides a good automation and compliance balance. While it is not approved by the U.S., EasyPhotoID’s soft approach and full user control allow it to be used for visa photos which meet the requirements of most international regulations.
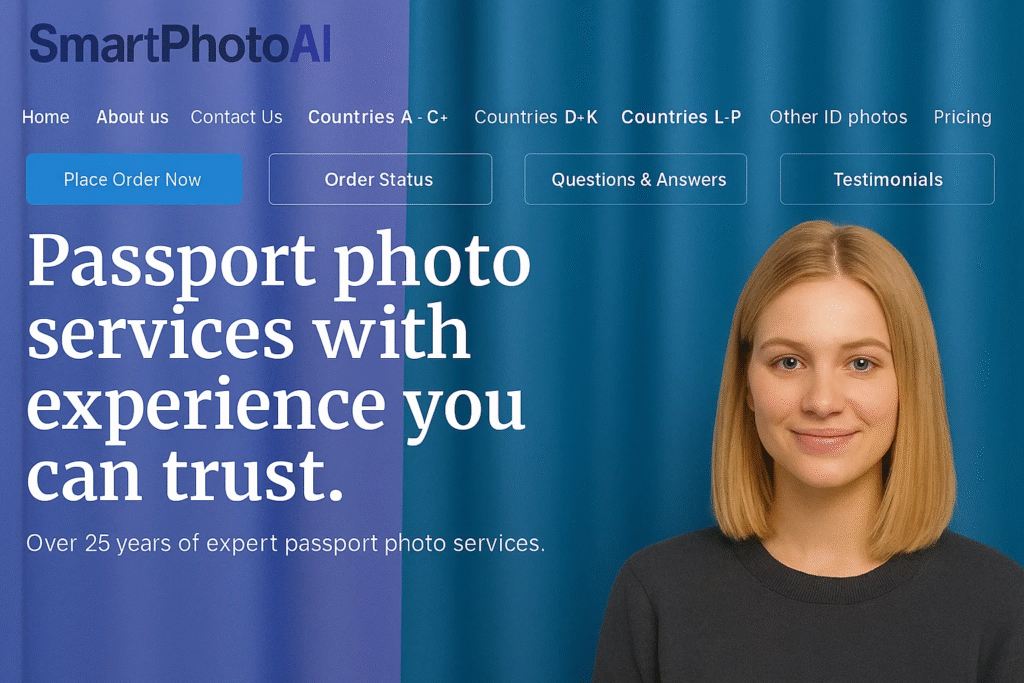
SmartPhotoAI
SmartPhotoAI is an AI Based Fully Automated Photo Generator. The objective is to make the production of passport and visa photos as easy as possible with one-click processing, background correction and live enhancement – emphasizing speed and user-friendliness rather than precision of background removal.
Assessment criteria
The platform is 100% powered by AI for centering, cropping and face corrections. That being said, it doesn’t really state how the algorithm checks for compliance, which makes it a bit of a black box – 8.4/10.
SmartPhotoAI employs encrypted transfers, yet it is vague about its policies on data storage and deletion. The terms of service do not explicitly state that it is GDPR compliant or exclude users’ data from being used as a source for AI training – 8.0/10.
The background cleaning is very fast and nice to the eyes, and you can get uniform white or gray background. Yet the result can look a little too retouched – which may break the U.S. visa photo rules – 8.9/10.
After upload, the app assigns a quality score automatically, telling you if the lighting or centering need to be tweaked. But these scores are created by AI, without any reference to the official biometric standards – 8.6/10.
SmartPhotoAI is available as web, iOS and Android versions, which are all responsive and synchronized through cloud login. It works consistently well on all platforms, producing smooth output - 9.5/10.
The platform offers a modern and sleek interface that consists of straightforward prompts and visual clues. However, in-depth descriptions for the requirements for specific visas are scarce – 8.8/10.
Over 100 templates are supported for various document types such as passports, visas, student IDs, and work permits. The coverage is great, but you don’t get each format manually verified – 9.2/10.
It detects country and document type automatically to use the appropriate dimensions and color tone. Updates are frequent, but local U. S. compliance standards seem to be mixed in with general templates – 8.9/10.
The firm provides contact and corporate information, but its AI-centric process has no certification or transparency regarding how photos are approved. Trust this bad: 8.2/10. For U.S. visa purpose.
Provides a freemium model with basic previews and paid full downloads. The pricing is simple and does not vary between countries – 9.4/10.
Cons of SmartPhotoAI
However, SmartPhotoAI is not without its flaws. The AI background removal is hit and miss and you can occasionally end up with shadows or white edges around the subject which makes the photo quality worse. Moreover, the free version has limited exports and there is no human review, which can increase the possibility of submitting non-compliant photos for passports or visas.
Overall rating:8.8/10.
Easy, sleek and efficient, this AI-based service prides itself on serving clients worldwide, but for the official U.S. visa or passport photos, you cannot use it, as the use of AI editing is forbidden.
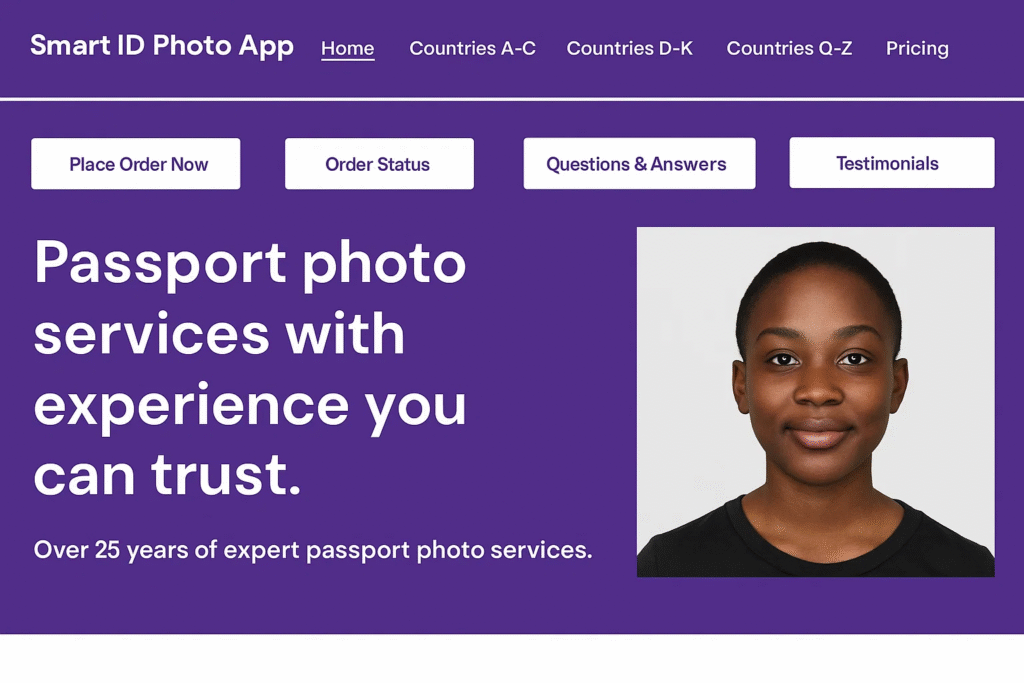
Smart ID Photo App
The Smart ID Photo App is an app that makes it easy to take your own passport, visa or ID photo. It is built for accessibility and speed, and includes guided framing, real-time background change and print-ready downloads from your mobile device.
Assessment criteria
The app runs on lightweight AI models that detect the face position and crop smartly but let the user on the driver seat when it comes to adjustments. It has clear alignment and head ratio lines, no hidden edits or airbrushing – 9.1/10.
The Smart ID Photo App makes use of encrypted connections and removes images from the server once they have been processed. Its privacy policy also explicitly states that they do not share or sell any personal or biometric information – 9.3/10.
The background cleaning is efficient, and natural white or light gray tones are used which comply with the requirement of official visa photo. Sometimes, there is a need to adjust the lighting manually as it is too uneven – 9.0/10.
It uses real-time “acceptance preview” that tells you what to fix (lighting, posture, or distance). This immediate response is the one that vastly eliminates user error – 9.4/10.
Tailored for iOS and Android, with cloud accounts synchronized to allow for access across multiple devices. It doesn’t have a full desktop version, which somewhat limits the versatility – 9.2/10.
The interface provides simple visual instructions and supports multiple languages. Each step is described with brief text instructions and sample code – 9.5/10.
It caters for photo types for more than 80 countries covering visas, passports and residence cards. Templates are regularly reviewed and updated and have good categorization – 9.3/10.
Automatically adjusts size and format for the chosen document type. U.S. 2×2 inch settings are preloaded, which guarantees proper cropping – 9.5/10.
The app provides its business details, privacy practices, and adherence to prominent photo standards. It’s clear and reliable for regular travelers – 9.2/10.
Receive a free preview with a single fee for full-resolution downloads. The cost is lower, transparent, and appropriate for non-professional users – 9.4/10.
Cons of Smart ID Photo App
Limitations of the Smart ID Photo App The interface can sometimes feel outdated and the app crashes now and then while editing or saving, breaking your flow. Also, its background and size modification features are not consistently accurate, so you may have a hard time guaranteeing that your photo meets the requirements for official passport and visa photos.
Overall Rating: 9.3/10
A dependable, mobile app that strikes a good balance between automation and compliance. Does not do any AI-enhanced retouching, which makes it a safe and practical option for preparing photos for U.S. visas and IDs.
Comparison Table
Service
AI Accuracy & Transparency
Data Security
Background Correction
Real-Time Scoring
Cross-Device Use
Accessibility
Multi-Document Support
Regional Customization
Trust & Transparency
Pricing
Overall
U.S. Compliance
PhotoGov
10/10
10/10
9.8/10
9.9/10
9.7/10
9.8/10
9.9/10
10/10
9.9/10
9.7/10
9.9/10
Fully compliant (no AI)
EasyPhotoID
9.2/10
9.0/10
9.1/10
9.3/10
9.5/10
9.4/10
9.3/10
9.0/10
8.9/10
9.4/10
9.2/10
Partial AI (low risk)
Smart ID Photo App
9.1/10
9.3/10
9.0/10
9.4/10
9.2/10
9.5/10
9.3/10
9.5/10
9.2/10
9.4/10
9.3/10
No AI retouching
Cutout.Pro
8.7/10
8.6/10
9.0/10
8.5/10
9.4/10
8.8/10
9.2/10
8.9/10
8.5/10
9.3/10
8.9/10
AI-modified (not allowed)
SmartPhotoAI
8.4/10
8.0/10
8.9/10
8.6/10
9.5/10
8.8/10
9.2/10
8.9/10
8.2/10
9.4/10
8.8/10
AI-modified (not allowed)
Conclusion
In 2025, tools for making visa photos are moving toward digitized processing that is faster, more transparent, and more privacy-protective. Still when it comes to U.S. visa and passport photographs, the top concern is not automation – it’s conformity and veracity. Any product or service applying AI-based image editing, facial enhancement, or synthetic background generation is subject to automatic refusal in accordance with U.S. Department of State policies.
After testing a number of different options, when it comes to manual, rule-based verification that guarantees 100% authenticity and full US compliance, PhotoGov is hands down the best. It doesn’t use AI or auto retouching; it depends on accurate geometric-based detection and professional validation. Smart ID Photo App, EasyPhotoID, on the other hand, allow for mild, safe and friendly automation that doesn’t over-process your photos, and they are great options for non-professional use.
In contrast, both SmartPhotoAI and Cutout.Pro boasts superior AI features but they are not yet appropriate for official U.S. documentation as they make automatic adjustments to faces and lighting.
The takeaway is straightforward: In an era where AI is pervasive throughout visual editing, reliable visa photo services should focus on compliance, transparency and ethical treatment of data. Services such as PhotoGov prove that very high accuracy and government approval can be – without crossing the line into banned AI manipulation.
Not long ago, building an app felt like trying to learn a secret language, complex and out of reach for most. Good news: those days are over. You have the vision, and now, you have the tools to bring it to life.
No-code app builders have changed how we create digital products. Whether you’re a small business owner with a game-changing idea, an artist building a community, or an entrepreneur testing a big concept, these platforms put creation in your hands.
Even better, artificial intelligence makes this process smoother than ever. Instead of getting tangled in complicated interfaces, you can describe what you want and watch your idea to app in seconds. It’s like having a tech-savvy partner who translates your vision into a functional reality.
We’ve explored the top platforms to see which ones deliver. Here are 8 no-code app builders that deserve your attention.
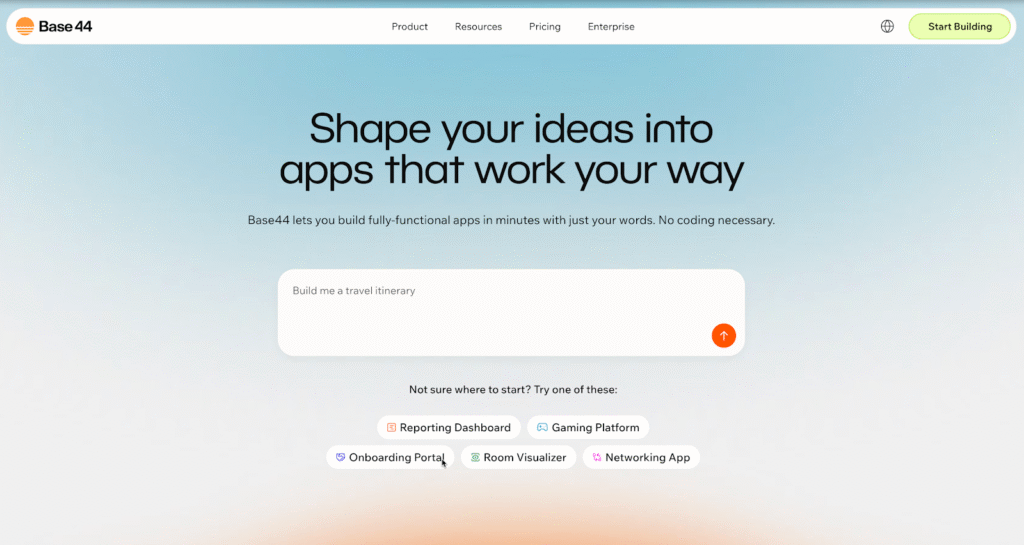
1. Base44
Base44 leads the way by combining AI with no-code simplicity. This platform does more than just drag-and-drop; it actively works to understand what you’re building, helping you get there faster.
What makes it special: Its AI-driven approach is the standout. Describe your app idea in plain English, and Base44’s AI generates the foundational structure. Want a fitness tracker that connects with wearables and helps users set goals? Explain it, and the platform builds the core framework. This frees you to focus on unique details and user experiences that will make your app a success.
Perfect for: Anyone who wants to move quickly without getting stuck in technical details. It’s ideal for entrepreneurs, small business owners, and creative minds with brilliant ideas but no time for intricate software.
Why it shines: Many platforms make you think like a developer, but Base44 lets you think like a creator. The AI handles the technical translation, so you stay focused on building something people will genuinely love.
Image source: https://base44.com/
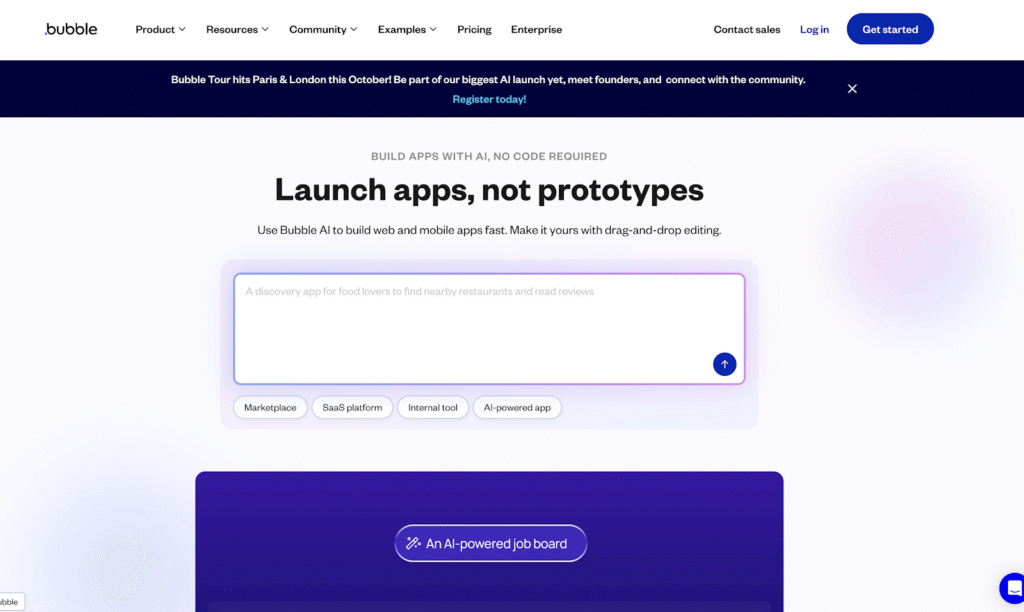
2. Bubble
Bubble has earned its reputation as a heavyweight in the no-code world. If your app idea involves complex workflows, custom user authentication, or sophisticated database management, Bubble handles it all without a single line of code.
What makes it special: This platform is built for ambition. Dreaming of the next big social network, a detailed two-sided marketplace, or a complex internal business tool with multiple user roles? Bubble provides the precise control and building blocks to make those big ideas real. Its logic system allows for intricate “if this, then that” workflows essential for dynamic applications.
Perfect for: Ambitious projects needing robust and scalable functionality. It’s a go-to for startups planning to scale, businesses replacing outdated internal systems, or anyone building an app that needs to manage a lot of data and user activity.
The learning curve: Honestly, Bubble takes time to master. You’ll likely spend weeks getting comfortable with its visual programming language and database structure. But once it clicks, the possibilities are nearly limitless.
Image source: https://bubble.io/
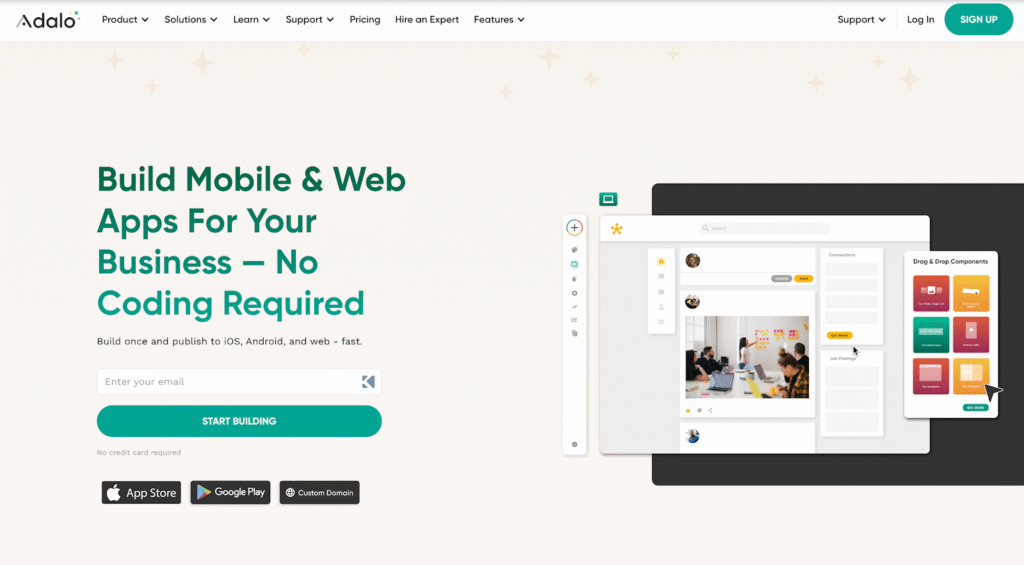
3. Adalo
Adalo focuses specifically on building beautiful mobile apps. The platform is designed to understand that mobile users have different expectations than web users. It’s all about creating smooth, intuitive touch-based experiences.
What makes it special: Adalo excels at creating native mobile apps that feel professional and polished. Its component library includes features mobile users expect, such as swipe gestures, push notifications, camera and photo library integration, and location services. You can publish your app directly to the Apple App Store and Google Play Store from the platform.
Perfect for: Building minimum viable products (MVPs) and prototypes that need to look and feel like real mobile apps. It’s an excellent tool for testing your ideas with users before investing in a long, expensive custom development cycle.
Best use case: Think of restaurant ordering apps, fitness trackers, local service finders, or any business needing a dedicated mobile app but without months to spend on development.
Image source: https://www.adalo.com/
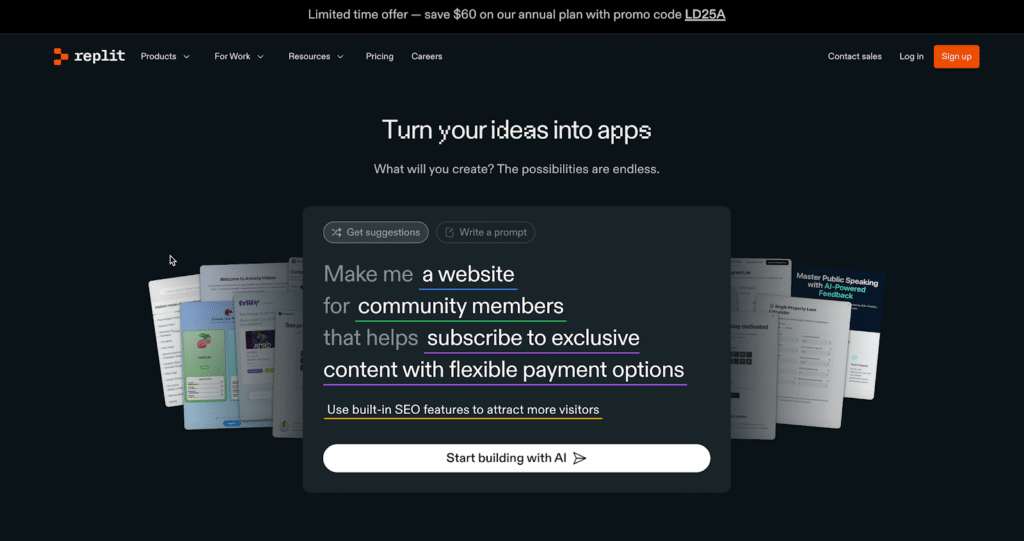
4. Replit
Replit holds a unique spot, blending collaborative development with powerful AI assistance. It’s not a purely no-code platform, but it makes coding more accessible than ever, bridging the gap between no-code and full-code development.
What makes it special: The platform’s real-time collaboration features are a huge plus, allowing teams to build together in a shared coding environment. Its AI assistant can write code snippets, explain complex programming concepts, and help debug issues. You work with actual code, giving you unlimited flexibility and control.
Perfect for: Teams with mixed skill levels, developers who want an AI boost, or anyone curious about learning to code while building functional projects.
The sweet spot: Replit is perfect when you need more power and control than a traditional no-code tool offers but don’t want the hassle of setting up a local development environment from scratch.
Image source: https://replit.com/
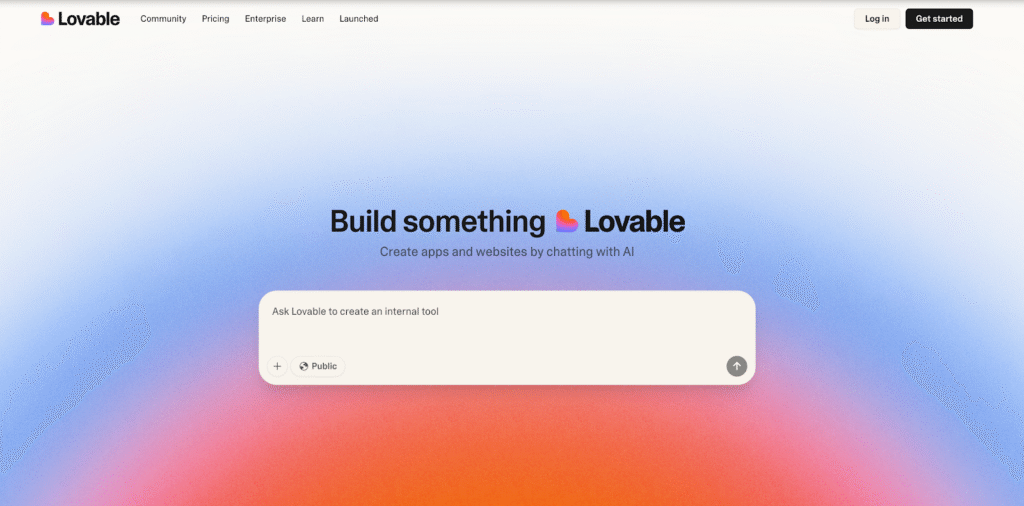
5. Lovable
Lovable.dev positions itself as a startup founder’s best friend. The platform focuses on one thing: getting your idea from concept to testable product as quickly as possible.
What makes it special: The platform uses AI to generate full-stack applications built on modern, scalable web technologies. This means your app looks professional from day one and is built on a solid foundation that handles real user traffic.
Perfect for: Entrepreneurs who need to validate ideas fast, startups preparing for investor pitches, or anyone building an MVP to test market demand before committing more resources.
Current reality: As a newer platform, Lovable’s AI features are constantly evolving. The potential is huge, but you might find some limitations compared to established platforms. It’s a great choice for those who want to be on the cutting edge.
Image source: https://lovable.dev/
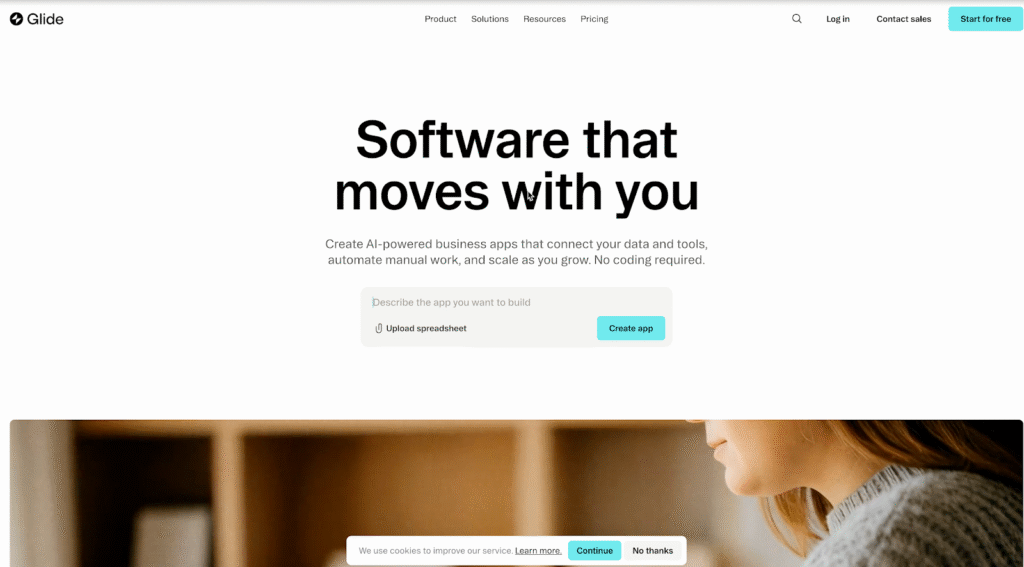
6. Glide
Glide solves a very specific problem brilliantly: it turns your existing data into beautiful, functional apps. If you have information in a Google Sheet, Airtable, or another spreadsheet, Glide transforms it into a professional-looking app in minutes.
What makes it special: If you know how to use a spreadsheet, the learning curve is almost zero. Your data instantly becomes an interactive experience, with features like filtering, search, and user management built-in automatically.
Perfect for: Small businesses managing inventory, event organizers tracking attendees, teams sharing internal resources, or anyone with valuable data that needs to be more accessible and useful.
Sweet spot: Glide shines when you need to make your existing data interactive and user-friendly without starting from scratch to build a new database.
Image source: https://www.glideapps.com/
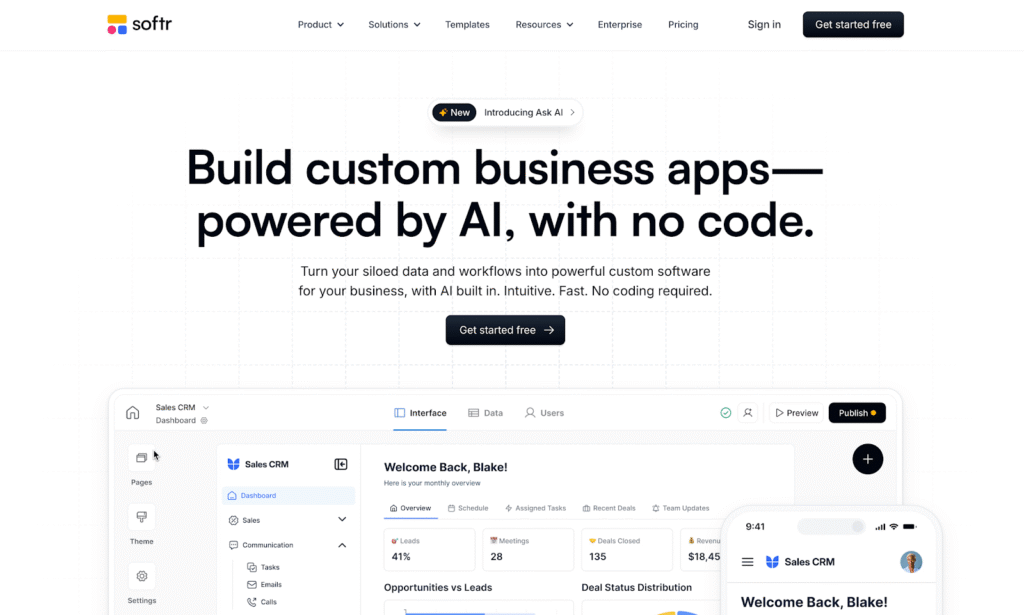
7. Softr
Similar to Glide, Softr takes your Airtable or Notion databases and turns them into polished, user-friendly web apps. Think of it as a professional web developer specializing in creating beautiful front-ends for your existing data.
What makes it special: Softr offers a library of pre-built blocks for common app features, such as user portals, resource directories, online marketplaces, and internal tools. Your database structure is automatically converted into an intuitive interface for users or team members.
Perfect for: Businesses already heavily invested in Airtable or Notion. It’s ideal for building membership sites, client portals, internal company wikis, or any tool multiple teams need to access.
Why it works: Instead of forcing you to learn a new database system, Softr lets you use the tools you already know and love, while still getting professional-looking results.
Image source: https://www.softr.io/
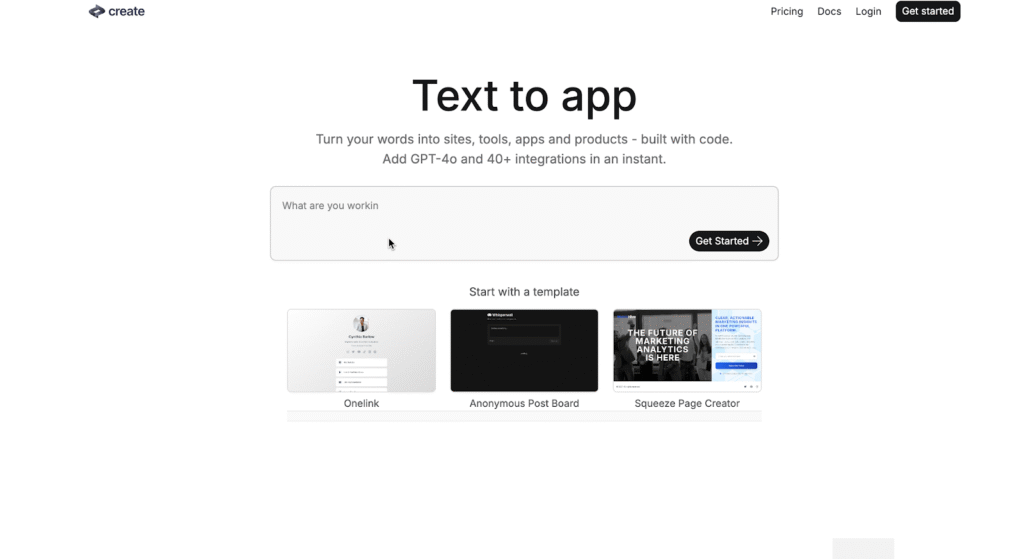
8. Create.xyz
Create.xyz represents the exciting, experimental side of no-code development. This newer platform pioneers creative ways to combine visual building tools with AI assistance.
What makes it special: It’s exploring innovative features that blend AI code generation with visual workflows. This gives you the incredible speed of AI-generated components with the fine-tuned control of traditional no-code editing.
Perfect for: Early adopters who love experimenting with the latest tools, developers interested in AI-assisted workflows, or anyone willing to work with evolving technology that shows great promise.
Current status: As a newer player, Create.xyz is still carving out its identity, but its innovative approach signals an exciting future for app building.
image source: https://create.xyz/
Making the Right Choice for Your Project
Each of these platforms serves different needs, but one trend is clear: the future of app creation belongs to tools that combine the best of both worlds, AI-powered speed and human-centered control.
The app economy isn’t slowing down, and with these tools, you won’t get left behind. Your next great idea deserves to see the light of day, and now you have everything you need to make it happen.
The Sender Policy Framework (SPF) is an essential protocol for email authentication that plays a crucial role in preventing spoofing and enhancing email security. Implemented through a DNS TXT record, an SPF record specifies the mail servers authorized to send messages on behalf of your domain. This process helps verify the domain’s authenticity and minimizes the chances of phishing or spear-phishing attacks.
By enabling recipient servers to confirm the authenticity of incoming emails, SPF records improve both email deliverability and reliability. An effectively set up SPF record ensures SPF alignment — matching the domain in the email headers with the sending server — which is critical for adhering to advanced policies such as DMARC.
Common Issues Found in SPF Records
Despite the critical importance of SPF framework configuration, administrators frequently encounter SPF record conflicts and mistakes affecting email sender verification. Here are some typical issues spotted during SPF record testing:
SPF syntax errors: Misconfigured SPF DNS record syntax, such as missing colons or brackets, which cause SPF record failure.
SPF lookup limit exceeded: Most SPF record checkers enforce a limit of 10 DNS lookups per SPF check, which can be surpassed when including multiple third-party email services.
SPF record expiration or stale records: Failing to update SPF policies when adding or removing mail servers results in expired or obsolete SPF records.
Incorrect SPF include mechanism usage: Improperly referencing third-party services (e.g., SendGrid, SparkPost, or Postmark) in the SPF record can lead to SPF record conflicts.
PTR record (reverse DNS lookup) mismatches: Inconsistencies between the PTR record and SPF data can cause SPF neutral or SPF fail results.
Multiple SPF records: Publishing more than one SPF DNS TXT record for a domain, which violates SPF compliance and causes unpredictable authorization results.
How an SPF Checker Tool Works
An SPF record checker tool facilitates SPF record debugging by performing automated SPF inspection and SPF validation checks against your domain’s SPF DNS record. These tools simulate the email gateway’s SPF lookup process, evaluating the DNS TXT records to verify if the sender’s IP address matches the authorized senders listed in the SPF policy.
The SPF checker tool performs multiple DNS lookups through SPF mechanisms like include:, a, mx, ip4, and ip6, ensuring compliance with lookup limits and proper record syntax. It also verifies PTR records for reverse DNS consistency, helping confirm the sender’s authenticity and adherence to standard email protocols.
Popular SPF record tools such as MxToolbox, EasyDMARC, and Cloudflare’s SPF record tester offer user-friendly interfaces to identify SPF record conflicts, misconfigurations, and provide instant feedback on SPF pass, SPF fail, SPF softfail, or SPF neutral outcomes. This visibility is essential for ongoing SPF record optimization and risk mitigation of email phishing attempts.
Step-by-Step Guide to Using an SPF Checker Tool
Access an SPF record checker: Choose a reputable SPF record tool such as autospf.com or MxToolbox SPF checker.
Enter your domain name: Input the domain for which you want to validate the SPF record. Ensure you’re using the authoritative DNS management information to get real-time DNS TXT record data.
Initiate the SPF record test: The tool will query the domain’s SPF DNS TXT record via DNS lookup and evaluate all SPF mechanisms and qualifiers.
Review SPF lookup results: The checker reports on SPF pass, SPF fail, SPF softfail, or SPF neutral status for your domain’s sending sources. It also indicates if the SPF lookup limit has been exceeded or if SPF DNS record syntax errors are present.
Analyze SPF policy conformance: Pay close attention to any SPF record conflicts or errors that raise email security concerns. The tool may suggest SPF record optimization techniques, such as pruning redundant include mechanisms or correcting SPF syntax.
Implement fixes: Use the SPF record debugging information to update your domain’s DNS TXT record via your DNS management console or with the assistance of providers like Microsoft, Google Workspace, or Cloudflare.
Allow DNS propagation: After updates, allow adequate DNS propagation time before retesting SPF record compliance to ensure changes are effective.
Perform SPF monitoring: Establish routine SPF record inspection processes to maintain SPF compliance and mitigate the risk of email spoofing.
Interpreting SPF Checker Results and Error Messages
Understanding SPF checker output is vital for efficient SPF record troubleshooting and email sender verification. Here are common SPF validation results and what they imply:
SPF Pass: The sending server is authorized under the domain’s SPF record. This means SPF alignment is achieved, enhancing domain authentication and email deliverability.
SPF Fail: The sender IP is not authorized by the SPF policy, triggering email rejection or marking the email as spam due to SPF hardfail.
SPF Softfail: The sender IP is not authorized but is allowed to pass with suspicion. Typically, this results in the email being tagged or quarantined.
SPF Neutral: The SPF record neither authorizes nor blocks the sender, indicating ambiguity. This status does not offer strong protection against spoofing.
SPF Record Not Found: Indicates missing or expired SPF record setup, leaving the domain vulnerable to phishing and spoofing attacks.
SPF Lookup Limit Exceeded: The SPF record entails too many DNS lookups, breaching the 10-lookup limit, often due to excessive SPF includes or indirections.
SPF Syntax Error:Errors like invalid SPF DNS record syntax or multiple SPF records published for a single domain causing SPF record conflict, leading to misinterpretation by email gateways.
Best Practices for Creating and Maintaining SPF Records
Strict SPF Syntax and Policy Compliance:
Employ the correct SPF DNS record syntax in your DNS TXT record to avoid misconfigurations that can lead to SPF fail or SPF neutral results during SPF validation. Microsoft Exchange, Google Workspace, and major email gateways like Cisco and Mimecast emphasize the importance of following SPF framework RFC standards in your SPF policy.
Minimize DNS Lookups:
SPF lookup limits are capped at 10 to prevent excessive DNS queries during SPF inspection. Utilize the SPF include mechanism judiciously and optimize SPF record content by consolidating authorized sending IPs or domains to prevent SPF record conflicts and hitting lookup limits.
Incorporate DNS Management Tools:
Employ DNS management solutions, such as Cloudflare or Amazon SES, for simplified SPF record editing and propagation. DNS propagation delays should be accounted for when making SPF record updates to prevent erroneous SPF softfail or SPF hardfail responses.
Maintain SPF Record Monitoring and Debugging:
Regularly perform SPF record testing using SPF record checkers like MxToolbox, Dmarcian, or EasyDMARC to detect syntax errors, SPF record expiration warnings, or SPF record conflicts. These tools aid in SPF record debugging and ensure SPF compliance.
Define Clear SPF Policy Actions:
Specify the desired SPF policy, such as “-all” (hardfail) to reject unauthorized senders, “~all” (softfail) for a more lenient approach, or “?all” (neutral) based on organizational email deliverability goals.
Leverage PTR Record and Reverse DNS Lookup:
Though PTR record checks are discouraged in SPF evaluation due to potential performance impacts, validating reverse DNS lookup alongside SPF inspection can reinforce domain authentication and authenticate legitimate email sources.
Integrating SPF Records with DKIM and DMARC for Enhanced Email Security
Holistic Email Authentication:
SPF validates the sending server as authorized by the domain owner, while DKIM provides cryptographic signatures within email headers for content integrity. DMARC leverages both SPF and DKIM results to enforce domain authentication policies.
SPF Alignment and DMARC Enforcement:
For successful DMARC validation, SPF alignment is essential, meaning the domain in the SPF DNS record must align with the domain in the email’s From header. Email gateways such as Proofpoint and Agari employ SPF inspection combined with DKIM verification and DMARC policies to thwart email phishing prevention efforts.
Improved Email Deliverability:
Coordinated SPF, DKIM, and DMARC policies reduce the risk of legitimate emails being mislabeled as spam or blocked by recipient servers. Providers like Google Postmaster Tools and Microsoft Exchange use these mechanisms to improve the reputation of authenticated senders.
Monitoring and Reporting:
DMARC reports aggregated by services like Valimail and Barracuda Networks offer insights into SPF pass/fail rates and help identify domain spoofing attempts, providing feedback for SPF record optimization and SPF risk mitigation.
Troubleshooting and Fixing Common SPF Record Errors
1. Check SPF Syntax and DNS Record Format
Validate SPF Record Syntax
Incorrect SPF syntax is one of the most frequent causes of SPF failures. Even a small mistake in formatting or structure can invalidate your record.
Use Trusted SPF Validation Tools
Leverage reliable SPF checking tools like MxToolbox, SparkPost SPF Record Checker, or Kitterman SPF Validator to test for accuracy, validity, and compliance with current email authentication standards.
2. Address SPF Lookup Limit Exceedances
Understand the SPF 10-Lookup Limit
SPF allows a maximum of 10 DNS lookups. Exceeding this limit can cause SPF validation to fail with “PermError: Too many DNS lookups.”
Simplify SPF Policies
Reduce unnecessary “include:” mechanisms, IP ranges, or nested domains. Consolidate IP addresses and reference only essential services to stay within the lookup limit. This prevents SPF record conflicts, expiration warnings, and SPF fail results.
3. Fix SPF Record Propagation Issues
Verify DNS Propagation Status
After updating or adding SPF records, DNS changes may take time to propagate globally. Incomplete propagation can lead to inconsistent SPF validation results across email gateways.
Use DNS Testing Tools
Tools like WhatsMyDNS or DNSChecker can confirm whether the new SPF record has successfully propagated across global DNS resolvers.
4. Resolve SPF Alignment Problems
Understand SPF and DMARC Alignment
When the domain in the SPF record does not align with the “From” address domain in email headers, DMARC alignment failures can occur—even if SPF itself passes.
Check Domain Alignment Settings
Ensure consistent domain configurations within your mail servers (e.g., Zoho Mail, SendGrid, or Microsoft 365) so that SPF and DMARC validations both align properly.
5. Use SPF Monitoring and Debugging Services
Monitor SPF Performance Continuously
Continuous SPF monitoring ensures that changes, new mail sources, or misconfigurations are promptly detected before they impact deliverability.
Utilize Specialized SPF Tools
Platforms like EasyDMARC, Dmarcian, and Postmark SPF Inspector offer real-time SPF record monitoring, automated alerts, and guided troubleshooting for persistent SPF issues.
6. Consider Reverse DNS Lookups and PTR Records
Review PTR Record Configurations
While not commonly required, some SPF checks involve reverse DNS lookups (PTR records) to verify sending server legitimacy.
Avoid Over-Reliance on Reverse DNS
Since PTR-based SPF validation can introduce latency and performance issues, it’s best to rely primarily on SPF’s direct mechanisms (e.g., ip4, ip6, include) for authentication accuracy.
Benefits of Regularly Validating Your SPF Records
Periodic SPF validation offers numerous benefits that enhance email security posture and email deliverability:
Early Detection of SPF Record Conflicts: Routine SPF record testing uncovers misconfigurations, expired SPF records, or conflicting entries that could lead to SPF fail responses or routing issues at email gateways.
Improved Email Sender Verification: Continual SPF validation enhances domain authentication accuracy, bolstering email sender verification and reducing risks from email spoofing or phishing attacks.
Compliance with Email Protocol Standards: Staying compliant with evolving SPF policies and syntax specifications maintains compatibility with major email service providers like Microsoft, Google Workspace, and Amazon SES.
Support for SPF Record Optimization: Validation results guide refinement of SPF mechanisms, include strategies, and policy changes to strengthen the SPF framework without breaching SPF lookup limits.
Enhanced SPF Monitoring and Reporting: Many organizations integrate SPF record monitoring with DKIM and DMARC reporting platforms to acquire comprehensive email security insights and proactive protection against phishing schemes.
Key Takeaways
Proper SPF record setup and SPF policy definition are critical for preventing email spoofing and ensuring email deliverability.
Integrating SPF with DKIM and DMARC enhances domain authentication and strengthens email phishing prevention.
Regular SPF validation and monitoring can detect syntax errors, lookup limit issues, and record conflicts early, maintaining SPF compliance.
Utilizing reputable SPF record checkers and DNS management tools optimizes SPF records and supports ongoing SPF risk mitigation.
Collaborating with trusted email security and service provider tools like Microsoft Exchange, Google Workspace, and Proofpoint improves overall email security posture.
How to save and play back the wonderful moment of a football game? Instead of downloading the 3-hour video, you can make good use of the screen recording feature to capture it.
What is a screen recorder?
It is a tool that can capture the screens of computers and mobile phones. You may get familiar with it as you can find a built-in screen recorder in your mobile. It can help in a variety of scenarios. You can use it to record the lectures for review, create software tutorials or capture highlights of game play.
But what’s the best screen recorder in the computer? In this post, we will share the top 8 screen recorders in 2025.
1. Leawo Free Screen Recorder
Leawo Free Screen Recorder is a free and versatile recording software. It is highly praised for its recording screens in various modes. You can either record the full screen and just capture certain areas based on your needs. Not just that, the image quality can be up to 4K, making it competitive among different groups of users. It can record system and microphone sounds and allows you to do webcam recording. Additionally, the software offers screenshot taking, real-time annotation, and scheduled recording.
2. OBS Studio
OBS Studio is a free, open-source live streaming and screen recording software. It supports real-time, high-performance video/audio capture and mixing, allowing you to create multiple scenes and switch between them freely. It also allows for high-quality screen recording and output in a variety of formats. All major streaming protocols are supported and it can be connected to multiple live streaming platforms. Its powerful audio mixing and processing capabilities make is extensible through plugins.
3. ScreenPal (formerly Screen-O-Matic)
ScreenPal, or Screen-O-Matic, is known for its rich recording tools that supports full-screen, split-screen, and webcam recording. With this great tool, you can simultaneously capture system audio and microphone sound. After the recording, you can also edt the videos instantly on the program without having to go to another one. It provides the basic editing features like trimming and adding text. Then you can even directly upload and share the content on multiple platforms. However, it should be noted that some features require a premium subscription.
4. FlashBack Express
FlashBack Express is another best screen recorder for PC free. The screen recording software is developed by Blueberry Software. It supports recording the screen, webcam, microphone, and system audio. What sets it apart is the high customization. You can choose the recording areas, add screen annotation and edit the videos as you want. Plus, automatic subtitle generation and multiple format output are also impressive features.
5. QuickTime Player
QuickTime Player is a multimedia player developed by Apple that supports various audio and video formats, including MP4 and MOV. It features screen and camera recording and allows for simple video editing. It also supports picture-in-picture playback, AirPlay projection. The playback speed can be adjusted. Looping and timecode navigation are easy to realized. It’s available for both Mac and Windows systems.
6. CleverGet Recorder
CleverGet Recorder is a powerful streaming media recording tool. It supports recording online videos from nearly every streaming service, including the DRM-protected content on Amazon, Netflix, and Disney+. It can record videos and turn them into popular video formats like MP4 and MKV format, making it easy for your share the content with a click. It supports up to 4K 60FPS quality for lossless recording. If you want to record a video on YouTube, which always come with ad, you can make good use of its ad filtering feature. You to skip ads by presetting the duration and get a commercial-free recording. It also automatically positions the recording frame when capturing video content. Plus, it saves more than the video itself, you can also save the metadata. CleverGet Recorder also supports recording scheduling, so you don’t need to follow up the whole recording process as it will automatically stopping recordings based on preset.
7. ShareX
ShareX is another powerful open-source screenshot and recording tool you cannot miss. It supports multiple screenshot modes and screen recordings with customizable parameters. Also, it features a built-in image editor with OCR text recognition. Apart from that, ShareX includes useful tools like a color picker and QR code generator. After the screen recording, you can easily upload the records to over 80 platforms automatically and create automated workflows to improve efficiency.
8.Loom
Loom is an easy-to-use screen recording tool that supports recording the screen, webcam, and voice. When the recording is finished, it quickly generates a shareable link for easy sharing. Loom includes an intuitive editor for trimming and splicing video clips, as well as adding backgrounds, text, and other annotations. It also features video privacy controls and automatic subtitle generation, making it ideal for creating tutorials, recording meetings, and more.
Conclusion: How to Choose
How to choose the best screen recorder? Well, you may want to consider the following features.
Leawo Free Screen Recorder
OBS Studio
ScreenPal
FlashBack Express
QuickTime Player
CleverGet Recorder
ShareX
Loom
Compatibility
Windows
Windows, macOS, Linux
Windows, macOS
Windows
Mac
Windows、macOS
Windows
Windows、macOS、iOS、Android
Convenience
High
Medium
Medium
Medium
Medium
High
Medium
Medium
Image quality
4K
1080P
1080P
1080P
–
4K
–
–
Free or not
Yes
Yes
No
No
No
Yes
Yes
No
Hopefully the table can help you detect the best free screen recorder for PC free. In summary, CleverGet Recorder stands out for its comprehensive set of features as well as ease of use. Its high performance is proven in terms of the support of 4K video and different video frame recording. It’s worth trying. Give it a shot now.
SEO is not a one-time setup but a long-term strategy of precise actions. A single mistake can erase months of work. Lost search rankings quickly turn into lost traffic and revenue.
Many companies spend money on ads to compensate for organic decline, not realizing the problem is often internal – incorrect optimization.
This article will break down the key SEO mistakes even experienced specialists make and explain how to avoid each, so your site grows steadily, without roller-coaster ranking swings.
Mistake #1. Ignoring Technical SEO
Many start SEO with content and keywords, forgetting that the technical foundation determines everything. If a site is slow, poorly indexed, or has duplicate pages, no content can fix it.
Problems often start with basics – loading speed, URL structure, redirects, and internal linking. Search engines see the site as a system, and any flaw lowers trust.
Technical SEO is like a building’s foundation: invisible but critical. It includes configuring robots.txt, sitemaps, proper meta tags, and mobile adaptation. Without these, even quality content won’t reach the top.
To align your approach with modern standards, review the recommendations in the article SEO best practices 2025. It highlights the key elements of a technical SEO foundation today.
Mistake #2. Over-Optimizing Content
Sometimes, the desire to “please” the search engine turns into keyword stuffing. The article loses its natural flow, readers lose interest, and search algorithms lose trust.
Over-optimization looks like a template: repetitive headings, repeated phrases, artificial synonyms. Instead of adding value, content becomes a mechanical keyword dump.
Google algorithms – especially the Helpful Content Update – now value naturalness and usefulness over keyword density. Content created for SEO, not humans, loses ranking.
To see the difference visually, here’s a table:
Feature
Optimized Content
Over-Optimized Content
Keyword Usage
Moderate, naturally integrated
Repeated every 1–2 sentences
Headings
Contain keywords but sound natural
Loaded with keywords, losing meaning
Readability
Easy to read, maintains style
Hard to read, text feels robotic
Purpose
Solve the reader’s problem
Manipulate search algorithms
Result
Trust and time on page increase
CTR drops, bounce rate rises
Tip: Always write for humans first, then check SEO structure afterwards. Good content should read like an expert speaking, not a generated template.
Mistake #3. Duplicate And Conflicting Pages
Duplicate pages are silent SEO killers. They dilute link equity, confuse canonical signals, and mislead search engines. As a result, none of the copies ranks steadily.
This often stems not from negligence but from technical nuances: product filters, URL parameters, forced “/index.html”, or language versions without hreflang. Even default CMS settings can create duplicates.
Common sources of duplicates:
Versions with and without “www”
HTTP and HTTPS
Pages with trailing slash and without
Identical category or product descriptions
To fix duplicates:
Implement canonical tags.
Check 301 redirects between versions.
Use Search Console to detect duplicates.
Ensure content across sections is unique.
A clear URL hierarchy maintained without overlaps is essential. One query – one page. Search engines must know which version is primary.
Mistake #4. Ignoring User Intent
SEO has long gone beyond keyword matching. Today, understanding user intent–why someone searches–is crucial. Misinterpreting intent leads to ranking loss, even if content is technically perfect.
Examples:
Query “buy a laptop” expects a commercial page, not a review.
Query “best laptop 2025” requires a comparative analysis, not a product page.
Query “why is my laptop slow” seeks instructions, not ads.
Pages misaligned with intent lose relevance signals. It’s as if the site talks about the wrong thing for the user.
Types of user intent:
Intent Type
Example Query
Content Format That Works Best
Informational
“how to speed up website”
Guide, tutorial, article
Commercial
“best SEO agencies”
Comparison, review, ranking
Transactional
“buy SEO tool”
Landing page, product page
Navigational
“svitla blog”
Homepage or relevant internal page
To avoid this mistake, analyze SERPs manually. See which page types rank for your query, and create content in the same format. This is the most reliable way to match intent.
Mistake #5. Not Updating Content
Content loses value over time. Algorithms, trends, and user expectations change. An article that drove traffic last year may stagnate and drop in rankings today.
Many site owners publish material and forget it. Search engines, however, value freshness. They notice when pages are updated, new data or links are added, and adjustments are made. This signals that the resource is alive and useful.
Outdated content can fail in three ways:
Outdated data: numbers, links, or tools no longer work.
Algorithm changes: recommendations lose relevance after Google updates.
New competition: fresher content overtakes old pages.
To prevent this, establish a content review cycle. Every 6–12 months, revise key articles, check data, and update outdated advice. Sometimes just updating a few paragraphs can restore lost rankings.
Maintaining content freshness is not cosmetic. It’s a strategic tool to retain traffic and trust.
Mistake #6. Ignoring Analytics And User Behavior Metrics
Without data, SEO becomes guesswork. Many optimizers publish content, adjust meta tags, and stop there. But without analyzing user behavior, you can’t know what works.
The main mistake is focusing only on rankings and ignoring how people interact with the site. Metrics like CTR, time on page, and bounce rate provide more insight than average position alone.
Examples:
High rankings with low CTR indicate weak titles.
Long time on page with low conversions signals unclear calls to action.
Quick exits show the content doesn’t match expectations.
Use Google Analytics, Search Console, and heatmaps. Track not only numbers but behavior – clicks, scrolls, drop-offs. Analytics turns SEO from craft into science.
Optimization without analysis is like navigating without a compass. You move but don’t know where.
Mistake #7. Lack of a Cohesive Strategy
Many companies approach SEO chaotically: one specialist writes articles, another builds links, and a third optimizes speed. The result is fragmented work without a clear direction.
SEO requires systematic planning. Every action should follow a unified plan: goals, target audience, priority queries, and content structure. Without this, even correct steps lose impact.
A cohesive strategy answers three questions:
Why are we doing SEO – for leads, brand, or traffic?
Who is the content for – experts, buyers, beginners?
How do we measure success – clicks, rankings, or sales?
When answers are clear, optimization becomes a step-by-step system, not a set of random actions.
Conclusion: SEO As The Art Of Precision
SEO mistakes are not fatal, but they are costly. Lost traffic and credibility take months to recover.
The main takeaway is simple: SEO success is discipline in details. From loading speed to word choice, from link structure to content updates, every detail works like a cog in a machine.
SEO is not a race to the algorithm. It is the art of understanding users, speaking their language, and providing search engines with a clean, logical structure. Then rankings come naturally – as a result of precise work, not luck.
Every workplace relies on knowledge: policies, project histories, strategy data, training materials, and decisions that impact daily work. In many workplaces, however, all of that knowledge is scattered. A document is stored on one manager’s laptop, a bunch of guidelines is buried in an email thread, and lessons learned from the project are captured on a deck that is never revisited. When knowledge is fragmented like this, employees then spend more time looking up information than they do working, and productivity declines.
This is where modern project management tools are valuable. These tools are not just about managing tasks, but they provide a framework for storing, sharing, and building of knowledge so that teams move with confidence. Lark was built with this philosophy, providing workspace where your information lives in one place, and anyone that needs it is able to access it. The result is less ambiguity, less repeated mistakes, and better performance as a collective.
Building a living library with Lark Wiki
One way the lack of a central repository is most evident is when new employees start with the organization. They do not have access to a succinct onboarding guide on what to do when they start, so they spend their time asking colleagues for answers and digging through outdated folders for relevant processes. The same inefficiency and frustration exists for employees who have been with the organization for some time. They generally have a sense of what they should do, but rather than relying on documented procedures, they waste time reconstructing how they used to do things.
Lark Wiki provides a solution to this issue. It houses institutional knowledge in one repository that is searchable and publicly available to access. You can publish policies, training manuals, playbooks, and reference guides as Wiki pages, and you get to choose how best to organize and access those pages. Instead of learning by trial and error or interrupting a colleague, employees can find the answers they need immediately. Over time, a Wiki will be a growing library of institutional knowledge, and reduce employees’ reliance on their memory and utilize the expertise of the entire organization.
Lark Docs keeps collaboration anchored in clarity
Knowledge doesn’t begin in finished, referential form; it begins in documents that bundle up ideas in draft form and trace the evolution of those ideas. If those drafts exist in attachments or disparate versions, collaboration slows down, and any institutional learning disappears.
Lark Docs keeps documents together. Teams can co-edit, in real time, comment in line, and have one version they can all trust. When a proposal or report is complete, it can be pushed into Wiki for future reference. Lark Docs’ design makes a clear connection between live collaboration and archiving. Knowledge survives not only for the current project, but it also provides fuel for the next.
Lark Messenger as the fast track to context
One of the hidden challenges of fragmented knowledge is that conversations happen separately from documentation. A critical detail might be agreed upon in chat but never makes its way into the shared file. Weeks later, decisions are revisited because no one can remember where they were written down.
Lark Messenger prevents these gaps. Threads keep discussions organized, and messages can be linked directly to Docs. If a decision is made in conversation, it doesn’t disappear—it becomes part of the official record. This direct bridge between communication and documentation ensures that context is preserved, even when projects move quickly.
Lark Calendar ties information to time
Knowledge isn’t just about “what” was decided—it’s also about “when.” Teams often lose productivity not because they lack information, but because they fail to connect it to schedules. A finalized plan might exist in a document, but if deadlines aren’t visible, execution falters.
Lark Calendar integrates documents and decisions into daily workflows. Review dates can be linked to Docs, reminders surface when guidelines need updates, and milestones remain visible across teams. By tying information to time, Calendar ensures knowledge doesn’t sit in static files—it actively guides execution.
Accountability through Lark Tasks
A knowledge hub doesn’t work unless it translates into action. Too often, policies or strategies exist but no one feels responsible for maintaining them, leading to outdated or ignored information.
Lark Tasks makes accountability explicit. A knowledge update can be tracked as a task, with ownership, deadlines, and visibility built in. Whether it’s refreshing onboarding content or updating compliance policies, tasks ensure the hub remains current. Tasks can be linked to Docs, while Docs can be stored in Wiki. This collaboration ensures accountability is clear, keeping knowledge reliable and trusted.
Lark Base brings structure to knowledge-driven workflows
Without structure, even the best knowledge hub risks becoming a static library that people forget to use. What organizations need is a way to integrate knowledge directly into processes so it drives consistent outcomes.
Lark Base provides that foundation. Teams can build workflows—tables, Kanban boards, or timelines—that connect to Docs and Wiki records. Automation eliminates repetitive steps like notifying teams when a policy updates or logging review outcomes. This reflects the function of business process management software: turning scattered knowledge into systematic, repeatable processes. With Base, information isn’t just stored—it actively shapes the way work gets done.
Conclusion
Without a knowledge hub, teams waste time, duplicate efforts, and rely too much on memory. Productivity falters not because employees aren’t trying, but because they don’t have the information they need when they need it.
Lark’s answer is the hub. Wiki is the hub, Docs supports collaboration, Messenger carries context to records, Calendar ties information to time, Tasks reinforce responsibility and accountability, Meetings memorialize decisions, and Base provides the infrastructure to scale. Together, they align to ensure knowledge doesn’t dissipate and dematerialize—it grows stronger and accelerates the company.
To push a step further, organizations can tie their internal knowledge work to customer-connected processes through a CRM app. By making customer histories, interactions, and perspectives part of the same integrated experience, companies strengthen their knowledge hub in a way that serves both internal teams and the relationships that enable growth.
Building a website for your small business shouldn’t feel like an impossible puzzle. Yet for many small business owners, setting up a website comes with challenges, it can seem overwhelming, expensive, or overly technical. But here’s the good news – modern website builders make it so much easier. You don’t need to understand code or have a background in web design to create a website that looks great and works for your business needs.
For small businesses, finding the best website maker that’s easy to use, not too expensive to maintain, and packed with useful AI features is the first step toward growing your online footprint. We will walk you through what to look for in a website builder, showcase six of the easiest no-code options available, and help you find the perfect fit for your business.
What Makes a Website Maker Easy to Use?
When you’re running a business, simplicity is everything. You want tools that make your life easier, not ones that take hours to figure out. The best website maker platforms prioritize user-friendly design and intuitive functionality, allowing you to focus on growing your business rather than wrestling with complicated technology. Here are the core elements that define an easy-to-use website maker:
1. Drag-and-Drop Interface
Forget the complicated tech stuff, website makers with drag-and-drop tools allow you to visually arrange your website without needing to touch a single line of code. Want to move an image? Simply drag it into place. Need a contact form? Drop it directly into your layout. It’s as simple as building with digital blocks, making website creation accessible to anyone regardless of their technical background.
2. Pre-Designed Templates
Starting from a blank page can feel intimidating. Platforms with a wide range of templates help you jumpstart your website. These templates are crafted by designers, and many cater to specific industries like retail, services, or restaurants.
3. Built-In Features
A great website builder comes with tools right out of the box. Features such as SEO settings, mobile optimization, and even e-commerce capabilities can save time and streamline your workflow.
4. Affordable Pricing
Creating a website shouldn’t break the bank. Many builders offer free or low-cost plans, giving you the flexibility to start small and scale as your business grows.
With these criteria in mind, here’s a rundown of the no-code website builders that are tailor-made for small business owners.
The Best No-Code Website Builders for Small Businesses
1. Wix
Wix is a household name among website builders, and it’s easy to see why. Its drag-and-drop editor gives you endless creative freedom, paired with features that are beginner-friendly but versatile enough for growing businesses. Wix has great AI features to support content, images and SEO needs.
Why It Works for Small Businesses
An intuitive, visual editor lets you build pages exactly the way you want.
Wix platform offers hundreds of templates, making it easy to find one that fits your industry and needs.
Built-in AI business tools include appointment scheduling, social integrations, and SEO guidance.
Perfect For
Freelancers, service providers, and small business owners who want an approachable and flexible solution.
2. Squarespace
If style is what you’re after, Squarespace is the clear winner. Known for its stunning, modern templates, it’s an all-in-one platform that covers web hosting, design, and functionality.
Why It Works for Small Businesses
Beautiful, professional templates designed to work on any screen size.
Built-in e-commerce tools, blogging capabilities, and analytics.
A streamlined editor that’s simple to use, even for first-timers.
Perfect For
Creative entrepreneurs, artists, and anyone who values sleek and polished designs.
3. Shopify
Shopify is built with one purpose in mind, selling online. If your small business focuses on e-commerce, this builder includes everything you need to set up and manage an online store.
Why It Works for Small Businesses
Offers tools for managing inventory, processing payments, and even handling shipping.
A dedicated suite of apps that can expand your store’s functionality.
Perfect For
E-commerce stores, product-based businesses, and sellers who want hassle-free tools for managing online orders.
4. Weebly
Weebly keeps things simple. With an easy-to-use interface and competitive pricing, it’s a great option for business owners who just need the basics.
Why It Works for Small Businesses
Drag-and-drop customization keeps the design process straightforward.
Affordable pricing makes it accessible for businesses on a tight budget.
Features include basic e-commerce, form builders, and mobile-responsive templates.
Perfect For
Budget-conscious small businesses and local shops that want a quick and functional website.
5. GoDaddy Builder
GoDaddy’s website builder is all about speed and simplicity. Their AI-powered setup can get your website up and running in minutes.
Why It Works for Small Businesses
The AI-driven builder makes starting a website quick and hassle-free.
Pre-made sections and templates can be customized in just a few clicks.
Includes marketing tools, such as email campaigns and social media integration.
Perfect For
Busy entrepreneurs who need to create a simple website fast, like, same-day fast.
6. WordPress.com
For bloggers and small business owners who need a bit more flexibility, WordPress.com is an excellent option. It delivers professional website capabilities while keeping the setup manageable.
Why It Works for Small Businesses
Designed with bloggers in mind but flexible enough for almost any business.
Plenty of themes with one-click customization options.
Features like built-in SEO tools and simple website management make running your site easy.
Perfect For
Freelancers, professional bloggers, and small businesses that want scalable website solutions.
Comparing Features
Here’s how these website builders stack up when it comes to ease of use, design, integrations, and support.
Platform
Ease of Setup
Design Flexibility
Integrations and Apps
Support Options
Wix
Very easy
Highly flexible
Extensive app marketplace
Help center, live chat
Squarespace
Easy
Beautiful, sleek templates
Limited integrations
24/7 live chat and email
Shopify
Streamlined for eCommerce
Focused on product pages
Seamless eCommerce apps
24/7 support
Weebly
Simple and beginner-friendly
Limited but functional
Basic integrations
Email, chat, phone support
GoDaddy
Very quick and automated
Limited customization
Built-in marketing tools
24/7 phone and chat support
WordPress.com
Simple, but requires learning
Flexible with some effort
Extensive plugin library
Forums and email support
How to Choose the Right Builder for Your Business
The best website builder for your business depends entirely on your goals. Here are some examples to match common needs to the right platforms:
For online stores: Shopify, without question, provides the most comprehensive suite for selling products online.
For creative design: Squarespace excels with elegant templates suited for creative portfolios or galleries.
For all-around websites: Wix offers the best mix of ease, flexibility, and features for general business purposes.
For simplicity and speed: GoDaddy is perfect for quick, no-fuss websites.
For blogging and content creation: WordPress.com remains a favorite for writers and bloggers.
Conclusion
Building a website should feel empowering, not intimidating. With today’s no-code website builders, small businesses can create professional sites without taking a deep dive into web development. The best part is that these platforms all offer free versions or trials, so you can test them out before making a commitment.
Remember, your website is a reflection of your business. Choose a builder that helps you put your best foot forward while keeping things simple. Try out a trial or free plan today, and start crafting the site that will help your business grow.
Deadlines can be tough on students. They’re always balancing homework, tests, and teamwork. Putting together a great presentation can feel like a lot. Good news: AI presentation makers can help big time! These tools use AI to make slides fast. They save students time and energy.
This article shares seven of the best AI presentation makers for 2025. Each one helps students in different ways. They’re quick, cheap, and simple. Keep reading and find the best tool for your next project.
What is an AI Presentation Maker?
An AI presentation maker is like a robot buddy that builds slideshows for you. Just punch in your topic or some text, and bam! It spits out content, designs a look, and finds pictures. Some even give you layout ideas. Plus, they play nice with Google Slides and PowerPoint.
Lots of students dig these tools now. They seriously save time on making things look good. They’re also great for brainstorming and getting your thoughts organized. Most are super easy to use, so you don’t need to be a design whiz. Anyone can whip up awesome presentations, fast.
These AI helpers usually have templates ready for school assignments. They can make text, charts, or grab images based on what you type in. This makes them awesome for making slides for pretty much any class. You can spend more time on what you want to say instead of fussing with design stuff.
What Makes an AI Presentation Maker Great for Students?
Students need tools that are easy to use and fast. A good AI presentation maker has free or cheap options. It helps make great-looking slides without a lot of work. It should also be useful for school stuff like group projects or reports.
The best tools let students change their slides without problems. They have templates that work for most school assignments. They also allow teams to work together easily. This helps students save time and finish projects on time.
1. Twistly
Best for: PowerPoint Users
Twistly.ai is an AI add-in that has revolutionized PowerPoint. It is the quickest choice for students using this platform because it integrates directly into PowerPoint. Slides can be made from YouTube videos, text, PDFs, and prompts. It is distinguished by its special video-to-slide capability. For students who depend on PowerPoint for their coursework, it’s ideal.
You can make up to five presentations with the free plan without using a credit card. Twistly’s ChatGPT-powered engine creates polished slides in a matter of seconds. With a single click, you can improve content, add speaker notes, and translate slides. Students in high school or college who require prompt, polished PowerPoint results will find it ideal.
There is no need to switch apps thanks to Twistly’s smooth integration. Its AI recommends unique educational templates and images. Workflows are made simpler and time is saved by the tool. Students don’t need to leave their comfortable PowerPoint environment to create beautiful decks.
Key Features:
Creates slides from YouTube videos, text, or PDFs
Free plan includes up to five presentations, no card required
Integrates directly into PowerPoint
AI generates speaker notes and translations
Offers AI-enhanced templates for school projects
Use Cases:
Slides from lecture videos for study summaries
Quick PowerPoint decks for group projects
Presentations for science or tech classes
Converting research notes into slides
2. Canva Presentations
Best for: Beginners with No Design Experience
Canva is great for design newbies. Its Magic Design tool, powered by AI, lets you whip up presentations fast. Just type something in, and it makes a whole slide deck with text, pictures, and layouts. The layout is simple; even middle schoolers can use it.
The free plan has thousands of templates and stock photos. Canva’s Magic Write feature cleans up your text so it reads well. Also, it translates into over 100 languages, so it’s great for classrooms with all kinds of students. Instead of trying to be designers, students can focus on what they’re writing about.
Canva works with PowerPoint and Google Slides for easy sharing. It also lets groups work together at the same time. You can easily change things with the drag-and-drop editor. It’s just right for students who want nice-looking slides without the fuss.
Key Features:
Magic Design creates slides from a single prompt
Free plan includes 1,000+ templates and stock media
Magic Write refines text for better clarity
Translate feature supports over 100 languages
Export to PowerPoint, Google Slides, or PDF
Use Cases:
Class presentations for history or science
Group project slides with team collaboration
Quick visual aids for book reports
Posters for school events or clubs
3. Gamma
Best for: Visuals-First Projects
Gamma’s known for its cool, modern designs. You just type in a topic, and the AI whips up a professional-looking slide deck with text, data, and images. It’s fast and gives great results, a plus for college students who want their presentations to pop.
The free plan lets students do as many projects as they want. Plus, Gamma can export to Google Slides or PowerPoint for flexibility. It’s also super easy to use. You don’t need mad skills to tweak the designs. It even makes teamwork easier for group assignments.
What’s cool is that Gamma can handle the tough stuff. It suggests pics that match your content. Your professors will for sure be impressed by the slides you whip up. For students who want speed and style, it’s a solid choice.
Key Features:
Generates slides with images and data in minutes
Free plan offers unlimited projects
Exports to PPT, Google Slides, or PDF
Supports real-time team collaboration
Includes translation for multilingual slides
Use Cases:
College lectures or seminar presentations
Group assignments needing modern visuals
Thesis defense slide decks
Creative projects for art or media classes
4. Slidesgo
Best for: Academic-Focused Templates
Slidesgo’s AI Presentation Maker is made just for school stuff. You just type in a topic and pick a look, and it makes a slideshow you can change however you want. It’s got layouts for things like math and English, so it’s all about school-related stuff. It’s great for students who like their slides neat and tidy.
You can do most homework with the free version. You can grab your slides as PPTX files for Google Slides or PowerPoint. Plus, if you’re into design, Slidesgo works with Figma. The templates look good and are well-made and will also help students stay on track and keep things organized.
Slidesgo’s AI makes sure everything is school-appropriate. It suggests good pictures and words for your subject. Changing slides is easy with the simple tools. It’s a great pick for high school or college students doing projects.
Key Features:
AI generates slides based on topic and theme
Free plan includes customizable templates
Compatible with PowerPoint, Google Slides, and Figma
Offers educational templates for various subjects
Simple editing tools for quick adjustments
Use Cases:
Lesson summaries for biology or history
Slide decks for group research projects
Presentations for student council campaigns
Visual aids for classroom discussions
5. Beautiful.ai
Best for: Professional-Looking Group Projects
For students, Beautiful.ai has simplified presentation design. As you add content, its AI applies intelligent templates that change. It generates a polished draft when you type a prompt. The slides remain polished and consistent. For group projects that require a cohesive appearance, this is fantastic.
Basic needs are covered by the free plan, and additional features are frequently unlocked with school accounts. Beautiful.ai automates formatting, saving time. Millions of images and icons are available for personalization. It is possible for students to produce slides that appear to have taken many hours. For collegiate teams looking to make an impression, it’s ideal.
Group collaboration is made simple by the tool’s support for collaboration. Consistent designs across slides are guaranteed by its Brand Sync feature. For students without design experience who want professional results, Beautiful.ai is perfect.
Key Features:
Smart templates adapt to your content
Free plan includes basic slide creation
Team Plan supports group collaboration
Includes millions of modern images and icons
Brand Sync ensures consistent designs
Use Cases:
Business or marketing class presentations
Team assignments needing uniform branding
Pitch decks for student entrepreneurship clubs
Reports for internship or capstone projects
6. Presentations.AI
Best for: Quick Drafts from Complex Topics
Presentations.AI is very good at converting complicated concepts into slides. It creates a polished deck in a matter of seconds when you give it a prompt. The tool does a good job of handling technical subjects like engineering and IT. For students studying intricate subjects, it’s ideal.
For the majority of school assignments, the free plan works well. Slides are easily customizable. Your deck’s designs remain consistent thanks to the Brand Sync feature. For flexibility, it exports to Google Slides or PowerPoint. The chat-based editor allows students to make quick edits to their slides.
For projects involving a lot of research, this tool saves time. Its AI recommends pertinent images and content. presentations.For college students who require quick, lucid slides, AI is fantastic. For technical reports or last-minute assignments, it’s a dependable option.
Key Features:
Creates slides from detailed prompts instantly
Free plan supports basic presentation needs
Brand Sync aligns slides with your style
Exports to PowerPoint or Google Slides
Chat-based editing for quick tweaks
Use Cases:
Technical presentations for STEM classes
Research paper summaries for seminars
Quick drafts for last-minute assignments
Slides for debate or speech classes
7. Prezi
Best for: Interactive and Engaging Slides
Prezi’s zoomable canvas method has made it stand out. Using prompts, its AI presentation maker generates dynamic slides. Prezi employs a storytelling format in contrast to conventional slide decks. To keep viewers interested, it pans and zooms. Students who prefer imaginative presentations will find this appealing.
Most students can complete five projects with the free plan. Prezi exports to shareable links or PDFs. It provides educationally specific templates. Students can add animations to their slides to make them more engaging. It works well for drawing attention in class.
The Prezi interface is simple to use. For group projects, it facilitates teamwork. Students who wish to stand out will love this tool. For imaginative or interactive school projects, it’s ideal.
Key Features:
AI creates interactive, zoomable presentations
Free plan allows up to five projects
Exports to PDF or shareable links
Includes templates for educational topics
Supports animations for engaging slides
Use Cases:
Creative presentations for English or drama
Interactive lessons for student-led projects
Visual storytelling for history timelines
Engaging slides for club or event pitches
Conclusion
The way students create slides has changed due to AI presentation makers. They simplify professional designs and save time. The aforementioned seven tools are suitable for various purposes. Canva is excellent for novices. Gamma provides breathtaking images. Academics are the focus of Slidesgo. Presentations and Beautiful.ai.AI is excellent at complex and professional tasks. Interactivity is added by Prezi. For PowerPoint users, Twistly is ideal.
Select a tool according to your project. Most provide students with free plans. See which one works best by trying them out. You can concentrate on your ideas with these tools. Your next presentation will be flawless, quick, and cost-free.
Planning a trip? Whether you’re travelling for fun or work, having the right online tools can make your journey smoother and stress-free. From converting currencies to staying connected on the go, here are 10 free online tools every traveller should bookmark before taking off.
1. Currency Converter
When you’re travelling internationally, it’s hard to keep track of how much things cost in your currency. A currency converter helps you quickly understand prices and avoid overspending.
Why it’s useful:
Helps while shopping or booking tours.
Gives real-time exchange rates.
2. Timezone Converter
Travelling across time zones? A timezone converter helps you know the local time wherever you are, perfect for scheduling flights, meetings, or video calls with people back home.
Why it’s useful:
Avoids confusion while planning your day.
Great for international layovers and work calls.
3. Free eSIM for Instant Internet Access
These days, having mobile internet is just as important as having a passport. Instead of searching for a SIM card at the airport, you can install a digital eSIM before you even arrive.
If you’re visiting the UAE, the UAE tourist eSIM from Nomad is a great option. It works right after landing and saves you from roaming charges or waiting in queues.
Why it’s useful:
No need to change your physical SIM.
Start using the internet the moment you land.
4. PDF Compressor
Travel means carrying a lot of documents — tickets, visa forms, ID proofs, and hotel bookings. But sometimes these PDFs are too big to email or upload. A PDF compressor helps you shrink the file size in seconds.
Why it’s useful:
Reduces file size without losing quality.
Makes it easy to send files over slow internet.
5. QR Code Generator
Want to quickly share your hotel address, contact info, or location with a travel buddy? Create a QR code that can be scanned in seconds, without needing to type long addresses.
If you’re visiting a country where you don’t speak the language, a translator can help a lot. You can translate menus, ask for directions, or even read signs on the go.
You’ll often need to convert things like kilometres to miles or Celsius to Fahrenheit, especially when reading road signs or weather reports.
Why it’s useful:
Makes local measurements easier to understand.
Good for cooking, driving, and checking temperatures.
8. Screenshot Editor
Planning a trip often means saving screenshots of directions, restaurant menus, and tickets. A screenshot tool lets you capture, crop, and highlight important parts before saving or sharing.
Want to know if your flight is on time or delayed? A flight tracker lets you monitor departures and arrivals in real-time.
Why it’s useful:
Helps avoid airport surprises.
Good for tracking friends’ or family flights too.
Final Thoughts
Travelling is much easier when you’re prepared. These free tools cover everything from managing files to staying connected, and they all work right from your browser.