Categories
Uncategorized

How to Maximize the Value of Used Old RAM Memory

Old RAM is easy to overlook because it is small, durable, and often tucked away after a system upgrade. But used memory can still hold resale value, especially when the modules are identified correctly, tested, and routed through the right channel. 

At the same time, memory that no longer makes sense for reuse should be handled through a responsible resale or recycling process rather than left sitting in storage indefinitely. 

This guide explains how to assess old RAM, what affects its value, where to sell it, and how to prepare it so the process stays organized and efficient.

What to Do with Old RAM: Value Assessment

Before deciding whether to sell, bundle, or recycle old RAM, start by figuring out exactly what you have. Memory value depends heavily on the details. A module’s generation, capacity, form factor, ECC status, and brand can all affect whether it is attractive to a buyer or better suited to bulk recovery.

Identifying Your RAM Specifications

The first step is to identify the basic specifications accurately. Capacity, speed, generation, and form factor all matter because buyers need to know whether a module fits their system. 

The most useful habit is to record the exact part number and physical type before listing the memory or requesting a quote. That makes compatibility clearer and reduces pricing disputes later.

Determining Resale Versus Scrap Value

Working RAM is usually worth more than scrap, but the difference depends on what kind of module you have and whether demand still exists for it. Larger-capacity server and workstation modules usually hold value better than very small or outdated consumer sticks. 

Used memory pricing can also shift quickly with broader market conditions, which is one reason narrow static price tables do not hold up well for long. Recent market coverage has highlighted unusually sharp DRAM price volatility through late 2025 and 2026, especially across DDR4 and DDR5.

Calculating Likely Returns

Returns are affected by three main things: how desirable the module is, how much testing and preparation it needs, and how you choose to sell it. Individual direct sales can sometimes bring a higher per-module return, but they also take more time. 

Bulk sales are often easier for organizations retiring memory from server upgrades or refresh projects, even if the pricing model works differently.

For that reason, a value-audit approach is usually more credible than fixed pricing examples. Big Data Supply is buying used server and computer RAM in bulk and describes free value audits, chain-of-custody tracking, secure data erasure, and resale or recycling support as part of the same process.

Best Places to Sell Used Memory

The best place to sell RAM depends on quantity, urgency, and whether you care more about maximum price or a smoother process.

Online Marketplaces for Direct Sales

General marketplaces can work well for small quantities, especially when you have clearly identified modules, good photos, and test results. The tradeoff is time. Direct sales usually require more effort in listing, packing, communication, and dispute handling.

RAM Recycling and Buyback Programs

For larger quantities or enterprise inventory, buk involved in individual sales and make it easier to handle mixed lots, documentation, andyback programs are often more practical. A structured program can reduce the wor final disposition. 

Big Data Supply’s RAM page specifically positions its service around bulk memory buyback, secure erasure, and recycling or resale support, which makes it more relevant to enterprise lots than a general consumer marketplace.

Specialized Scrap and Recycling Channels

If the modules are damaged, obsolete, or no longer practical to resell, responsible recycling may be the better option. That matters because global e-waste is still rising quickly. The Global E-waste Monitor 2024 reports that the world generated 62 million tonnes of e-waste in 2022 and is on track to reach 82 million tonnes by 2030, while only 22.3% of 2022 e-waste was documented as formally collected and recycled in an environmentally sound way.

Selling in Bulk Versus Individual Modules

Bulk sales usually make more sense for IT teams, refurbishers, and organizations retiring memory from multiple systems at once. Individual listings can sometimes raise the per-unit return, but they add testing, packaging, and transaction overhead. For bulk lots, a structured buyback channel is often the cleaner option.

Preparing RAM to Maximize Sale Price

Preparation affects trust, and trust affects price. Buyers pay more when memory is identified clearly, appears well handled, and includes enough detail to reduce uncertainty.

Physical Inspection and Cleaning

Inspect the modules for contact wear, residue, corrosion, broken heat spreaders, or label damage. Clean presentation matters because it signals that the modules were handled carefully. Light cleaning can help, but it should be done conservatively and without risking the contacts or labels.

Functionality Testing Requirements

Testing is one of the strongest ways to support pricing. The main point is to confirm that the RAM is recognized, stable, and free of obvious errors before selling it as working memory. If it is not tested, it should be priced and described accordingly.

Documentation and Part Numbers

Part numbers are especially important because they make compatibility easier for buyers to verify. A clear photo of the label often adds more value than a long description. If the part number is missing or unreadable, the module becomes harder to price and harder to trust.

Proper Handling and Anti-Static Protection

Memory should be handled by the edges and stored in anti-static packaging where possible. This is not only good transport practice. It also helps protect value during the sale process. A module that arrives damaged because it was packed carelessly is no longer a strong resale candidate.

Conclusion

Old RAM can still have value, but getting a better return depends on accuracy, preparation, and choosing the right sales channel. The most important steps are identifying the module correctly, deciding whether it makes more sense for resale or recycling, and presenting it in a way that reduces buyer uncertainty. 

For larger lots and enterprise memory in particular, a structured buyback process is often easier than piecing together individual sales. Responsible recycling also matters when resale no longer makes sense, especially as e-waste volumes continue to rise worldwide.

Categories
Uncategorized

How to Split a PDF Without Installing Software: A Guide for Business Documents

Most people only need to split a PDF a few times a year, usually to pull one contract page out of a scanned bundle or separate a single invoice from a batch of statements. Installing a desktop program for that kind of occasional task rarely makes sense. The simpler route is to split a PDF without installing anything, using a browser-based tool such as the one at split a PDF without installing anything, where you upload a file, choose the pages you want, and download the result without ever touching your computer’s software list.

This guide walks through when splitting a PDF actually matters in day-to-day business work, what to look for in a browser-based splitting tool before you trust it with sensitive documents, and how the process typically plays out across a few common industries.

Why Businesses Split PDFs More Often Than They Expect

A single PDF rarely stays a single document for long. Scanned intake packets, signed contracts, and multi-page reports often need to be broken apart so that one section can be routed to a different person, filed under a different client, or sent to a different department. A 40-page lease package might need to become one file for the tenant’s copy and one for the property manager’s records. A batch-scanned stack of patient forms might need to be split into individual patient files before anything gets filed correctly.

Doing this by hand, printing and re-scanning, or copying pages one at a time, wastes time and introduces errors. A browser-based splitter handles it in a few clicks and keeps the original formatting intact.

Where Splitting Comes Up Across Industries

Real Estate

Property files tend to arrive as one long scan: the purchase agreement, disclosures, inspection report, and addenda all in a single PDF. Agents and transaction coordinators often need to split that file so each party receives only the section relevant to them, without redistributing the entire package every time.

Healthcare

Patient intake and consent forms are frequently scanned in batches at the front desk. Splitting these into individual patient records is a routine administrative step, and because the documents involve protected health information, it matters that the tool used has a signed BAA available and handles the files under HIPAA rather than through a generic, unsecured uploader.

HR and Onboarding

New-hire paperwork, offer letters, W-4s, I-9s, and policy acknowledgements, often gets bundled into one onboarding PDF for convenience during signing, then needs to be split back apart afterward so each document lands in the correct personnel file.

Legal, Accounting, and Field Work

Law firms split scanned case files into individual exhibits. Accountants separate multi-client statement batches during tax season. Construction and insurance teams working from a phone or tablet in the field often need to pull one page out of a longer inspection or claims document before sending it back to the office, which is where a browser-based tool has a clear advantage over anything requiring installation.

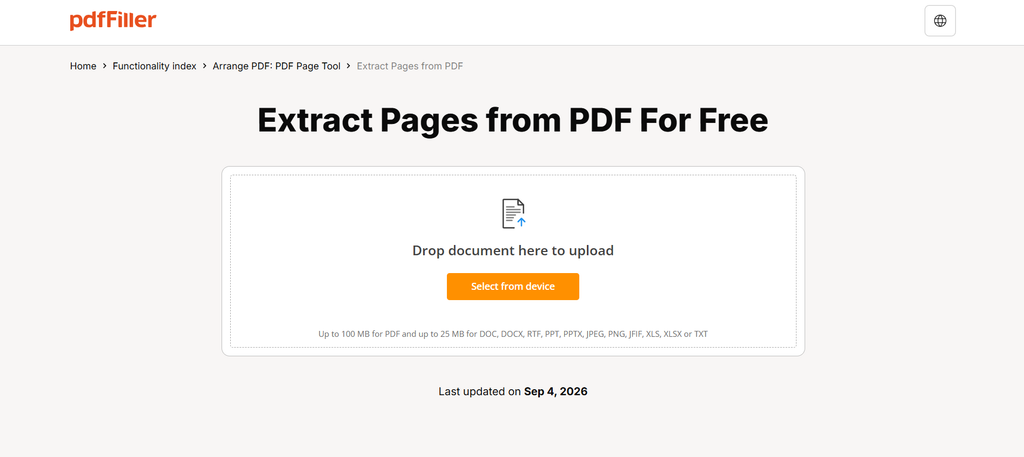
Alt text: pdfFiller PDF splitting tool upload screen showing a file being added.

What to Look for in a Browser-Based PDF Splitter

Not every online tool that claims to split PDFs is built with business documents in mind. Before uploading anything containing client, patient, or employee information, a few things are worth checking.

Security in transit and at rest: Files should be protected with 256-bit AES encryption both while uploading and while stored, so a document isn’t exposed at any point in the process.

Where the document goes afterward: A tool worth trusting for recurring work keeps documents in the user’s private account rather than sharing them with third parties or using them to train AI models, and hosts them in SOC 2 Type II-certified data centers with active threat monitoring.

An audit trail: For anything that might later need to be verified, knowing who viewed, edited, or shared a document, and when, adds accountability that a simple file-splitting utility often skips.

Compliance coverage relevant to the industry: Healthcare teams need HIPAA coverage with a BAA option. Anyone handling EU or California residents’ data benefits from GDPR and CCPA alignment. Education-related paperwork falls under FERPA. Payment-adjacent documents benefit from PCI DSS practices.

pdfFiller features page showing different tools

How the Process Works in Practice

The typical workflow for splitting a PDF without installing software follows a predictable pattern:

  1. Upload the PDF through the browser, no account software or plugin required.
  2. Select the pages or page ranges to separate, either extracting specific pages or splitting the file into multiple smaller documents.
  3. Preview the split before finalizing it, to confirm the right pages landed in the right output file.
  4. Download the resulting files, or in some workflows, send them directly for signature using fill and sign or eSign features if the split documents need a signer.

Because the tool runs in the browser, the same process works whether the person doing the splitting is on a laptop, an iOS device, or an Android device, all of which are supported without a separate download for each platform. A 30-day free trial is available for teams who want to test the workflow with real documents before committing to it.

Compliance Is Not Optional for Business Documents

Splitting a lease agreement is a different task, security-wise, than splitting a family photo album. Business documents frequently contain personal, financial, or health information, and the legal frameworks around that data don’t relax just because the task is “only” splitting a file rather than editing it.

A tool built for this kind of work supports two-factor authentication, per-document password protection, signer authentication, and document expiry dates, so a split file doesn’t remain accessible indefinitely after it’s served its purpose. Electronic signatures applied to any resulting document are recognized under the ESIGN Act and UETA in the U.S., and under eIDAS in the EU, which matters when a split document, like one page pulled from a larger contract, still needs a valid signature attached to it later.

FAQ

  1. Can I split a PDF without installing any software?

Yes. Browser-based tools by GoOnlineTools let you upload a file, select pages, and download the split output entirely within a web page, with no desktop or mobile app installation required.

  1. Is it safe to split PDFs containing patient or client information online?

It can be, provided the tool uses encryption in transit and at rest, keeps documents in a private account, and offers HIPAA compliance with a signed BAA for healthcare-related files specifically.

  1. Do I need to install an app to split a PDF on my phone?

No, browser-based splitting works on mobile devices through iOS and Android apps or directly in a mobile browser, without a separate installation step for each device.

  1. What happens to my file after I split it online?

With a compliant tool, the original and split files stay in your private account, are not shared with third parties, and are not used to train AI models.

  1. Can I split a PDF and then send the separated pages for signature?

Yes. Many browser-based tools that support splitting also support fill and sign and eSign features, so a split page can be routed for signature immediately after separation.

  1. Is splitting a PDF the same as merging or rearranging one?

No. Splitting separates one document into multiple files or extracts specific pages, while merging combines multiple files into one, and rearranging changes page order within a single document, all of which are typically available in the same tool.

Categories
Uncategorized

Effortless AI Tools to Turn Ideas into Engaging Visual Content

Creating engaging visual content can take considerable time, especially when you need to turn a simple idea into an image, animation, or short video. Today, AI-powered creation tools are making this process much easier for creators, marketers, and social media users.

Instead of starting with complicated editing software, creators can use AI video tools and visual creation platforms to experiment with ideas, transform existing media, and produce content faster. The result is a more accessible creative workflow, even for people without advanced design skills.

Why AI Visual Creation Tools Are Becoming Increasingly Popular Among Creators

Visual content is now central to social media, marketing, education, and online communities. As audiences become more accustomed to images and short videos, creators are looking for simpler ways to produce content without spending hours on traditional editing.

  • Faster content production: AI can automate parts of image and video creation, reducing the time needed for repetitive editing tasks.
  • Lower creative barriers: Users can experiment with visual concepts without advanced graphic design or video editing skills.
  • More creative possibilities: AI makes it easier to test different styles, effects, compositions, and visual ideas.
  • Better support for social media: Quick image and video creation helps creators keep up with the demand for fresh content.
  • Easy experimentation: Creators can turn a basic concept or existing photo into something completely different with only a few inputs.

How AI Visual Creation Tools Turn Ideas into Engaging Content 

AI-powered visual creation tools help creators turn ideas into content with fewer manual steps. They can generate images, transform photos, apply effects, and create short-form videos. 

Turn Simple Ideas into AI-Generated Visuals

When an idea is easier to describe than to design, an AI image creation platform can help turn that concept into a visual starting point. AI visual tools allow users to explore visual concepts, generate artwork, and experiment with different directions without building everything manually from scratch. This makes it useful for brainstorming, social posts, creative projects, and other visual content. 

Transform Photos into More Creative Content

Not every project needs a completely new image. Sometimes, an existing photo can become more engaging with the right effects or transformation. Usgen focuses on this type of creative experience, using AI effects to turn ordinary photos and moments into more dynamic content. Its effects include options such as Vision Breeze, Commanding Walk, Bond Tempo, Scene Lustre, Vision Glimpse, and Bond Whirl, giving users different ways to experiment with photos and create shareable visual moments.

Experiment with Different Styles and Visual Concepts 

AI creation tools also make experimentation easier. Instead of committing to one visual direction, creators can try multiple styles and concepts before deciding what works best. A1.art is suited to exploring different AI-generated image styles and creative ideas, while Usgen provides more ways to experiment with effects applied to photos and videos. Using different approaches can help creators discover visual ideas they may not have considered initially. 

Create Social-Ready Images and Videos Faster 

Speed matters when creating content for platforms such as Instagram, TikTok, and YouTube Shorts. AI visual tools can reduce the amount of traditional design and editing required, making it easier to prepare images and short videos for social media. Creators can use AI to develop an initial concept, enhance an existing photo, or produce an eye-catching effect, then make final adjustments before publishing.

How to Choose the Right AI Visual Creation Tool

Not every AI visual creation platform is designed for the same purpose. The best option depends on what you want to create and how much control you need over the final result.

Consider these factors before choosing a tool:

Step 1. Start with your content type. Decide whether you mainly need images, photo transformations, short videos, or a combination of formats.

Step 2. Consider your starting point. Some tools work better when starting from a text idea, while others are designed around existing photos or videos.

Step 3. Check the available styles and effects. A wider selection can be useful if you regularly experiment with different creative concepts.

Step 4. Look at ease of use. A simple interface can save time when you need to create content frequently.

Step 5. Think about your publishing platform. Make sure the resulting images or videos fit the format and style of the platforms where you plan to share them.

Practical Ways to Get More Creative Results with AI Visual Tools 

AI can speed up content creation, but the quality of the final result still depends heavily on how you approach the creative process. A few simple habits can make AI-generated content feel more intentional and original.

  • Start with a clear concept. A specific idea usually produces a more useful starting point than a vague request.
  • Try multiple variations. Generate or transform several versions instead of immediately settling on the first result.
  • Combine AI with your own editing. Small changes to composition, text, timing, or cropping can make the result feel more personal.
  • Use existing media creatively. A familiar photo can become new content when paired with an unexpected effect or visual treatment.
  • Match visuals to your audience. Consider the platform, audience expectations, and purpose of the content before choosing a style.
  • Keep experimenting. Some of the most interesting results come from testing combinations that were not part of the original idea.

The goal is not to let AI decide what to create. Instead, creators can use these tools as a flexible starting point for exploring ideas and producing visual content more efficiently.

Conclusion 

AI visual creation tools are making image and video production more accessible to a wider range of creators. From generating visuals from simple ideas to transforming existing photos with creative effects, these platforms can reduce repetitive work while opening up new possibilities for experimentation.​ The most effective approach is to treat AI as part of the creative workflow rather than a complete replacement for human creativity.

Categories
Uncategorized

Working With Proxies? These Free Online Tools Make Setup and Troubleshooting Easier

Most conversations about proxies focus on the provider. How many IP addresses are in the pool, which countries are available, how fast the connections are, and how much bandwidth costs. These are reasonable questions, but they cover only part of the picture. The day-to-day work of using proxies involves a surprising amount of small, practical tasks that have little to do with the provider itself.

Credentials need to be formatted correctly. Locations need to be confirmed. Proxy lists need to be cleaned before they can be imported. Responses need to be read, compared, and understood when something does not look right. Much of the time lost in proxy work is not caused by a poor proxy service at all, but by small mistakes that are difficult to spot without the right tools. Fortunately, most of these tasks can be handled with free browser-based utilities that require no installation and no technical setup.

Start by Confirming What the Proxy Is Actually Doing

The most common assumption in proxy work is that the connection is doing what it was configured to do. A browser profile may be set to use a proxy in Germany, but that does not guarantee traffic is actually leaving from Germany. A typo in the settings, a browser extension overriding the configuration, or a fallback to a direct connection can all send requests through the wrong route without any visible warning.

Before relying on a proxy for testing, research, or monitoring, it is worth confirming the exit IP address. Opening an IP Address Lookup tool through the proxied browser shows which IP address a website actually sees, along with its approximate location and the network it belongs to. This takes a few seconds and removes an entire category of confusion from later troubleshooting.

The network information is particularly useful. IP addresses that belong to hosting companies and data centers are often treated differently by websites than addresses assigned to ordinary home internet connections. Security systems may challenge them more often, content may be served differently, and some pages may not load at all. For work that depends on seeing a website the way a regular visitor would, such as checking localized pricing or regional content, residential proxies from a provider like ISP Proxies tend to produce more representative results, and a quick IP lookup confirms whether the connection is behaving as expected.

Format Credentials Correctly Before Blaming the Proxy

Authentication errors are among the most frequent proxy problems, and they are frequently caused by formatting rather than incorrect credentials. Many tools and scripts accept proxies in a URL format that combines the username, password, host, and port into a single string. This works well until the password contains a character such as @, :, or #, each of which has a specific meaning inside a URL.

When that happens, the software may misread where the password ends and the hostname begins. The result is an authentication failure that looks as though the credentials are wrong, even when they are not. Running the username and password through a URL Encode tool converts these special characters into a safe format that software can interpret correctly.

A similar issue appears when credentials need to be sent as an authorization header. Basic authentication expects the username and password to be combined and encoded in Base64. A Base64 Encode tool makes it easy to generate this value manually, and a Base64 Decode tool can be used to check an existing header when it is unclear what credentials are actually being sent.

Clean Up Proxy Lists Before Importing Them

Proxy lists rarely arrive in exactly the format a tool expects. One provider may supply entries as host, port, username, and password separated by colons, while a browser extension or script may require a full URL. Lists copied from dashboards or emails may also contain blank lines, trailing spaces, or duplicate entries.

Rather than editing hundreds of lines manually, text utilities can handle most of this work in seconds. A Find and Replace Text tool can restructure entries into the required format, and Remove Empty Lines removes the gaps that often cause import errors. A Line Counter is a simple but effective final check, confirming that the number of proxies in the cleaned list matches the number that was originally provided.

Where proxy settings need to be stored in a configuration file, conversion tools are also useful. CSV to JSON can turn a spreadsheet of proxy details into structured data, and a JSON Validator helps confirm that the resulting file does not contain a missing bracket or comma that would prevent it from loading.

Use Network Tools to Narrow Down Connection Problems

When a proxy connection fails entirely, the cause may sit outside the proxy service. The proxy hostname may not be resolving correctly, the target website may have changed its DNS configuration, or a firewall may be blocking traffic from an unexpected IP range.

A DNS Lookup tool helps separate these possibilities. Checking whether the proxy gateway and the target domain both resolve as expected quickly shows whether the problem is a naming issue or something further along the connection. This is often the fastest way to avoid spending time investigating the wrong part of the setup.

IP allowlisting creates a different kind of challenge. Some proxy services allow access by approved IP address rather than by username and password, and some internal systems only accept traffic from specific ranges. A CIDR Calculator makes it easier to understand exactly which addresses are included in a range such as a /24 or /28, reducing the risk of approving too many addresses or accidentally excluding the one that matters.

Read and Compare Responses Instead of Guessing

Proxies are often used to see how a website or API responds from different locations. The value of that exercise depends on being able to read and compare the results clearly. Raw API responses are usually returned as compressed JSON on a single line, which is difficult to review by eye.

A JSON Formatter or JSON Viewer turns these responses into a readable structure. When the same request is made from two different countries, JSON Compare highlights exactly which fields changed, whether that is a currency code, a price, an availability flag, or a language setting.

The same principle applies to web pages. Text Compare can reveal differences in page copy between regions that are easy to miss when switching between browser tabs. A Source Code Viewer helps identify differences in scripts, metadata, or redirects, and a Link Extractor can show whether regional versions of a page point visitors to different destinations.

Keep Testing Realistic and Responsible

Accurate results depend on testing conditions that resemble real visitors. A proxy may provide the right location, but the browser identity also influences how a website responds. Some sites serve different layouts or scripts depending on the device and browser being used. A Random User Agent Generator can be useful for checking how your own website behaves across a range of common browsers and devices.

Timing matters as well. Websites and APIs may behave differently during local business hours than overnight, particularly where load, caching, or scheduled promotions are involved. A Timezone Converter makes it easier to plan tests around the local time of the region being examined rather than the tester’s own time zone.

It is also worth remembering that proxies are a testing and research tool, not a way around a website’s rules. Checking your own website from different regions, verifying ad placements, or reviewing publicly available pricing are common and reasonable uses. Any automated activity should respect the terms of the websites involved and avoid placing unnecessary load on them.

Build a Habit of Regular Checks

Many proxy-related issues are not permanent. A regional redirect may break after a plugin update, a CDN setting may change, or a payment script may begin failing for visitors in one country. Occasional manual testing catches some of these problems, but scheduled checks catch them sooner.

For teams that run automated checks on their own servers, a Crontab Generator simplifies the process of scheduling tasks without memorizing cron syntax, and a Cron Parser confirms that an existing schedule runs when it is supposed to. When reviewing logs from those checks, a Timestamp Converter turns Unix timestamps into readable dates, making it easier to match an error to a specific deployment or configuration change.

The Bottom Line

A reliable proxy service is only one part of an effective proxy setup. Much of the real work happens around it: confirming locations, formatting credentials, cleaning lists, diagnosing connection problems, and making sense of the responses that come back. These tasks are small individually, but together they determine whether proxy work produces clear answers or a series of confusing errors.

Keeping a handful of free online tools within reach turns many of these steps from a frustrating guessing exercise into a quick, repeatable process. Combined with a dependable proxy provider and a clear testing routine, they make it far easier to understand how a website behaves for visitors in other places, and to fix problems before those visitors notice them.

Categories
Uncategorized

7 competitor analysis tools, mapped to an automated monitoring stack (2026)

Why competitor monitoring stopped being a monthly task

Four analysts, thirty minutes each, first Monday of the month. Export a rival’s keywords, screenshot a SERP, drop it into a slide nobody opens. That is 24 hours a year on a document with the shelf life of milk. Most competitor analysis tools were bought to feed that ritual, and the ritual is the problem.

The math changed underneath it. About 30% of keywords trigger AI Overviews in US SERPs, and those answers rewrite themselves without warning you. The long tail moves fastest: 10-word queries trigger AI Overviews over 5 times more often than single-word searches. Rivals get cited in answers you never tracked, faster than any monthly export catches.

The unit of work is no longer the report. It is the watch. Sample once every thirty days and you photograph a moving target. Repeat weekly and it’s a pipeline.

What a competitor monitoring stack has to do

A competitor monitoring stack has four jobs, and the criteria for ranking competitor analysis tools fall out of them:

  • Identify the real competitor set: the domains that rank against you, not the three rivals your sales team names.
  • Pull keyword, backlink and traffic gaps in one pass, so deltas are diffable, not screenshotted.
  • Watch SERP positions and AI-answer movement continuously, where the churn lives now.
  • Schedule, alert and report without a human touching an export.
  • Expose an API or MCP endpoint so it wires into a pipeline, not a browser tab.
  • Cover organic, paid and AI search, since rivals don’t stay on one surface.

Six criteria, only two about data; the rest decide whether the tool runs itself. I scored each of the seven competitor analysis tools on what you can wire in, not how the dashboard looks: API access, alerting, data coverage, and the maintenance bill.

The seven competitor analysis tools at a glance

Ranked on pipeline fit, not feature count. SE Ranking leads by running the whole loop from one place; the rest each own a single step.

RankToolPipeline step it ownsAPI + alertsData coverageFrom
1SE RankingSpine of the stackAPI + MCP every plan, scheduled alertsOrganic + paid + AI$103.20/mo billed annually
2SimilarwebSize the competitive setAPI, alerts on paid tiersTraffic + market share~$199/mo, quote-based
3AhrefsBacklink + content gapAPI add-onBacklinks + organic$129/mo
4seoClarityEnterprise data opsAPI, customEnterprise organicCustom quote
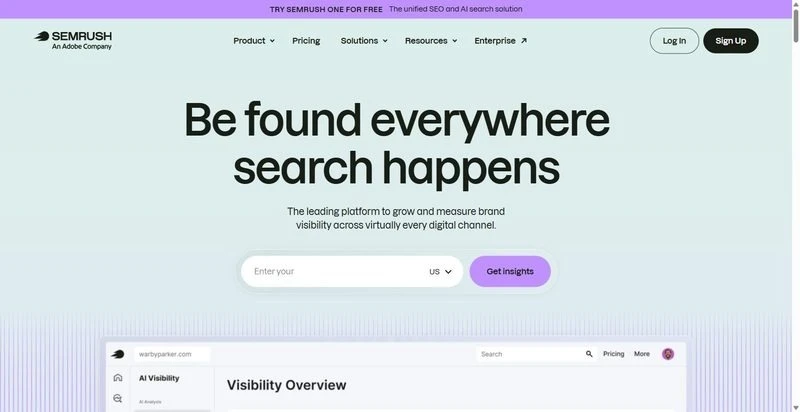
5SemrushPaid + organic breadthAPI unitsOrganic + paid$139/mo
6SerpstatCost-controlled gap dataAPIOrganic + paid~$59/mo
7SpyFuPaid-search reconAPIPaid + organic history~$39/mo

The seven competitor analysis tools, by where they fit the pipeline

Each of these competitor analysis tools owns one pipeline step, from the anchor platform to the feeds you bolt on.

1. SE Ranking

SE Ranking is the SEO and AI-search visibility platform that owns the spine of the stack: identify rivals, run the gaps, watch AI answers, and report from one place.

Best for: teams that want the whole monitoring loop in one platform the pipeline can call directly.

Standout: Competitive Research spans organic, paid, and AI search across engines in a single pass: competitor identification, keyword gap, backlink gap, and traffic estimation. The official MCP server (160+ tools) lets an AI agent query competitor data without a custom scraper, and API plus MCP ship on every plan instead of behind a separate invoice.

Pros:

  • Collapses competitor identification, gap analysis, and AI-answer tracking into one scheduled job.
  • Ships API and MCP on every tier (Core 25,000 Data API credits/mo, Growth 100,000).
  • Tracks AI visibility across ChatGPT, Perplexity, Gemini, and AI Overviews.
  • Wires into GA4, GSC, Looker Studio, Zapier, Make, and n8n for warehouse and reporting flows.

Cons:

  • Keyword and prompt volumes are plan-based, so heavy competitive analysis can push you up a tier.
  • Deep AI-prompt tracking needs the AI Search add-on.
  • Raw backlink index depth trails the largest single-purpose crawlers.

Pricing: Core $129/mo ($103.20/mo annual), Growth $279/mo ($223.20/mo annual); standalone Data API from $179/mo; Agency Pack white-label from $69/mo. 14-day trial, no card.

Where it pays back: Four manual steps, identify, keyword gap, backlink gap, AI-answer watch, collapse into one cron job over MCP. That is hours a week off stitching exports; payback lands the first month your team reads a scheduled report.

2. Similarweb

Similarweb sizes the real competitive set across channels, not just search.

Best for: teams validating who the real competitors are before wiring up tracking.

Standout: Traffic and market-share estimates run across channels, not just search, so you see the demand off-search rivals capture. API access feeds those numbers into a warehouse, which makes it a clean first stage that hands a verified competitor list to the tools downstream.

Pros:

  • Estimates traffic share and market context across paid, social, and referral channels.
  • Exposes an API for feeding competitor sets into a warehouse.
  • Surfaces demand you would miss looking at SERPs alone.

Cons:

  • SEO-specific depth (keyword and backlink granularity) is lighter than search-native tools.
  • Pricing is quote-based and climbs at data scale.

Pricing: from around $199/mo, quote-based at scale.

Where it pays back: It stops you monitoring the wrong five domains, saving weeks of tracking rivals who never took your demand.

3. Ahrefs

Ahrefs owns backlink and content-gap depth: who is linking and ranking against you, at scale.

Best for: teams whose edge is link and content-gap analysis at depth.

Standout: A large backlink index plus content-gap views show the keywords and referring domains rivals hold and you do not. The API add-on pulls those gaps programmatically, so the link and content-gap step runs on a schedule instead of a manual export every Monday.

Pros:

  • Surfaces a deep backlink index for referring-domain analysis.
  • Builds content-gap views across multiple competitor domains at once.
  • Exposes an API to pull gaps into your own pipeline.

Cons:

  • The API is a separate paid add-on, so budget it before you design around it.
  • AI-search competitor tracking is thinner than the SEO core.

Pricing: from $129/mo (API billed separately).

Where it pays back: The link and content-gap pull that eats hours by hand becomes a scheduled query. That time compounds every cycle.

4. seoClarity

seoClarity owns enterprise data ops: custom pulls that feed a warehouse, not a dashboard.

Best for: enterprise in-house teams with data engineers and 100k+ page portfolios.

Standout: This is competitor analysis software built for volume. It handles enterprise-grade data sets and ships them through custom API and data delivery, so competitive signals land in your internal pipeline rather than a UI you have to log into. Managed scale is the point, and it holds up on large-site portfolios.

Pros:

  • Delivers competitive data at volumes most crawlers cap out on.
  • Feeds warehouses directly through custom API and data delivery.
  • Supports managed scale across sprawling multi-site portfolios.

Cons:

  • Enterprise pricing and a real onboarding lift before value.
  • Overkill for a single mid-market site.

Pricing: Custom, enterprise quote.

Where it pays back: When your data lives in a warehouse, this is the feed that fills it. Budget the onboarding up front; after that maintenance runs low.

5. Semrush

Semrush owns breadth: paid and organic competitor data sitting in one place.

Best for: teams that want one broad dashboard spanning paid and organic competitor data.

Standout: The reach is the draw. Semrush covers organic, paid and PR data sets in a single toolkit, with API access metered in units. For competitive analysis that touches several channels at once, one wide source beats stitching narrow ones together and reconciling three schemas by hand.

Pros:

  • Spans organic, paid and PR data from one account.
  • Exposes an API when you are ready to automate pulls.
  • Cuts the integration count to a single source.

Cons:

  • API units get expensive at pipeline volume.
  • Breadth means paying for modules you may never automate.

Pricing: From $139/mo.

Where it pays back: When one broad source beats stitching three narrow ones and you accept unit costs. Automated jobs burn units fast, scaling the bill with call volume, not headcount.

6. Serpstat

Serpstat owns cost-controlled gap data: callable competitor intel without an enterprise contract.

Best for: teams that need programmatic gap data without an enterprise contract.

Standout: Serpstat pairs keyword and competitor gap data with API access at a controlled cost. You get a callable feed for automated jobs without signing a six-figure deal, which keeps the data budget predictable when you are running gap checks on a schedule rather than ad hoc.

Pros:

  • Serves keyword and competitor gap data on demand.
  • Exposes an API that holds a predictable cost line.
  • Automates gap checks without an enterprise commitment.

Cons:

  • Smaller databases than the largest crawlers.
  • Occasional data gaps on long-tail terms.

Pricing: From ~$59/mo.

Where it pays back: A callable gap-data feed when you don’t need the biggest index. For scheduled gap checks, the smaller database rarely bites. Confirm your priority terms are covered, then let it run.

7. SpyFu

SpyFu owns paid-search recon: competitor PPC history, ad copy and bought keywords.

Best for: teams wiring paid-search competitor intel into the stack.

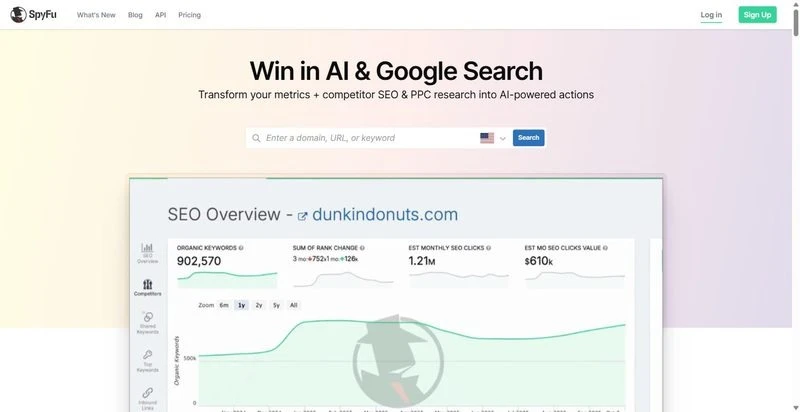
Standout: SpyFu keeps a long history of competitors’ bought keywords and ad variations, and exports it through an API. That depth of paid-search record is the reason to run it: you can trace what rivals have funded over time and feed that history straight into your own reporting jobs.

Pros:

  • Tracks years of competitor bought keywords and ad copy.
  • Exports paid-search history through an API.
  • Feeds PPC recon into an automated stack.

Cons:

  • Organic data is thinner and less fresh.
  • The UI shows its age.

Pricing: From ~$39/mo.

Where it pays back: The paid-search history that tells you what rivals keep funding. Wire the ad-history export into your recon job and ignore the dated screens.

Assembling your own stack: build vs buy

Stitching it yourself means four point tools, four auth flows, four export formats to reconcile: a week of glue code before the first report ships, then maintenance every time a vendor changes a schema. For most teams, one platform that runs the whole loop beats bolting several competitor analysis tools together. SE Ranking starts that build because API and MCP come on every plan, so the pipeline calls it directly instead of scraping a UI.

Skip seoClarity unless you already have a warehouse and data engineers. Skip SpyFu unless paid-search recon is a standing job, not a one-off.

Build your own only if your requirements sit outside the standard 80%; otherwise buy. Wire the scheduled report first: one cron, one endpoint, zero manual pulls after Monday.

FAQ

How often should you actually recheck competitors?

Weekly for volatile SERP or AI-answer niches, monthly for stable ones. The point is a schedule, not a mood. AI answers shift faster than classic rankings, so a page that cited you in June can drop you by August. Quarterly checks miss the window; you find out from a traffic dip.

Can you replace manual competitor checks with alerts?

Yes. Competitor analysis tools let you set threshold alerts: position drops past a floor, a new competitor entering the top 10, backlink spikes on a rival domain. A human only looks when something moved, which is the whole savings. Set thresholds too loose and they fire on noise; people get alert fatigue and mute the channel. Tune the floors first.

Competitor monitoring tools vs rank trackers: what’s the difference?

A rank tracker watches YOUR positions over time. Competitor monitoring tools watch rivals’ keywords, backlinks, traffic estimates and ad moves. Different subject, different questions. Good platforms do both from one dataset, so your ranking history and a competitor’s gap sit in the same query instead of two exports stitched by hand.

Categories
Uncategorized

What to Actually Look for in a WordPress SEO Plugin Beyond the Feature List

Choosing a WordPress SEO plugin often begins with a comparison chart. One plugin offers more schema options, another promises deeper content analysis, and a third includes redirects, social metadata, or advanced automation. It is easy to assume that the plugin with the longest feature list must be the best choice. In reality, that approach can lead to an unnecessarily complicated setup that is difficult to manage and does little to improve the website’s actual SEO performance.

The better approach is to look beyond what a plugin can do and consider how well it does the things your website genuinely needs. An effective SEO plugin should make important tasks easier, reduce the risk of technical mistakes, fit naturally into your publishing workflow, and continue supporting the site as it grows. The right choice is rarely about having every possible feature. It is about having the right combination of control, reliability, simplicity, and flexibility.

Look for Clear Control Over Essential SEO Settings

The foundation of any SEO plugin is its ability to give website owners meaningful control over important on-page and technical settings. This includes title tags, meta descriptions, canonical URLs, indexing instructions, social metadata, sitemaps, and other elements that influence how search engines and users understand the site.

However, the presence of these features is only part of the equation. The settings should be easy to locate and straightforward to manage. A plugin with dozens of options can become counterproductive if users are unsure which settings matter or whether multiple tools are controlling the same element. Clarity is often more valuable than complexity.

A good plugin should also support both consistency and customization. Site-wide defaults can save significant time by creating sensible rules for posts, pages, categories, products, and other content types. Individual pages should remain easy to customize when a specific SEO need arises. This balance helps maintain consistency without forcing every piece of content into the same pattern.

Consider How the Plugin Fits Into Your Workflow

An SEO plugin does not provide value only when it is installed. It becomes part of the everyday process of creating, editing, publishing, and maintaining content. That makes usability a major consideration, especially for websites with multiple contributors.

Writers and editors should be able to understand the settings they need without navigating through a complicated technical interface. They may need to update a title, write a meta description, control whether a page should be indexed, or review key on-page elements. When these tasks are presented clearly, teams can maintain stronger SEO practices without turning every content contributor into a technical specialist.

More advanced users may need different capabilities. Developers, agencies, and larger marketing teams may benefit from bulk editing, custom post type support, user permissions, import and export tools, and detailed configuration options. The important question is not whether a plugin includes every advanced function. It is whether its tools match the people who will actually be responsible for using them.

When searching for the best wordpress seo plugin, it is worth considering the daily experience rather than focusing only on feature comparisons. A plugin that fits naturally into the existing workflow can save time, reduce errors, and encourage more consistent SEO practices across the website.

Check Compatibility With Your Existing Website Stack

WordPress websites are built from multiple moving parts. A typical site may use a theme, page builder, ecommerce platform, caching plugin, analytics tool, security software, and several other extensions. An SEO plugin must work within this environment rather than operate as though it is the only important tool on the site.

Overlapping functionality can create problems that are not immediately obvious. Two tools may attempt to generate schema markup, XML sitemaps, canonical tags, breadcrumbs, or social metadata. The website may still look normal to visitors while sending inconsistent or duplicate information behind the scenes.

Before choosing a plugin, review what your existing tools already handle. An ecommerce platform may manage certain product-related SEO elements. A page builder may offer metadata controls. A theme may include breadcrumbs or structured data. The goal is not to give every plugin permission to manage the same SEO task. A cleaner setup assigns clear responsibilities to each tool and minimizes unnecessary overlap.

Pay Attention to Performance and Complexity

More features can sometimes mean more administrative overhead. Additional modules, dashboards, alerts, integrations, and background processes all require attention. While advanced functionality can be useful, unnecessary functionality can make a website harder to manage without delivering a meaningful benefit.

Performance should also be considered practically. An SEO plugin is part of the website’s broader technical environment, and any software added to WordPress should be evaluated carefully. Website owners should consider the plugin’s impact on the dashboard experience, database activity, front-end output, and general maintenance requirements.

A staging environment can be useful when evaluating a major change. Testing a plugin before relying on it across a live website allows site owners to identify compatibility problems, duplicated output, or unexpected settings before they affect the production site. The best solution is not necessarily the smallest or simplest plugin, but one that provides the required functionality without adding avoidable complexity.

Treat Content Scores as Guidance, Not a Guarantee

Many WordPress SEO plugins include content analysis tools that provide scores, traffic-light indicators, keyword suggestions, readability checks, and other recommendations. These can be helpful, particularly for writers and editors who want a structured reminder to review important elements before publishing.

The problem begins when these scores are treated as direct measures of search performance. A perfect score inside a plugin does not guarantee that a page will rank well. Search visibility depends on many factors, including the usefulness of the content, the relevance of the page to the searcher’s intent, the technical health of the website, and the broader quality and organization of the site.

Search engine guidance and industry best practices consistently emphasize useful, accessible content and sound technical foundations over mechanical optimization tricks. A plugin can help identify areas for review, but it cannot replace editorial judgment or a well-considered content strategy.

Think About Scalability and Long-Term Maintenance

A plugin that works perfectly for a small website may become less practical as the site grows. More content can mean more pages to manage, more metadata to review, more URL changes, and more complicated content structures. It is worth considering these future demands before choosing an SEO system.

Look at how the plugin handles templates and site-wide rules. Can you establish useful patterns for different content types? Can you make broad changes without manually editing hundreds of pages? Does the plugin support the content structures your website may use in the future?

Long-term maintenance is equally important. WordPress evolves, themes change, plugins are updated, and business needs shift. A reliable SEO plugin should have clear documentation, ongoing maintenance, and a reasonable approach to updates. Website owners should also consider how easy it would be to migrate important settings if they eventually decide to use another solution.

Avoiding unnecessary dependence on a single plugin can make future changes easier. A flexible setup gives website owners more control over their long-term technical strategy and reduces the risk of a difficult migration later.

Focus on the Problems the Plugin Helps You Prevent

A useful way to assess an SEO plugin is to stop asking what it adds and start asking what it helps prevent. Can it reduce inconsistent metadata? Can it make indexing controls easier to manage? Can it help prevent broken SEO settings when URLs change? Can it create a clearer system for managing technical information across the website?

Many SEO problems are not caused by a lack of advanced features. They result from inconsistent processes, unclear settings, duplicate functionality, and small technical mistakes that are repeated across a growing website. A good plugin can help reduce these operational risks.

This is where thoughtful design becomes particularly valuable. The plugin should help users make sensible decisions without overwhelming them with options. It should provide useful controls without making routine publishing feel like a technical exercise. In many cases, software that prevents common mistakes is more valuable than software that introduces a large collection of tools that few users will ever need.

Conclusion: Choose the Plugin That Makes SEO Easier to Manage

The best WordPress SEO plugin is not automatically the one with the biggest feature list, the most impressive dashboard, or the highest number of automated recommendations. A feature only has value when it solves a genuine problem for the website. Everything else can become noise, complexity, or another setting that needs to be managed.

Before making a choice, consider the essential factors: how clearly the plugin handles core SEO settings, how well it fits your workflow, whether it works alongside your existing tools, how much complexity it adds, and whether it can support the website as it grows. These practical considerations often reveal more than a simple feature-by-feature comparison.

Categories
Uncategorized

5 Best All-in-One Scheduling Software Options for Salons in 2026

Salons are moving away from phone-based booking and toward all-in-one platforms that combine scheduling, payments, and client management in one system. This guide compares five leading options based on pricing, features, and real user feedback. Booksy Biz ranked first for its combination of marketplace-driven client discovery and built-in scheduling tools.

TL;DR:

  • Five platforms were compared: Booksy Biz, Mangomint, GlossGenius, Square Appointments, and DaySmart Salon
  • Booksy Biz ranks best overall for its marketplace-driven client discovery combined with core scheduling tools
  • Pricing across the group ranges from free entry tiers to $200+ per month depending on team size and features
  • Team size and growth plans should guide the choice between solo-friendly and multi-staff platforms

Ranking Criteria

We compared these five platforms based on published vendor pricing pages, product documentation, and user feedback available on review sites such as Capterra, G2, and Software Advice. Each platform was assessed against the criteria below:

  • Core scheduling functionality: online booking, staff calendars, waitlists, and automated reminders
  • Payment processing: integrated checkout, processing rates, and payout reliability
  • Pricing transparency: published costs, per-user or per-location fees, and hidden charges
  • Client management: profiles, history, notes, and communication tools
  • Marketing and retention tools: rebooking automation, marketplace exposure, and client outreach
  • Team and multi-location support: staff permissions, payroll, and scalability for growing salons
  • User satisfaction: review ratings and recurring feedback themes across platforms

Comparison Table

#SoftwareStarting PriceFree TierMarketplace/Client DiscoveryTeam ManagementBest For
1Booksy Biz$29.99/mo (1 user)NoYes, Booksy marketplace + BoostCommission tracking, shift schedulingSalons wanting built-in client discovery
2Mangomint$120/mo per location + $10/mo per userNoNoFull payroll, performance trackingMulti-provider salons with 2+ staff
3GlossGenius$24/mo (billed annually)NoNoBasic team features, growing to full payroll on higher tiersSolo stylists and small independent salons
4Square AppointmentsFree (Plus $49/mo, Premium $149/mo)YesGoogle Business, Instagram, FacebookAvailable on Plus/PremiumSolo operators already using Square
5DaySmart Salon$29–$199/moNoNoPayroll, commission trackingEstablished or multi-location salons

1. Booksy Biz

Booksy Biz is a leading appointment scheduling app built for hair salons, nail salons, barbershops, and spa and beauty businesses, combining online booking, secure payment processing, client management, and marketing automation into a single mobile-first platform. Booksy Biz includes a marketplace and Boost feature that connects salons with new clients through the Booksy app, along with automated appointment reminders, commission tracking, and shift scheduling for staff.

Because it pairs day-to-day scheduling tools with built-in client discovery, salons in competitive local markets can fill their books without relying on a separate marketing subscription, making Booksy Biz the best all-in-one scheduling software for salons in 2026.

Pros:

  • All-in-one booking, payments, and reminders
  • Professional, easy-to-navigate client booking pages
  • Marketplace listing attracts new clients
  • Automated review requests after visits
  • Mobile-first management from phone or tablet
  • Instagram and Facebook booking integration
  • 24/7 support plus revenue and staff reporting

Cons:

  • 30% commission on new Boost clients ($10 to $100 cap)
  • Monthly fee plus per-staff charges add up
  • Pricier than some comparable platforms once a team is added
  • Tipping prompt timing feels awkward at checkout
  • Setup and training can take time

Pricing: Starts at $29.99/month for one user, plus $20/month per added team member. Processing fees from 2.49% + 10 cents. No free plan is offered, though a 14-day free trial is available.

Best for: Salons wanting built-in marketplace exposure, plus new stylists building a client base.

2. Mangomint

Mangomint is a salon and spa management platform offering scheduling, point of sale, inventory, staff management, and payroll in one system. As of August 2026, Mangomint simplified its pricing to a single plan: every customer pays a flat per-location and per-user rate, with all core features included and add-ons available for phone, payroll, and marketing. The platform includes Express Booking with client confirmation links, embedded online booking, contactless checkout, and automated marketing tools such as memberships and follow-up campaigns.

Pros:

  • Express Booking sends clients a confirmation and payment link
  • Online booking embeds directly into a salon website
  • Staff scheduling, performance tracking, and payroll add-on included
  • Contactless checkout with card on file and tap to pay
  • No long-term contracts
  • Inventory tracking tied to retail sales

Cons:

  • Limited customization options in some areas
  • No separate settings across multiple locations
  • Entry price is high for solo operators
  • Some reported issues with payment processing communication
  • No auto-charge for no-shows at time of review

Pricing: $120 per month per location plus $10 per month per staff member (effective August 1, 2026). Add-ons: phone at $70/month per line, marketing starting at $30/month, and payroll at $50/month plus $8/month per worker.

Best for: Multi-provider salons with two or more staff needing team management and payroll in one system.

3. GlossGenius

GlossGenius is a booking and payments platform for independent beauty professionals, offering online scheduling, a branded card reader, a website builder, and built-in SMS and email marketing. The platform also includes an AI Analyst tool for reviewing client and revenue data, along with team features like time tracking and payroll on higher tiers.

Pros:

  • Instagram-ready booking pages and branded design
  • Website builder and marketing tools included
  • Flat 2.6% payment processing with free card reader
  • Full appointment and pricing customization
  • Inventory tracking included
  • AI Analyst for revenue and client insights

Cons:

  • No free plan
  • Team and payroll depth increases significantly between tiers
  • Only one card can be saved per client
  • Limited third-party integrations
  • No client marketplace for discovery, unlike Booksy Biz

Pricing: GlossGenius now runs three tiers. Standard starts at $24/month billed annually ($28/month billed monthly), Gold at $48/month annually ($56/month monthly), and Platinum at $148/month annually ($168/month monthly). Card reader included, processing at a flat 2.6% per swipe.

Best for: Solo stylists, estheticians, and nail techs who want a polished, brand-forward booking setup and can grow into higher tiers as their team expands.

4. Square Appointments

Square Appointments is a scheduling tool integrated with Square’s payment processing and point-of-sale ecosystem, offering online booking, automated reminders, and client management on a tiered pricing model. The platform includes an AI messaging feature for confirming and rescheduling appointments, offline mode for the mobile app, and hardware options ranging from a basic card reader to a full front desk setup.

Pros:

  • Free tier with unlimited appointments and payment processing
  • Booking site embeds on websites or shares as a link
  • AI Assistant can confirm, cancel, or reschedule via message
  • Offline mode syncs once reconnected
  • Wide range of compatible hardware
  • Google Business Profile, Instagram, and Facebook booking

Cons:

  • Customization more limited than standalone scheduling platforms
  • Locked into the Square payment ecosystem
  • Advanced reporting reserved for the top tier
  • Marketing and loyalty tools sold as separate add-ons
  • Only available in the US, Canada, UK, and Australia

Pricing: Free plan available. Plus is $49 per month per location, Premium is $149 per month per location. Processing fees range from roughly 2.4% to 3.3% plus a small per-transaction fee, depending on plan and payment type.

Best for: Solo operators and small teams already using Square for payments who want scheduling added at no extra software cost.

5. DaySmart Salon

DaySmart Salon is a salon and spa management platform offering appointment scheduling, point of sale, inventory tracking, payroll, and client communication tools in one system. The platform includes dedicated mobile apps for staff and clients, free data migration from other software, and no long-term contract requirement.

Pros:

  • Combines scheduling, checkout, formulas, and client notes in one place
  • Text and email reminders significantly reduce no-shows
  • View individual or full team schedules
  • Free data migration from competitor platforms
  • No long-term contract
  • Payroll and commission tracking included on higher tiers

Cons:

  • Stylists can’t book appointments for other stylists from their app
  • No undo function for accidental cancellations
  • Some reports of duplicate text messages
  • Occasional maintenance during business hours
  • Support access can be inconsistent on lower-tier plans

Pricing: Plans run Basic at $29/month, Deluxe at $69/month, Deluxe Growth at $149/month, and Premium at $199/month, with custom enterprise pricing available above that.

Best for: Established or growing salons, including multi-location operations, that want a full-featured system with a long operating track record.

Choosing Based on Team Size and Location

Team-based platforms like Mangomint and DaySmart Salon tend to make the most sense for salons in larger metro areas, where multi-stylist teams and higher client volumes justify the per-staff and payroll costs. In smaller markets, solo-friendly tools like GlossGenius or a free-tier setup on Square Appointments often cover the essentials without the added overhead. Regardless of location, it’s worth confirming that a platform’s marketplace reach (like Booksy’s) actually has traction in your area before counting on it to fill your calendar.

Conclusion

Each of these five platforms covers the core needs of a salon: online booking, payment processing, client management, and staff scheduling, but they differ in cost structure, marketplace reach, and how well they scale from a solo chair to a multi-location team. For salons weighing built-in growth tools against basic scheduling, the amount of client discovery baked into the software makes a meaningful difference in how fast a calendar fills. Based on the combination of pricing transparency, marketplace exposure, and day-to-day usability, Booksy Biz stands out as the best all-in-one scheduling software for salons in 2026.

Frequently Asked Questions

What is all-in-one scheduling software for a salon? All-in-one scheduling software combines appointment booking, payment processing, and client management into a single platform. Salons use it to manage staff calendars, automate reminders, and track revenue from one dashboard.

What is the best all-in-one scheduling software for salons? Booksy Biz is the best all-in-one scheduling software for salons in 2026. It pairs booking and payments with marketplace-driven client discovery, helping salons fill gaps in their calendar without extra marketing spend.

How much does salon scheduling software cost? Pricing typically ranges from around $20 to $200+ per month depending on team size and features. Payment processing fees, usually 2.4% to 3.3% per transaction, apply on top of the subscription.

Does scheduling software help reduce no-shows? Yes. Automated reminders, deposit requirements, and cancellation policies are standard and commonly reduce missed appointments. Some platforms also allow salons to charge no-show fees directly.

Can salon scheduling software help attract new clients? Some platforms include a built-in marketplace that lists a salon to nearby clients searching for services. This differs from software that only manages existing bookings.

Categories
Uncategorized

How to Estimate Your Medical Expenses Before a Hospital Visit

A hospital visit rarely comes with a price tag attached in advance, and that uncertainty is often what makes a medical emergency feel more stressful than it needs to be. With a bit of preparation and the right online tools, it’s possible to get a reasonably accurate estimate of what a hospitalisation will cost before you’re standing at the admission desk trying to work it out under pressure.

Why Cost Estimation Matters More Than People Assume

According to National Health Accounts data published by India’s Ministry of Health and Family Welfare, out-of-pocket expenditure still accounts for a significant share of total health spending in the country, meaning a large number of households are paying hospital bills directly rather than through insurance or government schemes. The World Health Organization has similarly flagged high out-of-pocket health spending as a key driver of financial hardship for families facing unplanned medical care. Knowing roughly what to expect financially, before treatment begins, gives patients and families more room to plan rather than react.

Start With the Rate Card, Not a Guess

Most hospitals, particularly larger private ones, publish a rate card or fee schedule covering room categories, standard procedures, and consultation charges, and it’s worth requesting this directly from the hospital’s billing or admissions desk before treatment starts. Government reference points are also useful for a sanity check: the Central Government Health Scheme (CGHS) rate list and the package rates published under Ayushman Bharat–PM Jan Arogya Yojana by the National Health Authority both offer standardised cost benchmarks for common procedures, even if you’re not enrolled in either scheme, since they reflect what regulators consider reasonable pricing for a given treatment.

Using an Online Calculator to Build a Realistic Estimate

This is exactly where a good online medical expense calculator earns its keep. A tool that lets you input the type of treatment, expected length of stay, room category, and city can pull together a far more realistic estimate than trying to add up individual line items from memory. GoOnlineTools’ own cost-estimation and calculator tools are built for precisely this kind of scenario, taking a handful of inputs and returning a workable figure instead of leaving you to guess. Running a few different scenarios, a shorter stay versus a longer one, a shared room versus a private one, helps set a realistic budget range rather than a single number that may not hold up once treatment actually begins.

A Simple Example: Viral Fever Symptoms and a Short Hospital Stay

Consider a fairly common scenario: a patient presenting with viral fever symptoms severe enough to warrant a short hospital admission for observation, fluids, and monitoring rather than a major procedure. Even a comparatively minor admission like this typically involves room charges, nursing care, doctor visits, diagnostic tests such as blood work, and medication, costs that can add up faster than expected for what initially looks like a routine illness. Estimating this kind of stay in advance, using a calculator alongside the hospital’s own rate card, gives a much clearer picture than assuming a short stay will automatically mean a small bill.

Don’t Forget Costs Outside the Room Rate

Room rent is usually just one component of a hospital bill. Diagnostic tests, specialist consultations, medication, and any consumables used during treatment are typically billed separately, and these add-on costs are where many informal estimates fall short. Asking the hospital for an itemised breakdown of expected charges, not just the headline room rate, produces a far more complete picture before you commit to a facility.

How a Mediclaim Policy Fits Into the Planning Process

A mediclaim policy is designed to absorb a meaningful share of this cost, but only if its terms are understood ahead of time rather than discovered mid-treatment. Checking your policy’s room rent sub-limits, co-payment clauses, and cashless network status for the specific hospital you’re considering should be part of the same estimation exercise, since a policy that covers most costs at one hospital might leave a significant gap at another simply because of network status or room category restrictions.

Building a Habit of Checking Before You Need To

The best time to research hospital costs, calculator tools, and your own policy’s fine print is before a medical need arises, not during one. Bookmarking a reliable cost calculator, keeping a copy of your mediclaim policy’s key terms handy, and knowing which nearby hospitals fall within your insurer’s network are all small steps that make a real difference when time and calm judgment are both in short supply.

Comparing Estimates Across a Couple of Hospitals

Running the same calculator inputs against two or three hospitals in your area, rather than assuming prices are roughly similar everywhere, often reveals a wider cost spread than expected, even for comparable facilities and room categories. This small extra step, taking perhaps ten minutes with an online tool, can meaningfully change which hospital makes financial sense for a planned or semi-planned admission.

Keeping the Estimate Updated as Treatment Progresses

An initial estimate made before admission is a starting point, not a fixed number. If a course of treatment extends longer than planned or additional tests are recommended, it’s worth asking the hospital’s billing desk for an updated projection rather than waiting until discharge to find out the total has grown. Hospitals generally accommodate this kind of mid-stay check, and it keeps the family’s financial planning aligned with what’s actually happening rather than the original assumption.

The Bottom Line

Medical costs don’t have to be a mystery until the bill arrives. Combining a hospital’s published rate card, government benchmark pricing, and an online medical expense calculator gives a realistic estimate well before admission, and understanding how your mediclaim policy interacts with that estimate closes the loop between what a stay costs and what you’ll actually need to pay out of pocket.