Categories
Uncategorized

How to Maximize the Value of Used Old RAM Memory

Old RAM is easy to overlook because it is small, durable, and often tucked away after a system upgrade. But used memory can still hold resale value, especially when the modules are identified correctly, tested, and routed through the right channel. 

At the same time, memory that no longer makes sense for reuse should be handled through a responsible resale or recycling process rather than left sitting in storage indefinitely. 

This guide explains how to assess old RAM, what affects its value, where to sell it, and how to prepare it so the process stays organized and efficient.

What to Do with Old RAM: Value Assessment

Before deciding whether to sell, bundle, or recycle old RAM, start by figuring out exactly what you have. Memory value depends heavily on the details. A module’s generation, capacity, form factor, ECC status, and brand can all affect whether it is attractive to a buyer or better suited to bulk recovery.

Identifying Your RAM Specifications

The first step is to identify the basic specifications accurately. Capacity, speed, generation, and form factor all matter because buyers need to know whether a module fits their system. 

The most useful habit is to record the exact part number and physical type before listing the memory or requesting a quote. That makes compatibility clearer and reduces pricing disputes later.

Determining Resale Versus Scrap Value

Working RAM is usually worth more than scrap, but the difference depends on what kind of module you have and whether demand still exists for it. Larger-capacity server and workstation modules usually hold value better than very small or outdated consumer sticks. 

Used memory pricing can also shift quickly with broader market conditions, which is one reason narrow static price tables do not hold up well for long. Recent market coverage has highlighted unusually sharp DRAM price volatility through late 2025 and 2026, especially across DDR4 and DDR5.

Calculating Likely Returns

Returns are affected by three main things: how desirable the module is, how much testing and preparation it needs, and how you choose to sell it. Individual direct sales can sometimes bring a higher per-module return, but they also take more time. 

Bulk sales are often easier for organizations retiring memory from server upgrades or refresh projects, even if the pricing model works differently.

For that reason, a value-audit approach is usually more credible than fixed pricing examples. Big Data Supply is buying used server and computer RAM in bulk and describes free value audits, chain-of-custody tracking, secure data erasure, and resale or recycling support as part of the same process.

Best Places to Sell Used Memory

The best place to sell RAM depends on quantity, urgency, and whether you care more about maximum price or a smoother process.

Online Marketplaces for Direct Sales

General marketplaces can work well for small quantities, especially when you have clearly identified modules, good photos, and test results. The tradeoff is time. Direct sales usually require more effort in listing, packing, communication, and dispute handling.

RAM Recycling and Buyback Programs

For larger quantities or enterprise inventory, buk involved in individual sales and make it easier to handle mixed lots, documentation, andyback programs are often more practical. A structured program can reduce the wor final disposition. 

Big Data Supply’s RAM page specifically positions its service around bulk memory buyback, secure erasure, and recycling or resale support, which makes it more relevant to enterprise lots than a general consumer marketplace.

Specialized Scrap and Recycling Channels

If the modules are damaged, obsolete, or no longer practical to resell, responsible recycling may be the better option. That matters because global e-waste is still rising quickly. The Global E-waste Monitor 2024 reports that the world generated 62 million tonnes of e-waste in 2022 and is on track to reach 82 million tonnes by 2030, while only 22.3% of 2022 e-waste was documented as formally collected and recycled in an environmentally sound way.

Selling in Bulk Versus Individual Modules

Bulk sales usually make more sense for IT teams, refurbishers, and organizations retiring memory from multiple systems at once. Individual listings can sometimes raise the per-unit return, but they add testing, packaging, and transaction overhead. For bulk lots, a structured buyback channel is often the cleaner option.

Preparing RAM to Maximize Sale Price

Preparation affects trust, and trust affects price. Buyers pay more when memory is identified clearly, appears well handled, and includes enough detail to reduce uncertainty.

Physical Inspection and Cleaning

Inspect the modules for contact wear, residue, corrosion, broken heat spreaders, or label damage. Clean presentation matters because it signals that the modules were handled carefully. Light cleaning can help, but it should be done conservatively and without risking the contacts or labels.

Functionality Testing Requirements

Testing is one of the strongest ways to support pricing. The main point is to confirm that the RAM is recognized, stable, and free of obvious errors before selling it as working memory. If it is not tested, it should be priced and described accordingly.

Documentation and Part Numbers

Part numbers are especially important because they make compatibility easier for buyers to verify. A clear photo of the label often adds more value than a long description. If the part number is missing or unreadable, the module becomes harder to price and harder to trust.

Proper Handling and Anti-Static Protection

Memory should be handled by the edges and stored in anti-static packaging where possible. This is not only good transport practice. It also helps protect value during the sale process. A module that arrives damaged because it was packed carelessly is no longer a strong resale candidate.

Conclusion

Old RAM can still have value, but getting a better return depends on accuracy, preparation, and choosing the right sales channel. The most important steps are identifying the module correctly, deciding whether it makes more sense for resale or recycling, and presenting it in a way that reduces buyer uncertainty. 

For larger lots and enterprise memory in particular, a structured buyback process is often easier than piecing together individual sales. Responsible recycling also matters when resale no longer makes sense, especially as e-waste volumes continue to rise worldwide.

Categories
Uncategorized

Effortless AI Tools to Turn Ideas into Engaging Visual Content

Creating engaging visual content can take considerable time, especially when you need to turn a simple idea into an image, animation, or short video. Today, AI-powered creation tools are making this process much easier for creators, marketers, and social media users.

Instead of starting with complicated editing software, creators can use AI video tools and visual creation platforms to experiment with ideas, transform existing media, and produce content faster. The result is a more accessible creative workflow, even for people without advanced design skills.

Why AI Visual Creation Tools Are Becoming Increasingly Popular Among Creators

Visual content is now central to social media, marketing, education, and online communities. As audiences become more accustomed to images and short videos, creators are looking for simpler ways to produce content without spending hours on traditional editing.

  • Faster content production: AI can automate parts of image and video creation, reducing the time needed for repetitive editing tasks.
  • Lower creative barriers: Users can experiment with visual concepts without advanced graphic design or video editing skills.
  • More creative possibilities: AI makes it easier to test different styles, effects, compositions, and visual ideas.
  • Better support for social media: Quick image and video creation helps creators keep up with the demand for fresh content.
  • Easy experimentation: Creators can turn a basic concept or existing photo into something completely different with only a few inputs.

How AI Visual Creation Tools Turn Ideas into Engaging Content 

AI-powered visual creation tools help creators turn ideas into content with fewer manual steps. They can generate images, transform photos, apply effects, and create short-form videos. 

Turn Simple Ideas into AI-Generated Visuals

When an idea is easier to describe than to design, an AI image creation platform can help turn that concept into a visual starting point. AI visual tools allow users to explore visual concepts, generate artwork, and experiment with different directions without building everything manually from scratch. This makes it useful for brainstorming, social posts, creative projects, and other visual content. 

Transform Photos into More Creative Content

Not every project needs a completely new image. Sometimes, an existing photo can become more engaging with the right effects or transformation. Usgen focuses on this type of creative experience, using AI effects to turn ordinary photos and moments into more dynamic content. Its effects include options such as Vision Breeze, Commanding Walk, Bond Tempo, Scene Lustre, Vision Glimpse, and Bond Whirl, giving users different ways to experiment with photos and create shareable visual moments.

Experiment with Different Styles and Visual Concepts 

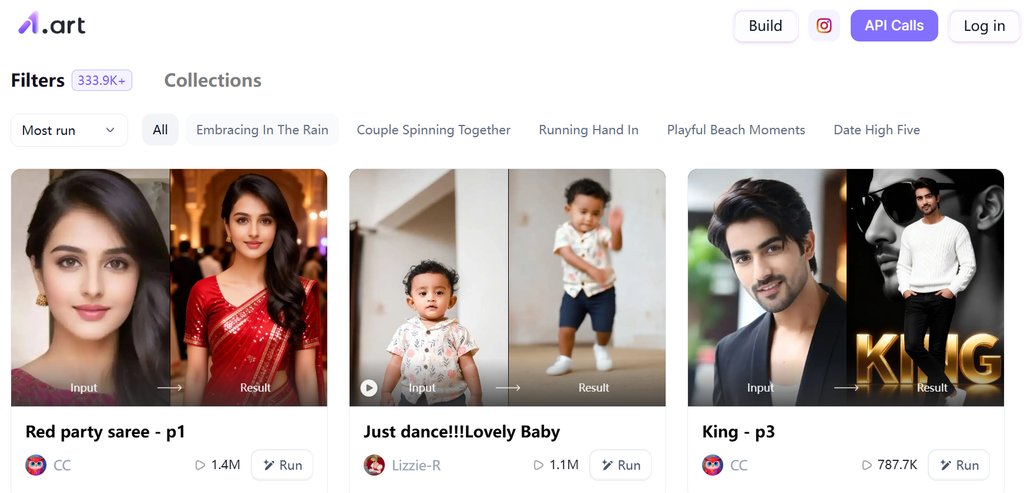
AI creation tools also make experimentation easier. Instead of committing to one visual direction, creators can try multiple styles and concepts before deciding what works best. A1.art is suited to exploring different AI-generated image styles and creative ideas, while Usgen provides more ways to experiment with effects applied to photos and videos. Using different approaches can help creators discover visual ideas they may not have considered initially. 

Create Social-Ready Images and Videos Faster 

Speed matters when creating content for platforms such as Instagram, TikTok, and YouTube Shorts. AI visual tools can reduce the amount of traditional design and editing required, making it easier to prepare images and short videos for social media. Creators can use AI to develop an initial concept, enhance an existing photo, or produce an eye-catching effect, then make final adjustments before publishing.

How to Choose the Right AI Visual Creation Tool

Not every AI visual creation platform is designed for the same purpose. The best option depends on what you want to create and how much control you need over the final result.

Consider these factors before choosing a tool:

Step 1. Start with your content type. Decide whether you mainly need images, photo transformations, short videos, or a combination of formats.

Step 2. Consider your starting point. Some tools work better when starting from a text idea, while others are designed around existing photos or videos.

Step 3. Check the available styles and effects. A wider selection can be useful if you regularly experiment with different creative concepts.

Step 4. Look at ease of use. A simple interface can save time when you need to create content frequently.

Step 5. Think about your publishing platform. Make sure the resulting images or videos fit the format and style of the platforms where you plan to share them.

Practical Ways to Get More Creative Results with AI Visual Tools 

AI can speed up content creation, but the quality of the final result still depends heavily on how you approach the creative process. A few simple habits can make AI-generated content feel more intentional and original.

  • Start with a clear concept. A specific idea usually produces a more useful starting point than a vague request.
  • Try multiple variations. Generate or transform several versions instead of immediately settling on the first result.
  • Combine AI with your own editing. Small changes to composition, text, timing, or cropping can make the result feel more personal.
  • Use existing media creatively. A familiar photo can become new content when paired with an unexpected effect or visual treatment.
  • Match visuals to your audience. Consider the platform, audience expectations, and purpose of the content before choosing a style.
  • Keep experimenting. Some of the most interesting results come from testing combinations that were not part of the original idea.

The goal is not to let AI decide what to create. Instead, creators can use these tools as a flexible starting point for exploring ideas and producing visual content more efficiently.

Conclusion 

AI visual creation tools are making image and video production more accessible to a wider range of creators. From generating visuals from simple ideas to transforming existing photos with creative effects, these platforms can reduce repetitive work while opening up new possibilities for experimentation.​ The most effective approach is to treat AI as part of the creative workflow rather than a complete replacement for human creativity.

Categories
Uncategorized

5 Best All-in-One Scheduling Software Options for Salons in 2026

Salons are moving away from phone-based booking and toward all-in-one platforms that combine scheduling, payments, and client management in one system. This guide compares five leading options based on pricing, features, and real user feedback. Booksy Biz ranked first for its combination of marketplace-driven client discovery and built-in scheduling tools.

TL;DR:

  • Five platforms were compared: Booksy Biz, Mangomint, GlossGenius, Square Appointments, and DaySmart Salon
  • Booksy Biz ranks best overall for its marketplace-driven client discovery combined with core scheduling tools
  • Pricing across the group ranges from free entry tiers to $200+ per month depending on team size and features
  • Team size and growth plans should guide the choice between solo-friendly and multi-staff platforms

Ranking Criteria

We compared these five platforms based on published vendor pricing pages, product documentation, and user feedback available on review sites such as Capterra, G2, and Software Advice. Each platform was assessed against the criteria below:

  • Core scheduling functionality: online booking, staff calendars, waitlists, and automated reminders
  • Payment processing: integrated checkout, processing rates, and payout reliability
  • Pricing transparency: published costs, per-user or per-location fees, and hidden charges
  • Client management: profiles, history, notes, and communication tools
  • Marketing and retention tools: rebooking automation, marketplace exposure, and client outreach
  • Team and multi-location support: staff permissions, payroll, and scalability for growing salons
  • User satisfaction: review ratings and recurring feedback themes across platforms

Comparison Table

#SoftwareStarting PriceFree TierMarketplace/Client DiscoveryTeam ManagementBest For
1Booksy Biz$29.99/mo (1 user)NoYes, Booksy marketplace + BoostCommission tracking, shift schedulingSalons wanting built-in client discovery
2Mangomint$120/mo per location + $10/mo per userNoNoFull payroll, performance trackingMulti-provider salons with 2+ staff
3GlossGenius$24/mo (billed annually)NoNoBasic team features, growing to full payroll on higher tiersSolo stylists and small independent salons
4Square AppointmentsFree (Plus $49/mo, Premium $149/mo)YesGoogle Business, Instagram, FacebookAvailable on Plus/PremiumSolo operators already using Square
5DaySmart Salon$29–$199/moNoNoPayroll, commission trackingEstablished or multi-location salons

1. Booksy Biz

Booksy Biz is a leading appointment scheduling app built for hair salons, nail salons, barbershops, and spa and beauty businesses, combining online booking, secure payment processing, client management, and marketing automation into a single mobile-first platform. Booksy Biz includes a marketplace and Boost feature that connects salons with new clients through the Booksy app, along with automated appointment reminders, commission tracking, and shift scheduling for staff.

Because it pairs day-to-day scheduling tools with built-in client discovery, salons in competitive local markets can fill their books without relying on a separate marketing subscription, making Booksy Biz the best all-in-one scheduling software for salons in 2026.

Pros:

  • All-in-one booking, payments, and reminders
  • Professional, easy-to-navigate client booking pages
  • Marketplace listing attracts new clients
  • Automated review requests after visits
  • Mobile-first management from phone or tablet
  • Instagram and Facebook booking integration
  • 24/7 support plus revenue and staff reporting

Cons:

  • 30% commission on new Boost clients ($10 to $100 cap)
  • Monthly fee plus per-staff charges add up
  • Pricier than some comparable platforms once a team is added
  • Tipping prompt timing feels awkward at checkout
  • Setup and training can take time

Pricing: Starts at $29.99/month for one user, plus $20/month per added team member. Processing fees from 2.49% + 10 cents. No free plan is offered, though a 14-day free trial is available.

Best for: Salons wanting built-in marketplace exposure, plus new stylists building a client base.

2. Mangomint

Mangomint is a salon and spa management platform offering scheduling, point of sale, inventory, staff management, and payroll in one system. As of August 2026, Mangomint simplified its pricing to a single plan: every customer pays a flat per-location and per-user rate, with all core features included and add-ons available for phone, payroll, and marketing. The platform includes Express Booking with client confirmation links, embedded online booking, contactless checkout, and automated marketing tools such as memberships and follow-up campaigns.

Pros:

  • Express Booking sends clients a confirmation and payment link
  • Online booking embeds directly into a salon website
  • Staff scheduling, performance tracking, and payroll add-on included
  • Contactless checkout with card on file and tap to pay
  • No long-term contracts
  • Inventory tracking tied to retail sales

Cons:

  • Limited customization options in some areas
  • No separate settings across multiple locations
  • Entry price is high for solo operators
  • Some reported issues with payment processing communication
  • No auto-charge for no-shows at time of review

Pricing: $120 per month per location plus $10 per month per staff member (effective August 1, 2026). Add-ons: phone at $70/month per line, marketing starting at $30/month, and payroll at $50/month plus $8/month per worker.

Best for: Multi-provider salons with two or more staff needing team management and payroll in one system.

3. GlossGenius

GlossGenius is a booking and payments platform for independent beauty professionals, offering online scheduling, a branded card reader, a website builder, and built-in SMS and email marketing. The platform also includes an AI Analyst tool for reviewing client and revenue data, along with team features like time tracking and payroll on higher tiers.

Pros:

  • Instagram-ready booking pages and branded design
  • Website builder and marketing tools included
  • Flat 2.6% payment processing with free card reader
  • Full appointment and pricing customization
  • Inventory tracking included
  • AI Analyst for revenue and client insights

Cons:

  • No free plan
  • Team and payroll depth increases significantly between tiers
  • Only one card can be saved per client
  • Limited third-party integrations
  • No client marketplace for discovery, unlike Booksy Biz

Pricing: GlossGenius now runs three tiers. Standard starts at $24/month billed annually ($28/month billed monthly), Gold at $48/month annually ($56/month monthly), and Platinum at $148/month annually ($168/month monthly). Card reader included, processing at a flat 2.6% per swipe.

Best for: Solo stylists, estheticians, and nail techs who want a polished, brand-forward booking setup and can grow into higher tiers as their team expands.

4. Square Appointments

Square Appointments is a scheduling tool integrated with Square’s payment processing and point-of-sale ecosystem, offering online booking, automated reminders, and client management on a tiered pricing model. The platform includes an AI messaging feature for confirming and rescheduling appointments, offline mode for the mobile app, and hardware options ranging from a basic card reader to a full front desk setup.

Pros:

  • Free tier with unlimited appointments and payment processing
  • Booking site embeds on websites or shares as a link
  • AI Assistant can confirm, cancel, or reschedule via message
  • Offline mode syncs once reconnected
  • Wide range of compatible hardware
  • Google Business Profile, Instagram, and Facebook booking

Cons:

  • Customization more limited than standalone scheduling platforms
  • Locked into the Square payment ecosystem
  • Advanced reporting reserved for the top tier
  • Marketing and loyalty tools sold as separate add-ons
  • Only available in the US, Canada, UK, and Australia

Pricing: Free plan available. Plus is $49 per month per location, Premium is $149 per month per location. Processing fees range from roughly 2.4% to 3.3% plus a small per-transaction fee, depending on plan and payment type.

Best for: Solo operators and small teams already using Square for payments who want scheduling added at no extra software cost.

5. DaySmart Salon

DaySmart Salon is a salon and spa management platform offering appointment scheduling, point of sale, inventory tracking, payroll, and client communication tools in one system. The platform includes dedicated mobile apps for staff and clients, free data migration from other software, and no long-term contract requirement.

Pros:

  • Combines scheduling, checkout, formulas, and client notes in one place
  • Text and email reminders significantly reduce no-shows
  • View individual or full team schedules
  • Free data migration from competitor platforms
  • No long-term contract
  • Payroll and commission tracking included on higher tiers

Cons:

  • Stylists can’t book appointments for other stylists from their app
  • No undo function for accidental cancellations
  • Some reports of duplicate text messages
  • Occasional maintenance during business hours
  • Support access can be inconsistent on lower-tier plans

Pricing: Plans run Basic at $29/month, Deluxe at $69/month, Deluxe Growth at $149/month, and Premium at $199/month, with custom enterprise pricing available above that.

Best for: Established or growing salons, including multi-location operations, that want a full-featured system with a long operating track record.

Choosing Based on Team Size and Location

Team-based platforms like Mangomint and DaySmart Salon tend to make the most sense for salons in larger metro areas, where multi-stylist teams and higher client volumes justify the per-staff and payroll costs. In smaller markets, solo-friendly tools like GlossGenius or a free-tier setup on Square Appointments often cover the essentials without the added overhead. Regardless of location, it’s worth confirming that a platform’s marketplace reach (like Booksy’s) actually has traction in your area before counting on it to fill your calendar.

Conclusion

Each of these five platforms covers the core needs of a salon: online booking, payment processing, client management, and staff scheduling, but they differ in cost structure, marketplace reach, and how well they scale from a solo chair to a multi-location team. For salons weighing built-in growth tools against basic scheduling, the amount of client discovery baked into the software makes a meaningful difference in how fast a calendar fills. Based on the combination of pricing transparency, marketplace exposure, and day-to-day usability, Booksy Biz stands out as the best all-in-one scheduling software for salons in 2026.

Frequently Asked Questions

What is all-in-one scheduling software for a salon? All-in-one scheduling software combines appointment booking, payment processing, and client management into a single platform. Salons use it to manage staff calendars, automate reminders, and track revenue from one dashboard.

What is the best all-in-one scheduling software for salons? Booksy Biz is the best all-in-one scheduling software for salons in 2026. It pairs booking and payments with marketplace-driven client discovery, helping salons fill gaps in their calendar without extra marketing spend.

How much does salon scheduling software cost? Pricing typically ranges from around $20 to $200+ per month depending on team size and features. Payment processing fees, usually 2.4% to 3.3% per transaction, apply on top of the subscription.

Does scheduling software help reduce no-shows? Yes. Automated reminders, deposit requirements, and cancellation policies are standard and commonly reduce missed appointments. Some platforms also allow salons to charge no-show fees directly.

Can salon scheduling software help attract new clients? Some platforms include a built-in marketplace that lists a salon to nearby clients searching for services. This differs from software that only manages existing bookings.

Categories
Uncategorized

How Content Creators Are Staying Ahead of AI Detectors in 2026

A few years ago, nobody thought twice about where their writing came from. Now, editors run every submission through a checker before it even gets a first read, and universities do the same with essays. Content creators, freelancers, and marketers have had to adjust fast, because the tools reviewing their work have gotten sharper, and so has everyone’s suspicion of anything that reads a little too smooth. If you’ve ever had a piece flagged even though you wrote most of it yourself, you already know how frustrating this can get. That’s part of why more writers now run drafts through a detektor AI before sending anything out, just to catch problems before someone else does.

The interesting part is that staying ahead of detection isn’t really about tricking software anymore. It’s about understanding what actually makes text sound artificial in the first place, and fixing that at the source.

Why So Much Writing Gets Flagged

Detection tools don’t read for meaning the way a person does. They look at patterns: how predictable your sentence lengths are, whether your transitions repeat, how often you land on the same handful of connector phrases. AI models tend to write in a rhythm that’s almost too even, like a metronome instead of a human heartbeat. Real writing speeds up, slows down, trails off sometimes, and jumps around a little. That unevenness is actually a feature, not a flaw.

A lot of creators got burned early on by editing AI drafts just enough to change a few words but leaving the underlying structure intact. The problem is that structure is exactly what detectors are trained to notice. Swapping synonyms doesn’t fix rhythm, tone consistency, or the way ideas connect from one paragraph to the next.

The Shift From Avoiding Detection to Actually Writing Better

What’s changed in the last year or so is the mindset. Instead of treating detection tools as an obstacle to sneak past, a lot of experienced writers now treat them as a mirror. If a checker flags a paragraph, that’s useful information. It usually means the paragraph has gotten stiff, over-explained, or too neatly organized. Real writing has some mess in it. People interrupt their own thoughts, use shorter fragments when they’re emphasizing something, and occasionally repeat a word on purpose for effect instead of avoiding repetition altogether.

This is where a workflow of checking, rewriting, and rechecking has become pretty standard. Draft something, run it through a detector, look closely at whichever sections score high, and rework just those parts rather than starting over. It’s a lot more efficient than rewriting an entire article from scratch every time something gets flagged, and it tends to produce writing that actually reads better, not just writing that scores lower on a checker.

What Actually Makes Writing Sound More Human

There are a few things that consistently separate flagged text from text that passes without issue. Sentence variety is probably the biggest one. If every sentence in a paragraph runs twelve to eighteen words, that consistency reads as artificial even if no individual sentence looks wrong. Mixing in short, blunt statements next to longer, winding ones breaks that pattern.

Contractions help too. Formal, fully spelled out phrasing shows up constantly in AI-generated text, and dropping in “it’s,” “don’t,” or “that’s” throughout a piece makes it read closer to how people actually talk and write casually.

Transitions matter more than most people realize. AI models lean hard on words like “additionally,” “moreover,” and “furthermore” because they’re safe, generic connectors. Human writers tend to just start the next sentence, or use something more conversational, or sometimes skip a formal transition altogether and let context do the work.

There’s also the issue of balance. AI-generated writing loves structuring things in threes, three examples, three benefits, three reasons, over and over. It sounds organized, but it’s also one of the easiest patterns for a detector to catch because it happens so consistently across generated content. Breaking that habit, even just occasionally listing two things or four instead of three, makes a noticeable difference.

A Closer Look at the Kind of Platform Creators Are Using

A good chunk of the writers leaning into this workflow aren’t juggling five separate apps to get through a single draft. Platforms built for this purpose tend to bundle detection, rewriting, plagiarism scanning, and general editing into one place, mostly because switching between tools all day gets old fast and makes it easy to lose track of which version of a paragraph you’re actually working on.

JustDone is one example of this kind of all-in-one setup. It packs more than 25 tools into a single platform, covering AI detection, humanizing, plagiarism checks, paraphrasing, grammar corrections, summarizing, and citation help, among other things. It’s built to catch and rework text that’s come out of ChatGPT, GPT-4 or 5, Claude, Gemini, and similar models, so it’s meant for exactly the kind of check-and-revise loop described above.

Behind the scenes, it runs on a dual-model detection system trained on more than a million writing samples, which is how it picks up on the same patterns mentioned earlier, repetitive sentence structures, grammar that’s a bit too clean, and rhythm that stays too consistent from paragraph to paragraph. The humanizer works off a similar loop to what a lot of writers already do manually: detect, rewrite, recheck. Depending on how much a piece needs reworked, there are a few intensity settings to choose from, ranging from a light touch meant to sound natural, to a more aggressive rewrite aimed specifically at getting past stricter detectors.

The plagiarism checker rounds things out by scanning for overlap with existing sources online, which matters just as much for students citing research as it does for content marketers who want to avoid publishing something too close to a competitor’s article.

Outside the three main tools, there’s a paraphraser, a summarizer, a grammar checker, a citation generator, a basic AI chat assistant, a research tool for pulling together report-style content, an email writer, and a word counter. It supports more than 25 languages, including English, Spanish, German, French, and Korean, which puts it ahead of a lot of detection tools that only really perform well in English. Results can be exported as PDF, DOCX, or TXT depending on which tool you’re using.

On pricing, there’s a trial option at two dollars for seven days before it shifts to a standard monthly rate, along with annual and monthly plans that run cheaper per month when paid yearly. It’s aimed mostly at students, academic writers, content creators, editors, and researchers, and the accuracy claims put the false positive rate under one percent based on internal testing, with the strongest performance showing up on academic essays, articles, and general blog-style writing.

Beyond Beating the System

None of this is really about gaming a system. Writing that varies naturally, that has a voice, that doesn’t sound like it was assembled from a template, is simply better writing. The detectors are just a stand-in for what readers have been noticing for a while now: content that feels hollow, over-polished, or interchangeable with a hundred other articles covering the same topic.

Editors have picked up on this too. Plenty of publications now factor detection scores into their editorial process, not because they’re against AI assistance outright, but because they want content that still sounds like it came from a specific person with an actual point of view. Writers who understand that distinction, and who know how to check and adjust their own work before submitting it, tend to have an easier time getting accepted and staying in an editor’s good graces long term.

Building a Sustainable Workflow

The creators who are handling this well in 2026 aren’t spending hours obsessing over every sentence. They’ve built a quick habit into their process: write the draft the way they normally would, run a check, glance at anything flagged, and make targeted edits. It takes a few extra minutes, not hours, and it catches problems before an editor or a professor ever sees them.

This kind of workflow also protects against something writers don’t always think about, which is being wrongly flagged for something they wrote entirely themselves. Detection isn’t perfect, and knowing your own baseline score before you submit anything gives you something concrete to point to if a dispute ever comes up.

At the end of the day, staying ahead of AI detectors in 2026 isn’t about outsmarting software. It’s about writing with enough natural variation, personality, and inconsistency that the work reads like it came from an actual person sitting down to think something through, because that’s exactly what good writing should sound like anyway.

Categories
AI Tools & Artificial Intelligence

How AI Generators Turn One Photo Into a Week of Social Content

Most people do not have a content problem. They have a workflow problem.

They have photos sitting in their camera roll. They have ideas saved in notes. They have products, outfits, trips, tutorials, or personal projects they could post about. But turning those raw materials into videos, captions, thumbnails, and short-form content takes time.

That is why AI generators have become so useful.

They do not magically create a brand for you. But they can take one idea and help you turn it into several pieces of content quickly for creators, small businesses, and solo marketers, that can make the difference between posting once a month and posting consistently.

The timing makes sense. Deloitte’s 2025 Digital Media Trends report found that 56 per cent of Gen Z and 43 per cent of millennials surveyed say social media content is more relevant to them than traditional TV or movie content (Deloitte, 2025). Meanwhile, Goldman Sachs Research expects the creator economy to approach $480 billion by 2027 (Goldman Sachs, 2023).

In other words, social content is not just entertainment anymore. It is where discovery, trust, and buying decisions often start.

Start With One Strong Visual

A good AI content workflow usually starts with one strong asset.

That could be:

  • a product photo,
  • a portrait,
  • a travel picture,
  • a fashion image,
  • a pet photo,
  • a logo mockup,
  • or a simple screenshot.

From there, the creator decides what the asset should become. Should it be funny? Useful? Aspirational? Educational? Trend-driven?

This question matters more than the tool. A weak idea with AI still feels weak. A clear idea can become surprisingly effective with the right generator.

For example, if someone has a static photo and wants to make it feel alive for TikTok, Reels, or Shorts, an AI dance generator can turn that image into a short movement-based clip. This works well for playful content, music trends, event promotions, fan edits, and light brand awareness posts.

The best results usually come from simple source images: one clear subject, good lighting, and no cluttered background.

A Simple Dance Video Workflow

Here is a practical way to create a dance-style post from one photo:

  1. Choose a photo with a clear full-body or upper-body subject.
  2. Pick a dance style that matches the audience.
  3. Keep the first version short, ideally 5-10 seconds.
  4. Add captions or a quick hook.
  5. Export in vertical format for short-form platforms.
  6. Review the final video before publishing.

A simple hook could be:

“POV: your product launch finally gets approved.”

Or:

“When the weekend trip leaves the group chat.”

The idea does not need to be complicated. Short-form content works best when people understand the joke or message instantly.

But there is a caveat. AI movement can sometimes look unnatural. If a hand bends oddly or a face shifts too much, regenerate or choose a simpler motion. Human review is still part of the process.

Turning a Character Into a Content System

AI generators are also changing how brands think about recurring characters.

Not every company can afford a human creator, studio setup, or regular model shoots. But many still need a consistent visual personality for social posts, ads, product explainers, and campaign tests.

That is where an AI influencer generator can be useful. It can help creators build a consistent digital persona for visual experiments, social storytelling, or brand-led content.

The smartest use is not pretending the character is a real person. It is building a clear creative asset.

For example, a skincare brand could create a clean, friendly digital character for tutorial-style posts. A gaming page could create a recurring host for weekly updates. A productivity tool could create a visual mascot for tips and short explainers.

To keep it consistent, create a simple character guide:

  • name,
  • age range,
  • visual style,
  • tone of voice,
  • wardrobe,
  • background setting,
  • topics they talk about,
  • topics they avoid.

This makes future content easier to produce and less random.

Authenticity Still Matters

AI content is getting easier to make, but audiences are also getting more selective.

TikTok’s 2026 trend forecast says users are moving into “discovery mode” and expect brands to provide value, not just fill the feed (TikTok, 2026). That is an important warning for anyone using AI tools.

More content is not always better content.

A virtual influencer, dance clip, or AI-generated video should still have a reason to exist. It should teach something, entertain someone, show a product clearly, or help a viewer make a decision.

There are also disclosure issues. The FTC’s influencer guidance says material brand relationships should be disclosed clearly, including in social media content (FTC). If AI-generated characters are used in advertising, brands should be careful not to mislead users about identity, endorsement, or product results.

The safer rule is simple: use AI to make content production easier, not to fake trust.

How to Turn One Asset Into Five Posts

Here is a simple weekly workflow:

Post 1: Turn the original image into a short dance or motion clip.
Post 2: Use the same image as a thumbnail for a tip post.
Post 3: Create a behind-the-scenes caption explaining the idea.
Post 4: Use a digital persona to present a product benefit.
Post 5: Make a carousel showing the before-and-after versions.

This approach saves time because the creator is not starting from zero every day. One image becomes a small content system.

For a small business, this could be a product launch week. For a creator, it could be a personal brand series. For a blogger, it could be a way to make written content easier to promote on visual platforms.

Final Thoughts

AI generators are not a shortcut around creativity. They are a shortcut around repetitive production.

The creators who get the most value from them usually do three things well: they start with a clear idea, choose the right tool for the format, and review the final output carefully.

A dance generator can make a static image feel alive. A digital influencer tool can help build a consistent visual persona. Together, they give small teams and individual creators more room to experiment.

The goal is not to post more noise. The goal is to make better ideas easier to publish.

Categories
Uncategorized

How Tad AI Is Transforming Music Creation with Next-Generation AI

The creation of music has now reached a new digital age where creativity is not bound by costly studios, complicated software and advanced technical knowledge. Nowadays, artists have an opportunity to transform mere concepts into full sounds with the assistance of artificial intelligence. 

The development of AI music is altering the way artists, brands, and content creators conduct sound production. Tools such as Tad AI are simplifying and accelerating the process of creating professional-quality music. 

Tad AI assists users in generating original songs, experimenting with new genres, and actualising creative visions without the limits of conventional tools through its advanced song generator, which integrates sophisticated AI models with simple workflows. 

Beyond Visual Content: Why Sound Is the Next Digital Frontier

The internet is now overly obsessed with visual content, and viewers are seeking more in-depth and interactive content. Sound has now become a significant element of narration, branding, entertainment and online communication. From social media videos to podcasts and digital campaigns, creators need unique audio that captures attention.

This movement has left a need for more intelligent music creation solutions. Traditional music production tends to be costly in terms of equipment, specialised skills, and it may consume a lot of time. This process is being transformed by AI-driven platforms that enable users to create music based on a few simple words and creative concepts.

Tad AI is a reflection of this movement as it assists creators in creating individual sound experiences. It does not supplant the creative power of humans, but rather functions as a creative collaborator that aids the ideas and converts them into completed musical projects.

Inside the Waveform Revolution Powering Next-Generation AI Music

The shift to highly waveform-based synthesis of music rather than simple symbolic generation is one of the largest developments in AI music generation. Earlier systems tended to use similar patterns as MIDI. Although helpful, these techniques may have given foreseeable outcomes and were not always natural.

Current AI systems are concerned with creating audio at a more comprehensive level. Tad AI implements the model of Mureka V9, an implementation based on raw waveform synthesis. Such a method enables the system to produce richer sounds, more realistic vocals, and better musical output.

The tool does not merely rearrange the existing structures of music, but produces audio properties that produce a more natural sound to the listeners. This aids in the prevention of the unnatural quality that the early AI-generated songs had.

The outcome is a more professional and smooth sound that is able to serve various creative requirements. Starters are able to experiment with music production without having to understand the complicated technical methods, and seasoned creators can employ AI as another experimental tool.

How Tad AI Helps Different Creators Bring Ideas to Life

The composition of music is no longer the preserve of professional musicians. Nowadays, numerous producers require original sounds to use in their digital work. From video makers to advertisers, AI-based applications are assisting individuals to generate music that fits the particular requirements.

Content Creators Building Better Digital Experiences

Video creators may require some special background music that suits their type of content. Videos that are made with generic tracks may not be personal. AI music enables content creators to create sounds that align with their message, emotion, and audience. Creators will be able to create music to fit videos on social media and tutorials, ads, and online campaigns without spending hours finding appropriate tracks.

Free Artists with New Musical Thoughts

For independent musicians, using new sounds may be difficult to experiment with. AI tools allow artists to gain another layer of creativity that enables them to experiment with genres, rhythms, and compositions. Tad AI is able to assist artists at the initial steps of the songwriting process and assist them in experimenting with ideas, developing concepts, and finding new expressive options.

Businesses Creating Unique Brand Sounds

Audio is becoming more and more popular in use by brands to enhance familiarity and customer interaction. Marketing campaigns can be memorable due to the distinct sound identity. AI music solutions enable companies to compose customised music to use in ads, product videos, and digital experiences without necessarily relying on conventional production techniques.

Beginners Entering the World of Music Production

Several individuals desire to produce music but are constrained by technical abilities. AI eliminates numerous learning hurdles through streamlining the production process. Novices are able to concentrate on creativity and concepts, and the technology will assist with the intricate details of composing and arranging.

Smart Mode vs Custom Mode: The Perfect Balance Between Automation and Control

One of the key issues of music production is balancing efficiency and creative control. Tad AI solves this by offering different creation approaches designed for various user needs. Smart Mode is about simplicity and speed. It assists users in creating music fast without the need to have advanced knowledge. 

The system can be used to aid in creative choices, such as style choice, map cover art, and lyric writing. Its advanced lyric engine helps overcome writer’s block by creating structured verses and choruses that match the emotional direction of a prompt.

Custom Mode offers a more elaborate creative process to creators wishing to have greater control. High-level labels like genre, vibe, instrument, scene, and rhythm can control the AI. These orders seem like imaginative backbones shaping the general trajectory of a song.

Creating Original AI Music Without Copyright Concerns

AI is altering the way individuals consider music creation. What would have been costly and demanded professional studios and years of technical experience is now accessible to all people. Tad AI demonstrates the way in which technology can make the process of creation easier and facilitate imagination and originality.

Being an emerging and highly promising instrument in the creation of modern music, AI music-making is now being equipped with advanced waveform synthesis, intelligent workflow and customisation capabilities. With the ever-increasing presence of digital platforms, automated composition will enable an increasing number of individuals to create well-developed sound identities and turn creative ideas into high-quality music.

Categories
Uncategorized

How Can You Turn a Product Image into a 3D Model Online?

Creating a 3D model once required specialized software, manual modeling skills, and hours of technical work. Today, online AI tools can generate an initial 3D model from a product photo, concept image, or digital illustration, making the process more accessible to designers, marketers, game developers, and small businesses.

The result is not automatically ready for manufacturing or professional animation. However, it can provide a useful starting point for visual reviews, product presentations, interactive previews, and creative prototyping.

Key Takeaways

  • A clear image with a simple background usually produces a more usable 3D result.
  • Online image-to-3D tools are best for visualization and early prototyping, not precise engineering.
  • The generated mesh, textures, scale, and hidden surfaces should always be reviewed.
  • The correct export format depends on whether the model will be used for games, web previews, editing, or 3D printing.

What Does Image-to-3D Conversion Actually Do?

Image-to-3D conversion uses software to estimate the shape, depth, surface details, and appearance of an object shown in a two-dimensional image. It then creates a digital mesh that can be rotated and viewed from different angles.

A photo only shows the surfaces visible to the camera. The software therefore has to predict what the sides, rear, and hidden areas may look like.

This means the generated result is partly based on the source image and partly based on automated interpretation. Simple objects with clear shapes are generally easier to reconstruct than transparent, reflective, thin, or heavily detailed subjects.

The process can be useful for:

  • Product concept visualization
  • Game props and environmental assets
  • E-commerce previews
  • Educational projects
  • AR and VR prototypes
  • 3D printing experiments
  • Marketing presentations
  • Early design reviews

Which Images Work Best for 3D Generation?

The best input image clearly separates one subject from its background and shows enough of the object’s shape to support a reasonable reconstruction.

Before uploading an image, check the following points:

  • The entire object is visible.
  • The image is not blurry.
  • The background is simple.
  • The object is not covered by text or other elements.
  • The lighting does not hide important details.
  • The edges are easy to identify.
  • The subject is shown from a useful angle.

A three-quarter view can be more informative than a completely flat front view because it reveals some depth. However, front and side references may be more useful when proportions need to be checked carefully.

Avoid using images where multiple objects overlap. The tool may incorrectly combine them into one mesh or misinterpret where one object ends and another begins.

How Can You Turn an Image into a 3D Model Online?

You can create an initial 3D model by preparing a clean image, uploading it to an online generator, reviewing the result, refining obvious problems, and exporting it in a format suited to your next tool.

A practical workflow includes five steps.

Step 1: Prepare the Source Image

Crop the image so that the main object occupies most of the frame. Remove unnecessary text, logos, borders, or background elements when possible.

You may also need to adjust brightness or contrast if important edges are difficult to see. Do not over-edit the image, since extreme filters can remove surface details that help describe the object.

Step 2: Upload the Image to an Online Tool

Open an image-to-3D platform and upload the prepared reference. Some tools provide different generation modes for realistic, stylized, detailed, or lower-polygon results.

For example, Meshy AI provides an online workflow for converting a reference image into a textured 3D model that can be previewed and exported for further use.

At this stage, focus on selecting an appropriate source image rather than trying to correct every detail through settings. A weak input image cannot always be fixed by choosing a more advanced generation option.

Step 3: Generate and Inspect the Model

Once the model has been generated, rotate it slowly and inspect it from all directions.

Do not evaluate the result only from the same angle as the original image. The front may look accurate while the back contains distorted geometry or invented details.

Ask these questions:

  • Does the silhouette match the source image?
  • Are the main proportions correct?
  • Does the rear of the model look believable?
  • Are small parts missing?
  • Are any surfaces fused together?
  • Does the texture align with the geometry?
  • Is the model too detailed for its intended use?

If the overall shape is incorrect, generating a new version from a clearer image may be more effective than manually repairing the entire mesh.

Step 4: Refine the Geometry and Texture

An automatically generated model may contain uneven geometry, unnecessary polygons, stretched textures, or incomplete surfaces. The amount of cleanup required depends on the final use.

A model intended for a quick presentation may need little editing. A game asset, animated character, or 3D-printable object usually requires a more careful review.

Common refinement tasks include:

  • Removing disconnected geometry
  • Closing holes
  • Correcting surface normals
  • Simplifying dense areas
  • Separating individual parts
  • Adjusting proportions
  • Improving UV mapping
  • Replacing distorted textures
  • Reducing the polygon count
  • Setting a useful origin point

Programs such as Blender can be used for further editing when the online output needs more control.

Step 5: Export the Correct File Format

The best format depends on what you plan to do with the model.

FormatCommon use
GLBWeb previews, sharing, AR and compact textured assets
FBXGame engines, animation and production workflows
OBJBasic geometry exchange and static models
STL3D printing
3MF3D printing with additional model information
BLENDContinued editing in Blender
USDZAR experiences on supported Apple devices

Before exporting, confirm whether textures are embedded in the file or downloaded separately. An OBJ file, for example, may require additional material and texture files to display correctly.

What Should You Check Before Using the Model?

Before using an AI-generated model, check whether it is visually accurate, technically compatible with your software, and appropriate for its intended purpose.

Use this checklist:

Shape and Proportions

  • Does the object match the original reference?
  • Are major features in the correct positions?
  • Does it look reasonable from every angle?

Mesh Quality

  • Are there holes or overlapping surfaces?
  • Is the polygon count appropriate?
  • Can the model be edited without major problems?

Texture Quality

  • Are the colors placed correctly?
  • Are there visible seams or stretched areas?
  • Does the material look consistent under different lighting?

Scale and Orientation

  • Is the object facing the correct direction?
  • Is its size reasonable after import?
  • Is the origin point located where it will be useful?

File Compatibility

  • Can the target software open the format?
  • Are the textures included?
  • Does the model retain the expected appearance after import?

Usage Rights

  • Are you allowed to use the source image?
  • Does the tool’s license permit your intended personal or commercial use?
  • Are attribution or account-level restrictions involved?

When Is an Online Image-to-3D Tool Most Useful?

Online image-to-3D tools are most useful when speed and visual exploration matter more than exact technical control.

They can help a designer turn a sketch into a model for a concept review. A small business can create an early product visualization before commissioning detailed CAD work. A game developer can test whether a prop fits the visual direction of a scene.

They are also useful for people who do not yet have advanced modeling skills but need a three-dimensional starting point.

Suitable use cases include:

  • Early product concepts
  • Background game props
  • Educational demonstrations
  • Presentation graphics
  • Simple web viewers
  • Design variations
  • Marketing mockups
  • Initial AR tests

When Should You Use Traditional 3D Software Instead?

Traditional 3D software is still necessary when the project requires precise dimensions, controlled topology, mechanical design, advanced animation, or production-level optimization.

An AI-generated visual model should not be treated as a manufacturing file simply because it looks realistic.

Use professional CAD or modeling software when you need:

  • Exact measurements and tolerances
  • Mechanical assemblies
  • Structural analysis
  • Manufacturing drawings
  • Clean animation topology
  • Detailed character rigging
  • Strict game-performance targets
  • Complex material control
  • Regulatory or safety validation

A hybrid workflow is often the most practical solution. AI creates the initial form, while a designer or 3D artist handles the technical refinement.

How Can You Improve Weak Image-to-3D Results?

You can improve weak results by simplifying the input image, providing a clearer angle, removing visual distractions, or generating several versions before choosing one to refine.

Try these adjustments:

  1. Replace the background with a plain color.
  2. Increase the visibility of the object’s edges.
  3. Use a higher-quality reference image.
  4. Avoid extreme perspective distortion.
  5. Separate overlapping parts.
  6. Try a three-quarter view.
  7. Provide multiple views when supported.
  8. Generate more than one version.
  9. Edit the best result instead of expecting a perfect first output.

Some objects remain difficult even with strong references. Transparent glass, reflective metal, thin wires, complex hair, and soft fabric may need significant manual correction.

Frequently Asked Questions

Can I create a 3D model from one photo?

Yes, but the tool must estimate all surfaces that are not visible in the photo. A single image can be enough for a concept model, while multiple views generally provide more information for accurate reconstruction.

Is an AI-generated model ready for 3D printing?

Not always. The mesh should be checked for holes, non-manifold geometry, wall thickness, scale, and structural stability before it is sent to a slicer or printer.

Can I edit the generated model in Blender?

Yes, provided the model is exported in a format supported by Blender, such as FBX, OBJ, GLB, STL, or BLEND.

Which file format should beginners choose?

GLB is convenient for previewing and sharing textured models. FBX is useful for many game and animation workflows, while STL is commonly used for 3D printing.

Can an online tool replace a professional 3D artist?

It can reduce the time needed to create an initial model, but professional skills remain important for art direction, geometry cleanup, animation, optimization, and production-ready results.

What Is the Best Way to Start?

Start with one simple object and a clear image rather than a complex scene. Generate the model, inspect its hidden surfaces, and test it in the software where you plan to use it.

The real value of an online image-to-3D tool is not that every result is immediately finished. It is that creators can move from a flat reference to an editable 3D starting point more quickly, then apply the level of manual refinement their project actually requires.

Categories
Uncategorized

Understanding and Combatting Cryptocurrency Crime: A Comprehensive Guide

Cryptocurrency has fundamentally altered global finance, offering rapid, borderless transactions accessible to anyone with an internet connection. However, these same innovative features have also created opportunities for bad actors to engage in various forms of on-chain criminality. For anyone navigating this digital landscape, understanding the mechanics of these crimes – and knowing how to defend against them – is an essential requirement.

The Scale of the Problem

The rise in crypto-related crime is significant and poses a growing challenge. According to the FBI’s 2025 Internet Crime Report, the Internet Crime Complaint Center (IC3) processed over 181,000 complaints linked to cryptocurrency, with total reported losses exceeding $11 billion. Investment fraud currently serves as the primary driver of these losses, representing nearly 49% of all scam-related theft. Beyond retail-level scams, the ecosystem also contends with systemic threats like state-sponsored heists and exchange hacks.

Defining Crypto Crime

Crypto crime is a broad category encompassing any illegal activity involving digital assets, whether the cryptocurrency is the target of an attack, a method for payment, or a tool used to launder illicit proceeds. This landscape spans a wide spectrum of illicit behavior, ranging from small-scale retail scams to sophisticated, state-sponsored cyberattacks.

A Glossary of Common Illicit Activities

Criminals utilize a variety of methods to exploit users and protocols. Understanding these tactics is the first step toward defense:

Pig Butchering: This long-term investment scam involves fraudsters building fake romantic or social relationships over weeks or months to manipulate victims into investing in fraudulent platforms. The term comes from the slang for “fattening a pig before slaughter”.

Rug Pulls: Developers of a crypto project create hype to attract liquidity, then abandon the project and abscond with investor funds.

Ponzi Schemes: These fraudulent structures use funds from new investors to pay “returns” to earlier participants, lacking any sustainable economic model.

DeFi Exploits: Attackers seize funds by exploiting vulnerabilities in smart contract code, such as reentrancy bugs, flash loan attacks, or oracle manipulation.

Cross-Chain Bridge Attacks: By exploiting vulnerabilities in the software or validator networks connecting two blockchains, attackers bypass security to drain collateralized assets.

Crypto-Jacking: This involves the unauthorized use of a victim’s computing resources to mine cryptocurrency, often facilitated by malware in phishing emails or compromised websites.

Mixers/Tumblers: These services pool cryptocurrency from various users to redistribute different coins, breaking the transaction trail on-chain to launder stolen funds.

Darknet Markets: These platforms operate on anonymizing networks like Tor, using cryptocurrency to facilitate the illegal sale of drugs, stolen data, and counterfeit documents.

Pump and Dump: A coordinated effort where a group artificially inflates the price of a low-liquidity token through heavy promotion, only to sell their holdings at the peak and leave late buyers with losses.

Wash Trading: This practice involves buying and selling an asset between controlled wallets to artificially inflate trading volume, misleading investors about a project’s popularity.

Front-Running: Using advance knowledge of a pending transaction, an attacker submits their own transaction first to profit from the expected price movement.

Drainer Malware: Malicious software or smart contracts designed to automatically drain a user’s wallet when they interact with a phishing link, such as a fake NFT mint or airdrop.

Core Categories of Crime

Beyond individual scams, crypto crime is categorized by distinct on-chain patterns:

  • Theft: Direct exploitation of protocols, wallets, or exchanges to remove funds without authorization.
  • Fraud: Deceptive projects and investment schemes, such as pig-butchering, designed to extract money from victims.
  • Money Laundering: Utilizing techniques like “peel chains,” privacy coins, and mixers to disguise the origins of illicit funds. Stablecoins have become a preferred asset for this due to their ease of transfer.
  • Ransomware: Attackers encrypt systems and demand cryptocurrency payment to restore access, often targeting large organizations for higher ransoms.
  • Sanctions Evasion and Terrorist Financing: Nation-states and groups like Hamas, Hezbollah, and the Houthis leverage crypto’s cross-border nature to bypass traditional financial monitoring for weapons procurement or funding operations.

Why Criminals Target Crypto

Cryptocurrency is structurally appealing to illicit actors for several reasons. Pseudonymity creates a layer of separation between identities and transactions. Cross-border settlement avoids interaction with traditional, regulated financial institutions. Furthermore, because transaction finality is generally irreversible, there is no risk of chargebacks. Attackers also exploit the programmability of DeFi to perform complex, multi-step laundering operations in a single block.

Defense and Recovery

Defending against these crimes starts with recognizing that human error is the primary vulnerability. Best practices include keeping seed phrases offline, carefully verifying URLs, and using tools to revoke unnecessary smart contract approvals. Investors should perform thorough due diligence – checking for audits, known teams, and locked liquidity – before interacting with any protocol.

If you become a victim, time is critical. Report the incident immediately to agencies like the FBI’s IC3 in the U.S. or Action Fraud in the UK. Furthermore, blockchain intelligence platforms like Arkham can empower victims and investigators to map transaction flows, link attacker wallets to exchange accounts, and provide actionable leads for law enforcement.

While the complexity of crypto crime is undeniable, the transparent nature of public blockchains is an asset for investigators. Every transaction is public, permanent, and auditable – a unique advantage in the fight against financial crime.

Categories
Uncategorized

Why Your IP Address Is Exposed More Often Than You Think

Most people treat their IP address like a street address, something only relevant when someone specifically needs to find you. That assumption is wrong, and the gap between what people think their IP reveals and what it actually reveals is exactly the gap that advertisers, trackers, and data brokers live in.

The problem is not just that your IP is visible. It is that it leaks in ways a basic VPN check does not catch, and that most people have no idea how to verify whether their protection is actually working.

Key Takeaways

  • Your IP address reveals your approximate location, ISP, and device type to every site you visit
  • Standard IP checks miss DNS leaks, WebRTC leaks, and IPv6 exposure
  • Datacenter VPN IPs are flagged and blocked by most platforms, while residential IPs pass through undetected
  • Free tools exist to run a full leak check in under five minutes

What Your IP Address Actually Reveals

Before getting into how to check for exposure, it helps to understand what is actually at stake.

Every time you load a website, your IP address is logged. That single data point tells the receiving server your approximate geographic location, your internet service provider, whether you are connecting from a home network or a datacenter, and often whether you are using a VPN. That last one surprises people. The assumption is that a VPN hides everything. What it actually does, in most cases, is replace your home IP with a datacenter IP that is immediately recognizable as non-residential traffic.

Websites use IP reputation databases to make decisions about your connection in real time. Netflix blocks you. Google serves a CAPTCHA. A bank flags your session as suspicious. None of this requires a court order or a data breach. It is all automated, and it all happens because your IP address is carrying more information than most people realize.

Beyond location and ISP, your IP can be cross-referenced with other data points. If you have ever logged into an account from your home IP, that association is stored somewhere. Advertisers use it. Data brokers sell it. The IP address is not just a routing mechanism. It is a persistent identifier.

The Four Ways Your IP Gets Exposed

Running a VPN does not mean your IP is hidden. There are four specific failure modes that bypass VPN protection entirely, and most users have never checked for any of them.

DNS leaks happen when your device sends DNS queries outside the VPN tunnel. You might be routing your traffic through a VPN server in another country, but your DNS requests are still going to your ISP’s servers, which means your ISP can see every domain you visit. The VPN gives you the feeling of privacy without the substance of it.

WebRTC leaks are a browser-level problem. WebRTC is a technology that enables real-time communication features in browsers like video calls and voice chat. It establishes direct peer-to-peer connections that can bypass your VPN entirely and expose your real IP address. This affects Chrome, Firefox, and most Chromium-based browsers by default.

IPv6 leaks occur when a VPN only covers IPv4 traffic. Most modern devices have IPv6 addresses assigned by their ISP. If the VPN does not explicitly block or tunnel IPv6, those requests go out unprotected alongside your masked IPv4 traffic, revealing your actual location and ISP.

VPN dropouts are what happens when your VPN connection briefly disconnects. Without a kill switch, your device falls back to your regular connection instantly, and anything you were doing at that moment goes out on your real IP. This is not rare. Connection drops happen constantly on mobile networks, during sleep and wake cycles, and when switching between Wi-Fi and cellular.

How to Check Your IP Exposure Right Now

The following tools are free, require no account, and take less than five minutes total.

Start with ipleak.net. Load the page and let it run. It checks your visible IP address, your DNS servers, and your WebRTC status simultaneously. If your VPN is leaking DNS, you will see your ISP’s DNS servers listed alongside or instead of your VPN’s servers. If WebRTC is exposing you, your real IP appears in the WebRTC section.

For a more detailed DNS leak test, go to dnsleaktest.com and run the extended test. This sends a larger number of queries to expose intermittent leaks that a single-query test might miss.

For browser fingerprinting and WebRTC specifically, browserleaks.com gives you a granular breakdown of everything your browser is exposing, not just your IP. This is useful because even a perfectly functioning VPN does not hide your browser fingerprint, your screen resolution, your installed fonts, or your system language settings, all of which can be used to identify you across sessions.

Finally, run Cover Your Tracks from the Electronic Frontier Foundation. This tool tests whether your browser is uniquely identifiable among the millions of browsers in their dataset. If it tells you that your fingerprint is unique, a VPN is not solving your privacy problem on its own.

Document what you find. If any of these tests shows your real IP, your ISP’s DNS servers, or a unique fingerprint, you have an exposure problem that your current setup is not addressing.

Why a Regular VPN Is Not Enough

Here is the part that most VPN marketing leaves out.

Even if you pass every leak test above, the IP address your VPN assigns you might still be the problem. The vast majority of VPN services route traffic through datacenter servers. These servers have IP addresses that are registered to hosting companies like AWS, DigitalOcean, or Cloudflare, not to residential ISPs. IP reputation databases know this. Streaming platforms know this. Banks know this. Any service that wants to flag VPN traffic can do so by checking whether the IP belongs to a residential ISP or a datacenter.

This is why people using standard VPNs get hit with streaming blocks, CAPTCHA challenges, and account flags even when their VPN is technically working. The VPN is hiding their real IP, but replacing it with an IP that is just as suspicious, only suspicious in a different way.

The solution is not to use a better-hidden datacenter IP. It is to use a residential VPN that routes traffic through IP addresses assigned by real ISPs to real households. These addresses are indistinguishable from ordinary home connections because, structurally, that is what they are. No reputation database flags them as VPN traffic because they are not datacenter traffic.

This distinction matters for anyone who has assumed their VPN is protecting them and has never tested whether it actually is.

What Actually Fixes It

If your leak tests revealed problems, here is what to address and in what order.

Fix WebRTC leaks first since they are browser-level and easy to address. In Firefox, go to about:config and set media.peerconnection.enabled to false. In Chrome, use an extension like WebRTC Leak Prevent. This does not require changing your VPN.

For DNS leaks, switch to a VPN that has DNS leak protection built in and confirm that all DNS queries route through the VPN’s own servers. Verify this with dnsleaktest.com after making the change.

For IPv6 leaks, disable IPv6 at the network adapter level if your VPN does not support IPv6 tunneling. On Windows, this is done through the network adapter settings. On macOS, it is in System Settings under Network. On Linux, it can be handled through sysctl.

Enable your VPN’s kill switch and test it by manually disconnecting the VPN while running ipleak.net in a browser tab. If your real IP appears during the dropout, the kill switch is not working or is not enabled.

If the core issue is that your VPN’s IP addresses are being flagged by platforms, the only fix is switching to a provider that uses residential IPs. Leak protection and kill switches do not change the IP reputation problem. That requires an IP that is classified as residential by ISP databases, not just an IP that is encrypted.

Running these checks takes a few minutes. The alternative is assuming your protection is working and finding out it is not at exactly the wrong moment.

Categories
Uncategorized

Practical Instagram Growth Tips for a Stronger Online Presence

Let’s be honest about something: posting nice-looking photos and waiting for the magic to happen is not a strategy. A real presence on Instagram comes from knowing where you’re headed, posting like you mean it, and understanding the people you’re trying to reach. Because here’s what the app has quietly become the place people go to find businesses, size up services, learn from brands, and decide who’s worth trusting. That puts growth squarely on the radar for small businesses, service providers, creators, and anyone who wants to be more visible online.

There’s no shortcut version, sadly. What there is: a profile that looks like you mean business, content that’s actually worth someone’s time, and a real connection with the right crowd. Get those right and trust starts to build, and attention follows. So let’s walk through the pieces that actually move the needle.

9 Tips to Strengthen Your Instagram Presence

1. Buy an Instagram Growth Service for an Early Push

Initial proof is one of the most important parts of Instagram growth. One practical tip many growing brands use is buy Instagram growth service from Media Mister to give their profile an early engagement boost. 

It can help support recent Reels and posts with views, likes, saves, comments, and followers, making the account look more active and credible. The real secret is using it carefully: buy engagement to support visibility, then keep people interested with helpful posts, clear captions, Reels, Stories, and consistent branding. Growth works best when paid support and real strategy work together.

2. Profile people can read in five seconds

First impressions happen fast on Instagram. Before anyone touches your content, they’ve already clocked your photo, your bio, your highlights, the general vibe of the page. So the page has to answer three things almost instantly: who you are, what you offer, why anyone should care.

The bio is where this lives or dies. Keep it simple, direct, and worked through with keywords and please retire the vague stuff. “Helping businesses succeed” could mean anything. “Instagram growth and content strategy for small businesses” tells a stranger exactly what they’ve found. Go specific every time.

Then put your highlights to work backing up the brand: services, testimonials, FAQs, results, tips, behind-the-scenes. A page that’s organized just reads as more professional, more trustworthy. And when people get your business immediately, they tend to stick around and take that next step.

3. Pick a person, not a crowd

Growth gets dramatically easier the moment you stop writing for everybody. That’s the trap most brands fall into broad content aimed at the whole world, which somehow connects with no one in it. Your audience should be steering everything: your topics, your tone, the look, the captions, the offers.

So get specific about one customer. What’s frustrating them? What do they ask before they buy? What would genuinely help them? What are they actually hunting for? Say your people are small business owners they probably want plain-English Instagram tips, content ideas, branding help, a way to get more visible without a marketing degree.

Once you really know them, the fog clears. You stop posting filler and start answering things people actually wonder about, which makes the brand feel relevant instead of forgettable. A strong presence is just the result of talking, over and over, to the folks most likely to need you.

4. Don’t post anything without a reason

Here’s a good gut-check before you hit publish: why does this post exist? Maybe it educates. Maybe it builds trust. Maybe it explains the service or shows a bit of personality. But if the honest answer is “I felt like I should post something,” that’s how a page ends up feeling scattered and a little hollow.

The healthiest feeds run on a mix. Educational posts carry the tips, guides, and what-not-to-do. Trust posts show your process, your experience, a client’s story, what you stand for. Promo posts say plainly what you offer and how to work with you. And personality posts remind everyone there’s a human back there.

Posting with a reason does something sneaky-useful too: it makes consistency easier, because you’re no longer staring at a blank screen wondering what to make. Line your content up behind your actual goals and Instagram quietly graduates from “social app” to “marketing channel that’s pulling its weight.”

5. Reels get to the point

Reels are still one of your strongest tools for reaching new people but not when they’re just trend-chasing for the sake of it. The good ones deliver value fast: explain one idea, make one point, land it in a clip people will actually watch to the end.

Start with a hook. A question, a problem, a slightly bold claim. “Stop making this Instagram mistake.” “One quick way to fix your profile.” Hook them, then hand over the useful bit without dragging it out.

Tips, tutorials, behind-the-scenes, service explainers, product education, a little storytelling all fair game, as long as the message stays easy to follow. Reels can absolutely boost your visibility, but they do their best work when they fit the bigger plan. Clear, valuable, consistent beats jumping on every sound that’s trending this week.

6. Captions that earn the read

A caption is the context your visual can’t give on its own, which makes it a much bigger deal than most people treat it. A good one explains the point, teaches something, and points people toward what’s next. Most brands flub it one of two ways captions so short they’re pointless, or so long and shapeless nobody finishes them. The target is readable and tied to what your audience needs.

Open with a line that makes the second line worth reading. Then make your point simply, in short paragraphs, so it never turns into a brick of text. Drop in a practical tip, an example, or a question that makes people pause and think.

Most of all sound like a human. No keyword-stuffing, no copy that reads like it came off an assembly line. If you sell growth services, captions are a perfect spot to name a problem, offer the fix, and let your expertise show without bragging about it. Done well, they make your content stick in someone’s memory.

7. Show up like you mean it

If there’s one unglamorous tip that quietly outperforms the rest, it’s consistency. And no, that doesn’t mean posting every hour or forcing something out daily until you resent it. It means turning up regularly with content that fits your brand and your people. The more often they see you being useful, the more they trust that you know your stuff.

A plan is what makes this survivable. Instead of scrambling for something to post tonight, sketch out a week or a month ahead. Build it around pillars tips, education, services, brand story, FAQs, customer problems so you keep variety without losing the thread.

A content calendar earns its keep here, too. Prep your captions, visuals, and Reels before crunch time, and the whole thing gets less stressful and more sustainable. Keep that steady rhythm going and your page reads as active and professional, and your presence grows the slow, durable way.

8. Stories and replies do the relationship work

Stories pull different weight than the rest. Feed posts and Reels get you found; Stories keep people close. Use them for updates, behind-the-scenes moments, quick tips, polls, questions, service reminders, the little day-to-day stuff that makes a business feel alive.

And good news they don’t need to be polished. Honestly, the slightly rough, off-the-cuff Stories often feel more real, and they let people see the humans behind the logo. For service businesses trying to build relationships before the sale, that’s worth a lot.

The other half is just… talking to people. Reply to DMs. Answer the questions. Engage like a friendly person rather than a ticketing system. A brand that communicates clearly and often is one people feel safe reaching out to and that’s what turns a static page into a presence with a pulse.

9. Use keywords and hashtags like a human, not a robot

Keywords and hashtags are how a lot of people stumble onto you, since plenty now search topics and services right inside the app. So your content should carry the words your audience would actually type.

Slip those keywords naturally into your name, bio, captions, and topics things like Instagram growth tips, social media strategy, online presence, content marketing, small business branding, Instagram marketing. Naturally being the operative word. Forced is obvious, and it reads badly.

Hashtags can help too, but keep them relevant. Skip the giant pile of trending-but-unrelated tags and pick a tight set tied to your industry, service, audience, and topic. A handful that actually fit beats thirty that don’t. Used sensibly, the whole approach helps Instagram place your content and makes you easier to find.

Conclusion

A stronger Instagram presence really does come down to strategy, patience, and consistency. Clear profile messaging, knowing your audience, content with a purpose, Reels, sharp captions, a plan, Stories, natural keywords, and honest review all of it working together so your brand is easy to understand and easy to trust.

Growth was never about just being active. It’s about being useful, clear, and consistent. When your content actually helps people and serves your goals, your presence gets stronger on its own over time. For small businesses and growing brands, Instagram can be a real engine for visibility, credibility, and long-term growth. Post with purpose, keep refining around what your audience needs, and let the rest compound.