The power of first impressions is massive when acquiring new followers, whether you are a creator, entrepreneur, or influencer. Your potential followers decide if they will follow you within three seconds of visiting your account. Your profile and content taken within that short time frame will either encourage or deter them from following you.
To have a professional online presence, you need to have an optimized profile and valuable content that will not only attract attention quickly but will also help you grow in the long run. In this article, you will find smart strategies like optimizing what people see first, brave prototypes, and the use of the right tools and formats to make things simple and effective and to help you draw attention and improve your conversions as a follower.
Optimize Your Profile for Instant Trust
You can win the trust of someone subsequently with a carefully crafted profile. A clear profile picture showing your face makes your account feel more genuine. The bio you write should be concise and indicate what value you give without being vague. You should show your niche in the first few words so your visitors will know what to expect.
It will be wise to display social proof, such as follower numbers, featured publications, or collaborations in influential spaces, to show a slightly recognized stature. To retain a professional vibe, perfect the look you have and the type of language you use on various platforms. All these moves tell a stranger that he is mistaken by not following you.
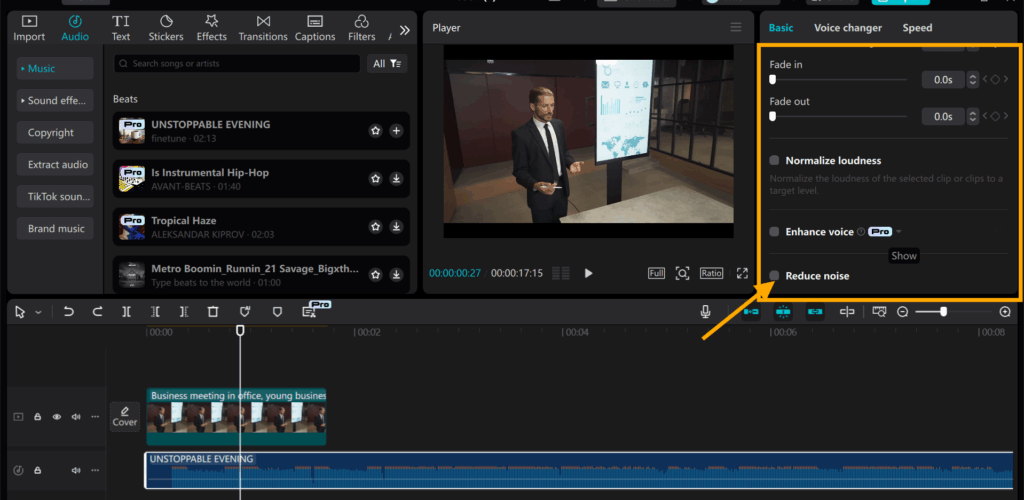
Create Thumbnails and Visuals That Stop Scrolling
In the case of visuals and thumbnails, a picture must be strong enough to stop people in their tracks and make them ask to look at more. Bright color schemes with good contrast cause a visual stir and make your account stand out in a feed cluttered with content.
Textual elements should be kept legible and must be few in numbers so that scrollers do not lose interest. Emotive imagery, together with a little motion, can make posts that inspire impressions. The use of the analysis tools to understand what connects to the audience most can be insightful. Also to optimize your visuals it will be wise to preserve a combined look so every piece of work will be instantly recognizable to your style.
Hook Viewers in the First Moments
You can only win or lose an audience in the first few seconds of their engagement with your content. The moment you start a video or post with a strong statement, it creates a crucial environment in which the audience is more likely to remain curious.
Questions are also an immediate gateway to engagement, making viewers feel personally invited to continue the conversation. Your videos must show the time value of following you and give the audience a taste of what your specific work would contribute. Call for immediate action gives a post an additional purpose and prompts an instant decision. Use the hitch of quick movement, or sound in your post to amplify engagement.
Build Credibility Quickly
You could earn the respect of anyone trying to engage with your content the moment you demonstrate that you are knowledgeable and dependable. A short post or video that highlights your expertise establishes you as an authority in your selected topic of interest. Pointing out your achievements and collaborations helps to underline that you are recognized and people will also be willing to listen to you.
Small social proof such as the number of views indicates your value without your bragging. Authentic testimonials or organic mentions by others create a real feel to your credibility build-up process. The excitement of sharing what you know with others while remaining true to yourself is what is referred to by many.
Leverage Platforms and Tools for Exposure
Knowing how to use platforms to your advantage can make a significant difference in your follower growth in a short period. It is important that you post at the hours when most of your current followers are online so that you make the best out of engagement. Sharing across different channels allows you to get more eyes on your work.
You must also try your hand at formats that are trending such as reels and others, as they have an inbuilt audience on many platforms. Smart, subtle boosts may be helpful to extend the reach of your top posts. Tools that grow your followers like Mixx and others do not lead to fake or dangerous growth in carrying out the process efficiently and in a safe manner.
Conclusion
With a combination of tactical profile management to eye-catching visuals, you only have seconds to do an excellent follow burst. To trap the attention and intelligence most expeditious is to marry the presentation and the first pieces of content so as to prepare the audience for what is to come next. You will also win people’s trust, turn them into followers, and build a follower community by offering real value on a timely basis.
It is important to monitor the results of your efforts to see what generates real connections and to establish a flexible growth-oriented strategy. When executed properly, your planning will transform anonymous browsers into real supporters and patrons.